Banana Quick Bread

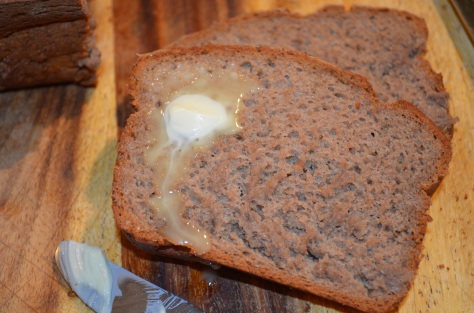
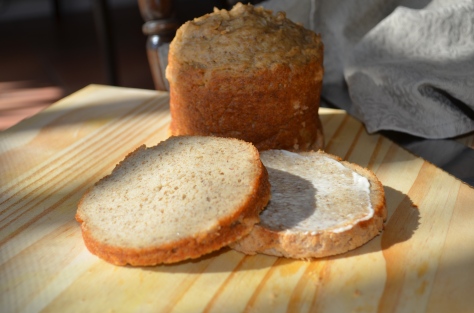
I had some bananas going begging, this week, which just demanded a recipe for banana bread. Daughter #2 was particularly fond of this loaf. It has a distinct banana flavor, and is moist and vaguely sweet, with more densely sweet pockets provided by the dried fruit. It slices well, and it’s also extremely easy to make!

Banana bread4 oz brown sugar
2 oz margarine
4 medium sized eggs
1 tbsp lemon juice
1 tsp cinnamon
10 oz blanched almond flour
5 oz tapioca flour
2 tsp baking powder
1 tsp baking soda
1/4 tsp salt
2 very ripe bananas
1 cup raisins or walnut pieces

Preheat the oven to 350F (this quick bread doesn’t take long to put together)

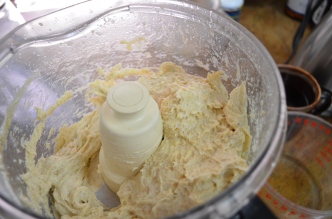
In a food processor, beat together the sugar and margarine.

Add the eggs one at a time, and process until combined.

Sprinkle the rest of the ingredients (except for the raisins/walnut pieces) over the egg mixture, and process to combine.

Add the raisins/walnuts, and process for about 5 seconds (or by hand) to combine.

Turn the mixture into two 1lb loaf pans greased or lined with baking parchment.

Cook for 60 minutes at 350F on the middle shelf, or until a toothpick inserted into the center of the cake comes out clean.

Allow to cool before eating.

Variation: Instead of baking in a loaf pan, smooth the batter into a silicone flan pan (same cooking time), and when the cake has cooled, fill it with bananas and custard made with 2-3 bananas.

Cooked flan case

GF Banana Bread flan case

GF Banana Bread flan case topped with bananas and custard.

GF Banana Bread flan case topped with bananas and custard.

Crusty, Vegan, Gluten Free Bread

Cut loafAfter having been in temporary accommodation for exactly a year now, with half to two-thirds of my kitchen in storage, we’re finally looking at moving into a permanent house in a couple of weeks’ time. I’m so looking forward to being able to play in the kitchen again. Amongst other things, I managed to put into storage all my bread tins, so have been experimenting with some glass cookware (that I rarely used before, but somehow ended up taking with us).
Making gluten free bread with eggs is now pretty straight forward, but getting a good rise out of a vegan bread mix has been more challenging.

slice of bread

This slice was cut before the loaf had fully cooled, but note the lack of unleavened bread at the bottom of the loaf!

I was toying with my copy of Gluten-Free and Vegan Bread by Jennifer Katzinger (with which I’ve had limited success) a few months ago, when I realized that the logic that she was using for not waiting for the dough to rise before putting it in the oven, could be applied to what I used to do sometimes with wheat bread. Sometimes, I would only wait until the dough was mostly risen, then put it in a cold (but heating) oven so that the slowly rising heat from the oven caused the yeast to go mad, right up until the point that it got hot enough to cook. Jennifer puts her bread straight into a hot oven, but I wanted to experiment putting the dough into a cold oven, so that it only had 15 minutes of rising before cooking at a reasonably high temperature. It seems to me that we still need a certain amount of yeast action to raise the loaf, but (according to Jennifer) we don’t want enzymes to have time to break down the structure, so we’d best be using lots of first generation yeast instead of waiting for successive generations to build up the CO2 in our loaf. This means that I’ve used far more yeast than I would normally use in a loaf …. and at this rate, using individual sachets of yeast is an expensive proposition. I buy my yeast in 2 lb bags in Costco for about the same money that I’ve seen charged for a 4 oz jar in other supermarkets.

The resultant bread is mildish in flavor (but not bland) with a crunchy crust, and a soft, moist mie the texture of REAL bread (as opposed to the pointless, fluffy-white-nothing of mass-produced ready-sliced modern wheat bread, of which I was never particularly fond). The tapioca starch keeps the texture of the mie soft; the almond flour gives a mild but nutritious aspect; the bean flour is great for nutrition and structure (but tends to be rather strongly flavored which is why I’ve diluted it with other flours), and the teff flour is also nutritiously superior, but with a warming, mellow flavor. I think it’s the teff that gives the slight molasses (not sweet) flavor that my daughter noticed. All in all, I really like this loaf. It isn’t as calorie dense as my much loved almond bread, but has good structure and flavor and isn’t reliant on eggs.

2 tbsp chia seeds
6 oz (1 1/4 cups) tapioca flour/starch or arrowroot
2 1/2 oz (2/3 cup) almond meal
2 1/2 oz (1/2 cup) garbanzo/garfava bean flour
5 oz (1 cup) teff flour
1 1/2 tsp salt
2 1/2 tsp xanthan gum
3 tbsp olive oil
2 tbsp instant yeast
2 tbsp maple syrup/1 tbsp sugar

Measure the chia seeds out into a small container, add 4 fl. oz (1/2 cup) of water and put to one side to swell. (Minimum 15 mins. Hot water speeds up the process.)

Into the food processor, put the starch, almond, bean, and teff flours. Add the salt, xanthan gum, oil, and yeast.

Teff doughInto a jug, measure 1 1/2 cup of warm water and the maple syrup. (Warm water speeds up the rising.)

Once they’re ready, add the soaked chia seeds to the processor (the mixture will have thickened). Start processing the mixture and slowly (~10 seconds) add the water/syrup mixture. Process until the ingredients are fully amalgamated (~60 seconds). Add another tbsp or two of water, if your processor is having a hard time mixing this.

Heavily grease a 2lb loaf pan, scrape the dough into the pan and smooth the top with a spatula.

Cover loosely with a sheet of baking parchment (not foil which increases the cooking time) to avoid over-browning.

Place the wannabe loaf in the oven, then turn on the oven to heat up to 360F and cook for 1 hr (from cold).

When cooked, the loaf will have pulled away from the side of the pan slightly. Tip it out, and allow to cool (ha ha … I never manage this bit) before slicing.

Teff Bread

Sliver pictureI know I’ve said this before, but I am still of the opinion that gluten free flours have a tendency to be either nutritionally poor and mildly flavored, or nutritionally good and strongly flavored, and unfortunately, many of the strong flavors are too intrusive and so we have to mix our flours to moderate them, or settle for the less nutritious flours. Teff appears to be a moderate flour; on its own it approaches the nutritional value of whole wheat, and there are no harsh notes. Don’t expect it to taste like wheat bread, but do expect it to taste like a great specialty bread.

This loaf was springy, flexible, and moist; easy to slice and slightly dense, and reminiscent of the malt loaf that I absolutely loved as a kid. It isn’t sweet, however, so it’s fine for savory sandwiches (although I am SO tempted to make a sweet one to toast).

I cooked this at a low temperature in order to get a soft crust, which it obligingly gave me.DSC_0011

10 oz (2 cups) teff flour
5 oz (1 cup) tapioca starch
1 oz (1/4 cup) flaxmeal
1 1/4 tsp xanthan gum
1 1/2 tsp salt
1 tbsp yeast
2 tbsp sugar (for the yeast, not for you)
1 tsp white vinegar
2 eggs
9 fl. oz water

DSC_0001

Batter consistency.

DSC_0003

Smoothed, unrisen dough.

Put all the dry ingredients in a food processor.
Put all the wet ingredients in a jug.

Start the processor, and slowly (over a period of about 10 seconds) add the wet ingredients to the dry. Process for about 2 minutes to activate the xanthan gum.

Risen dough ready to go in the oven.

Risen dough ready to go in the oven.

Scrape the batter out into a greased loaf pan; smooth the top, and allow to rest somewhere warm to rise by about 50% (~35 minutes depending on liveliness of your yeast and ambient temperature).
Place the pan in the oven, cover with a sheet of parchment or foil, and set the temperature to 330F.

Bake for 65 – 70 minutes (timed from turning on the oven, not from getting up to temperature).
Remove from the pan, and allow to cool (ha ha!) before slicing.

Burger Buns

Burger bunsYou may or may not know this. A nice little trick with bread involves knowing that high cooking temperatures will give a thicker, crunchier crust, and lower cooking temperatures result in a thinner, softer one. So, if you want your bread to have a soft almost non-existent crust, much like burger buns, then a lower cooking temperature is required.

I normally cook my almond brioche bread at a medium temperature (~360F/180C) to get a medium amount of crust. To get these soft, thin crusted baps, I drop the temperature to 320F/160C, though I suspect that lower would work, too. Additionally, I wet the surface of the dough before it goes in the oven, to delay the formation of the crust (due to the surface drying out) so that the dough can continue rising in the oven for a little longer. I happen to love the mild (but not non-existent) flavor, and soft, flexible texture of this almond brioche bread, but if you have a favorite GF bread mix, you can just try dropping the temperature to make burger buns.

This recipe makes 8-10 burger sized rolls

1 recipe Almond Brioche dough

Line a cookie/baking tray with parchment paper, and use a serving spoon to form 8-10 equal sized mounds. Spread the batter out with the back of the spoon into patties, 3/4″ high, by ~5″ diameter.

Now, use wet fingers in small circular motions to gently smooth the top and sides of the buns. Re-wet your fingers frequently. This will give a smoother external texture, as this dough doesn’t smooth out on its own very well.

Leave the rolls to rise for 30-40 minutes.

Put the tray into the middle of a cold oven covered lightly with parchment paper to prevent over browning, and turn on the oven to cook for 35 minutes at 320F.

When the rolls are lightly browned, and spring back when prodded, remove them from the oven, and cover with a clean kitchen towel while they cool, to help keep the crust soft.

Enjoy.

Quinoa and Hemp bread

This week, a gluten eating friend of mine asked me, “Have you ever made bread with quinoa flour? I bought some and want to try it out if you have any suggestions…..” This wasn’t exactly something I could turn down, so after sending her links for quinoa tortillas and steamed bread, I got on with figuring out the following. Now, quinoa is a fairly well behaved flour, but it has a strong flavor, so I mixed it with hemp (the legal, non-intoxicating variety) which is mild and gives a stretchy quality which I like in bread. Quinoa is also known as a good protein source, but hemp is even better, so this loaf is nutritionally interesting.

Torn bread

Daughter #1 braved it when she got back from school, and declared that it was mild in flavor, had a good texture, and was interesting. Her sandwich didn’t last long. I should clarify that it isn’t mild in flavor when it first comes out of the oven. The quinoa has quite a distinctive smell and flavor which mellow as the loaf cools.

sandwich

Quinoa and Hemp Bread

5 oz (1 cup) hemp seed (dehulled)
5 oz quinoa flour
5 oz (1 1/4 cup) tapioca starch
1 1/4 tsp xanthan gum
1 1/4 tsp salt
1 tbsp yeast
2 tbsp sugar
1/4 cup margarine
2 eggs
5 fl. oz water

Put all the dry ingredients (and the margarine) in a food processor.

Put all the wet ingredients in a jug.

Start processing, and gradually (over ~10 seconds) add the wet ingredients to the dry.

Continue processing for about 3 minutes to activate the xanthan gum.

Line a loaf pan or baguette former with parchment paper, and scoop the bread dough into shape. Smooth it over, and leave to rise until doubled in size (~2 hours).

Preheat the oven to 360F, place the loaf in the center of the oven lightly covered with parchment paper to prevent over browning, and cook for 45 minutes for bagettes, 55 minutes for a sandwich loaf.

Allow to cool before eating, so the flavor can mellow.

Hemp Bread (vegan)

I’ve had this bag of hulled hemp seeds sitting in my fridge for about a month now. I came across it in Costco when I was looking for some more flax meal, and decided that I needed some even though I had no idea what it tasted like, or what to do with it. Needless to say, it then sat in the fridge ignored because the package only suggests adding the stuff to smoothies or sprinkling it on cereals.

Moist, but not gummy, with a soft crust, and mild flavor.

Moist, but not gummy, with a soft crust, and mild flavor.

Then, last week I decided to check out the web for things to do with hemp, only to discover that people only seemed to add it to smoothies or sprinkle it on their cereals (I exaggerate slightly … but only slightly)!! So, I threw caution to the wind, and attempted to make an American pancake with it. I’ve tested all sorts of flours using this method. The pancakes are not always optimal, but they do give a great idea of the flour’s properties (bean flour is strongly flavored but has good structure, almond flour has a great flavor but a tendency to be gummy, rice flour is tasteless …. that sort of thing.) Anyway, the pancakes came out light, slightly stretchy, and mild in flavor. It was at this point that I figured I might have stumbled upon something worth stumbling upon.

Bread, vegan bread is what I really wanted to make. Something that rose, and wasn’t gummy, and was not too strongly flavored, and not too bland, but just right. Anyway, this recipe went through many revisions, before I settled on this concoction. Chia seeds or flax meal? Potato starch or tapioca? 1 tsp or 1 1/2 tsp xanthan gum (yes, I tried both before settling for 1 1/4 tsp …. it does make a difference, so measure carefully). My freezer is now full of half loaves which I didn’t want to eat immediately because I’d blow up like a balloon. Anyway, this loaf is moist and soft, with a bit of spring in its texture, and a soft-ish crust. It’s still best eaten the day it’s made, but perfectly serviceable the next day, especially if toasted.

The hemp that I bought was still in seed form. However, it’s soft enough that the couple of minutes in the processor with the other ingredients is sufficient to reduce it to a non-lumpy format, so don’t worry about getting hemp flour for this. If you click the picture and then click again, you get to see the texture of the bread in a fashion that my eyes don’t manage unaided, and there is still a bit of evidence of the hemp seed, but nothing that your mouth would discern.

If my sources are correct, whole wheat/meal bread has about 2g fiber per slice. This hemp bread has between 4 and 4.5g per slice.

Hemp Bread

8 oz (scant 2 cups) hemp seeds
5 oz (1 cup) tapioca starch
2 1/2 oz (1/2 cup) brown rice flour
1 oz (1/4 cup) flaxmeal
2 oz (1/4 cup) margarine
1 tbsp instant dried yeast
2 tbsp sugar (for the yeast, not for you)
1 1/4 tsps salt
1 1/4 tsp xanthan gum

7-8 fl oz (1 cups) water
1/2 tbsp vinegar or lemon juice, added to water (to activate xanthan gum)

Unrisen

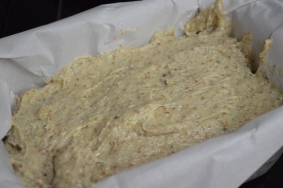
Bread dough/batter directly after transfer to lined loaf pan. Note that it’s more of a thick batter than a bread dough. Many gluten free breads are like this.

Put all the dry ingredients along with the margarine in a food processor. Collect the wet ingredients together in a jug.

Start processing, and add the wet ingredients (lesser amount unless more needed) to the dry ingredients slowly (~10 seconds). Process for 2-3 minutes to activate the xanthan gum.

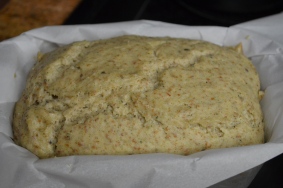
Risen dough/batter, just starting to show cracks.

Risen dough/batter, just starting to show cracks.

Spoon the dough out into a small loaf pan lined with parchment paper or heavily greased, and allow to rise until at least 50% bigger, with cracks just starting to form on the surface.

Cooked, soft, dark brown crusted bread.

Cooked, soft, dark brown crusted bread.

Put the loaf in the center of the oven. Loosely cover with foil or parchment paper to prevent over browning. Cook at 360F for 55-60 minutes. Enjoy!

Vegan Steamed Bread (Bagel Bread)

The texture of this bread is reminiscent of bagels, with a close-ish texture which tends to fight back slightly when you eat it. It makes a nice, flexible, sandwich bread with a soft crust, (best eaten on the day of cooking) and excellent toast (any time).

Recipes for steamed bread frequently call for coffee tins for the cooking vessel, but since our coffee comes in cardboard containers, I figured that wouldn’t work for us. Instead, I used 2 large (28 oz) tomato tins, whose lids I had removed with one of those tin openers that don’t leave a sharp edge. I scrubbed them out, and scoured the cut edge with a dish scourer to make sure there were no bits of loose metal, and heavily greased the inside before dropping the bread dough into place.

Note that the dough won’t rise further once you’ve put it on to steam, so make sure it’s as risen as you want it before getting to that stage. Update: Initially, I used 1 tbsp of sugar in this recipe, but when I increased the sugar to 3 tbsp, the bread rose significantly better, but didn’t end up tasting sweet, so I’ve adjusted the recipe to reflect that.

Steamed Vegan GF Bread

1 tbsp dried yeast
3 tbsp sugar (this is for the yeast, not flavor)
4 oz (1 cup) quinoa flour
2 oz (1/2 cup) millet flour
2 1/2 oz (1/2 cup) brown rice flour
6 1/2 oz (1 cup) arrowroot
1 oz (1/4 cup) flax meal
1 tsp salt
1 tsp xanthan gum
2 tbsp chia seeds, ground

Mix the yeast and sugar with 1/2 cup warm water, and leave for 5 – 10 minutes so the yeast can prove that it’s alive and turn frothy.

Put all the other ingredients in a food processor along with the activated yeast mixture and an additional cup of water, and process for about 3 minutes to activate the xanthan gum.

Grease the inside of two 28oz tomato cans, and divide the mixture evenly between them. Allow to sit and rise for 30-45 minutes, or until 50% bigger. Timing will depend on how lively your yeast is feeling, and how warm your flour (and kitchen) is.

In a large pressure cooker, with a trivet or a few forks in the bottom to stop the bread bottom from being scorched on the bottom, bring about an inch of water to the boil.

Cover the top of the cooking tins with a layer of baking parchment and then a layer of foil. Tie them down with a piece of string to prevent steam from getting in, and place in the pressure cooker.

Put on the lid, and bring up to pressure. Cook for 45 minutes, then remove the pan from the heat, and allow to come down to atmospheric pressure naturally.

Remove the loaves from the pan, and allow to cool on a cooling rack.

Sun Dried Tomato Gougere

I’m not quite sure what got me cooking again today. Was it the retirement specialist I was dealing with who said that he used to photograph food for hotels (he’d followed the blog link in my email signature; I didn’t have the nerve to ask him how I was doing), or was it the calm that has descended on the house since our brief vacation last week, that was sorely needed to restore some kind of sanity to our household. I don’t know, but my mind was able to start wandering again, and as I mused about my beloved almond bread, it occurred to me that the batter wasn’t too far off that for a gougere ….. and then I was off peering at a recipe attempt I made a year or two ago (which produced a delicious, but crunchy, affair) …. and then out popped this recipe. It worked first time! ….. and they weren’t crunchy, and the crust wasn’t too thick, and they weren’t like omelet, and they didn’t sink after they came out of the oven. Lucky, or what! I’m not proud; I’ll admit to accidental successes.

You can also cook this mixture in circles (to accept fillings and then be served as a main course – see below), or as little bowls (to accept fillings and then be served as hors d’oeuvres).

gougere

This makes 36-40 mini gougeres.

4 oz blanched almond flour
2 1/2 oz tapioca flour/starch
2 tbsp flax meal
2 tbsp nutritional yeast (optional – use for a slightly cheesy flavor)
2/3 tsp salt
1 1/2 tsp xanthan gum
2 tsp sugar
1 tsp vinegar
4 fl oz water
4 tbsp margarine (I use spreadable Earth Balance)
3-4 eggs, beaten
1/2 cup minced sun dried tomatoes in olive oil

In a bowl, mix together the dry ingredients.

In a medium saucepan, bring the vinegar, water and margarine quickly to a rolling boil.DSC_0001

Remove from the heat, and quickly shoot all the flours into the boiling liquid, then mix furiously with a wooden spoon until a stiff dough is formed (I managed a whopping 30 seconds before my arm gave out), and allow it to cool for at least two or three minutes, so that it isn’t hot enough to scramble the egg that you’re about to add.

DSC_0005

This paste used all 4 eggs. I have subsequently used just 3 eggs to make a thicker mixture, which also worked nicely, but produced a construction with fewer holes.

Now, using an electric hand mixer, thoroughly incorporate about a tablespoon of the beaten egg. Repeat this step until all of the egg has been absorbed, one tablespoon at a time.

Heavily grease 40 mini muffin formers, and spoon about a tablespoon of mixture into each,
OR just place on a greased or parchment paper lined baking tray / cookie sheet in tablespoon sized dollops, or form 4″ wide circles, or pipe into 5″ long sticks.

When you’re ready to cook the gougeres, preheat the oven to 400F.

Place the tray in the center of the oven, and cook for 15 minutes.

Turn the temperature down to 360F, and cook for a further 15 minutes.

Remove from the oven, release from the tin with a knife, and serve as they are, or split, and fill with vegan cream cheese or somesuch.

stuffed gougere 2

Sun dried tomato gougere stuffed with cauliflower in an orange/tomato sauce, served with steamed chard and a walnut sauce.

Gluten Free Teabread (Bara Brith)

Warm, slightly sweet; best served toasted and generously spread with melting margarine, and a good hot cup of tea. This recipe came into being when I was making almond bread and accidentally used sweet vanilla almond milk instead of the required unsweetened plain almond milk, so I had to add more sugar and fruit and nuts. A girl’s gotta do what a girl’s gotta do ….. and daughter #2 took this on board, and ate over half the loaf that evening, presumably to prevent me from getting fat! Sweetheart.

For Bara Brith (a Welsh bread), substitute more dried fruit/ candied peel for the nuts, and soak them in tea for at least 1/2 an hour before using.

GF Teabread

Shown here with the minimal raisins and walnuts suggested in the recipe.

2 cups (8 oz) almond flour (preferably from blanched almonds)
1 cup (5 oz) tapioca flour
1/4 cup (1 oz) flax seed meal
1/2 tsp cinnamon
1/4 cup margarine
1 1/2 tsp salt
1 tbsp xanthan gum
1 1/2 tbsp yeast

4 large eggs
2 tsp wine vinegar
1/3 – 1/2 cup brown sugar or honey
3/4 cup (6 fl. oz) sweetened, vanilla almond milk

1/2 – 1 cup raisins
1/2  – 1 cup walnut pieces

Put all the dry ingredients together in a food processor, and the wet ingredients in a measuring jug. Start processing. Gradually (over a period of about 10 seconds) pour most of the wet ingredients into the processor (hold back the last fluid ounce or two if the batter seems too wet), and process for about 3 minutes, scraping down occasionally if required. Adjust consistency after a minute or two with additional liquid if necessary. (The flax meal takes about this amount of time to absorb liquid and thicken the mixture.)

Gluten Free Bread Dough Consistency

Dough Consistency

Stir the raisins and walnuts into the batter.

Turn the mixture into a medium loaf pan lined with parchment paper.

Leave to rise for about 30 minutes.

Cook for 60 minutes in the middle of the oven at 360F, lightly covered with tin foil to prevent over browning.

Allow to cool before slicing. This is particularly good toasted and smothered with melted margarine, accompanying a piping hot cup of tea.

Moist Cauliflower Cornbread

Upturned Cornbread

This is surprisingly good, and is almost a meal in its own right with a protein source, vegetables, and a whole-grain carbohydrate. It serves 6 people served with side-dishes such as Red Bean Chili or Black Bean and Veggie Chili. Note that the cornbread rises best if made in a hot pan, and put in a hot oven as soon as the wet ingredients hit the dry ingredients. You can use any combination of vegetables that you want. I’ve used, broccoli, cauliflower, and fried onions with both of them. I’m sure that small cubes of white or sweet potato or garlicky French beans would also work well.

1 medium (1/2 a large) onion, chopped
2 oz (1/4 cup) margarine
12 oz cauliflower (or ~3 cups of some other combination of veggies)
12 oz firm tofu
4 eggs
1/2 tsp garlic powder
1/2 tsp onion powder
1/2 tsp + 1 1/2 tsp salt
4 oz (1 cup) fine ground cornmeal (not cornstarch)
1 tsp baking powder
1/2 – 1 tsp pepper

Preheat oven to 400F (200 degrees C).

Fry the onion in the margarine, and cook the veggies any way you like until soft. I steam/fry mine with garlic as in Garlicky Vegetable Salad in the cast iron pan(s) that I want to bake the cornbread in.

Drain the tofu and briefly squeeze to remove some of the water. Crumble it with your hands into a large mixing bowl, and season with 1/2 tsp each of salt, garlic powder, and onion powder.

Combine all of the ingredients in the large bowl, breaking the vegetables into smallish pieces, and scraping the cooking fat in as well.

Pour the mixture back into the hot (well oiled) cast iron pan(s) (1 x 10″ pan or 2 x 8″ pans), and smooth the top over with a spatula.

Bake for 20 minutes (if using 2 x 8″ cast iron pans) or 30-40 minutes (if using a single 10″ pan), or until a toothpick inserted into the center of the cornbread comes out clean.

Almond Brioche Bread

Fresh almond brioche.

In my pre-gluten-free days I loved to make bread. I made crusty French bread and honey wheat bread, free-form white farmhouse loaves and soft bread rolls flavored with black olives and rosemary, pizzas and bread encrusted pies. When the bomb was dropped that I could no longer eat wheat, I was devastated.

Only temporarily deterred, I’ve since made dozens of loaves of GF bread with various ingredients and with varying degrees of success. One of the battles I’ve fought has been a nutritional one. If you’ve not had a chance to check out my post ‘Exactly Why am I Eating This?’ you might find it an eye-opener. Neither rice flour nor tapioca flour/starch is a good base for gluten free bread nutritionally, but just choosing a flour with a good nutritional content isn’t really the whole story, since different flours have different flavors and structural properties.

One of my favorite flours is almond. It is one of the fussier flours, in my opinion, prone to sucking up moisture and making a soggy product if not handled right, but it has a lovely flavor and a decent nutritional profile (particularly good for diabetics, I’m told, due to lower carbohydrate content).

Baking gluten free bread is not the same as baking wheat based bread. For starters, you need far more ingredients which perform various functions and can’t really be left out. Don’t let this deter you, since once you’ve done it a couple of times, you’ll find it all comes together in an acceptable period of time. It’s NOT a complicated recipe. For a sweet variation: Add 1/3 cup each honey, walnuts, and raisins, and use sweetened vanilla almond milk instead of unsweetened plain almond milk.

This is a good batter consistency to aim for, but I wouldn’t want it any drier.

.

The trick is to get the batter the right consistency. Once the batter has been worked in the processor for a couple of minutes, it should look like the picture on the left and less like the picture below.

.

If your batter looks more like this, then you need to be more careful with your timing of the rise and transfer to the oven, and you run the risk of producing a damp loaf.

Almond Brioche Bread is rich in flavor with a meltingly soft mie, and a crunchy, but not hard, deep brown crust. It is rich, it isn’t a bog standard bread; this bread is a treat in its own right, not an imitation. My husband says he would be perfectly happy if I never made regular bread again since we introduced this item to our kitchen. This works fine for me, as the bread freezes well. I slice mine before freezing in a freezer bag, and then toast individual slices as and when we need them.

Note that although I’ve given volume measurements for most of the ingredients, this is an area of cooking which is better if done by weight (also included) for the flours since this is a more accurate method.

Almond Brioche

2 cups (8 oz) almond flour (preferably from blanched almonds)
1 cup (5 oz) tapioca flour
1/4 cup (1 oz) flax seed meal
1 1/2 tsp salt
1 tbsp xanthan gum

1 1/2 tbsp yeast

1/2 – 1 cup (4 – 8 fl. oz) water or unsweetened non-diary milk
2 large eggs and 3 egg whites
2 tsp wine vinegar
3 tsp maple syrup
1/4 cup margarine (optional – for richness)

Put all the dry ingredients together in a food processor, and the wet ingredients in a measuring jug. Start processing. Gradually (over a period of about 10 seconds) pour all the egg and 1/2 of the milk into the processor, and process for about 3 minutes, scraping down occasionally, if required. Adjust consistency after a minute or two with the additional dairy free milk, if necessary. (The flax meal takes about this amount of time to absorb liquid and thicken the mixture – check out my pictures, above.)

Turn the mixture into a medium sized loaf pan lined with parchment paper, or pipe/scoop into 12 rolls onto a parchment lined cookie tin, or 3 baguettes on a lined French bread former.
Leave to rise for 30-60 minutes.

These loaves are sitting in the cold oven rising with foil in place above them ready for cooking. Note that you can cook the bread starting in a cold oven providing you add 5 – 10 minutes to the cooking time, and turn the oven on just before cracks start to form in the rising batter.

Your bread is ready to go in the oven when it has risen by about 50% and cracks have just started to appear on the surface.

Once cracks start to form on the top of the loaf, it is time for it to go in the preheated oven (it probably won’t wait 10 minutes while the oven warms up).

Cook for 90 minutes (50 minutes for rolls) at 350F on the middle shelf, lightly covered with tin foil or parchment to prevent over browning (I put mine on the shelf just above the bread).

Allow to cool completely (ha ha) before slicing, so that it has time to set.