Rich and tangy, this sauce goes well with Tofu Cakes and oven chips (gasp).
Vegan Tartar Sauce
1 cup (vegan) mayonnaise 1/2 cup sweet pickled cucumbers (aka bread and butter pickles) 1 small spring / green onion, finely chopped (optional) 1 tsp lemon juice
Put all ingredients into a small food processor or blender, and pulse until the pickles are evenly chopped to no more than 1/4″ cubes.
Adjust consistency with non-dairy, unsweetened, unflavored milk, if desired. Chill and serve.
Quinoa Tofu Burgers with dairy free tartar sauce and oven fries.
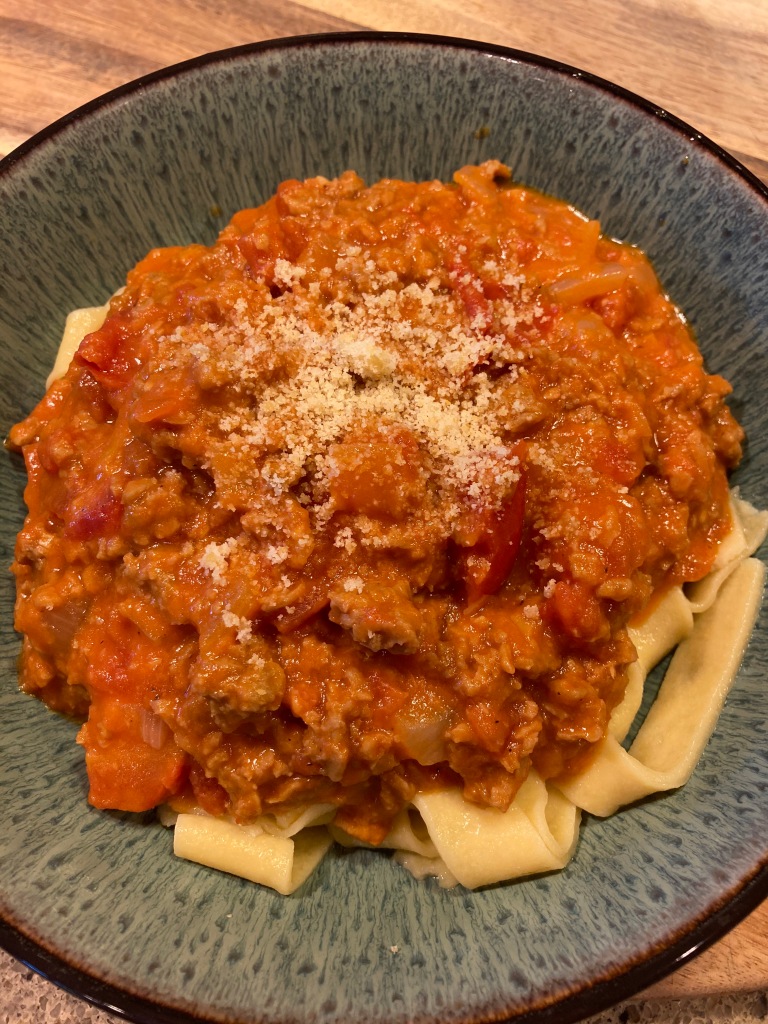
Bolognese is one of those dishes that my husband has always been partial to, and particular about! The advent of Beyond Meat products has reconnected us with it, and he is very happy about that.
Many bolognese recipes call for celery and carrots, but he’ s not at all keen on this idea, so I leave them out. There is a general agreement in our household that sliced mushrooms (~4 oz) fried up with the onions is a good variation, so I occasionally do that, too.
Serves 2 well
1 tsp margarine or oil
3 oz (1/4 large or 1/2 medium) onion, diced
1 large clove garlic, minced
8 oz Beyond Meat mince
1/8 tsp black pepper
1/2 tsp salt (or to taste)
small pinch of nutmeg
1 bay leaf
14 oz diced tomatoes
3 tbsp tomato paste
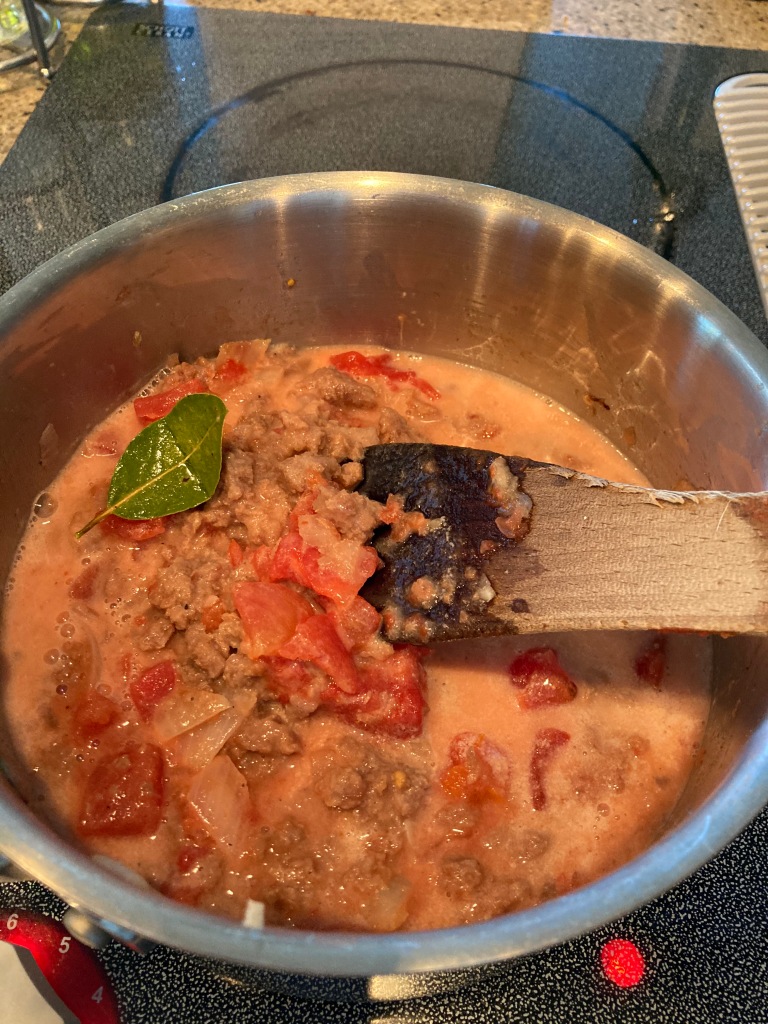
4 fl oz (1/2 cup) unsweetened, plain almond or soy milk (home made or commercial)
If you’re going to use home made non-dairy milk, make sure you’ve made it first.
Heat the fat in a large pot, and fry the onion over a medium-low heat until softened and browned (~5-10 mins).
Add the minced garlic to the pan, and warm through for a minute.
Add the Beyond meat to the onions. Break it up into small chunks with the side of a fork or stiff spatula, and stir over a medium heat until it has released its oil, and has started to brown. (~5 mins)
Add the remaining ingredients (including the non-dairy milk, but not the pasta) to the mixture, bring to a simmer, and then cook uncovered over a medium-low heat until the tomato dice have disintegrated into a sauce. (~30 mins)
Cook the pasta, and serve it topped with the hot bolognese sauce.
Use the cooking spray to grease a cookie sheet / baking tray.
Clean up the cauliflower and place on one end of the cookie sheet / baking tray. Lightly spray with cooking oil.
Put the onion on the other end of the cookie sheet. Lightly spray with cooking oil.
Cover the garlic bulb lightly with baking foil (one layer only or the cooking time will be different) and place between the onion and cauliflower.
Place the cookie sheet on the top shelf in the oven, and cook the veggies until soft and lightly browned (~20 mins).
Once soft, squeeze the garlic cloves out of their cases, and put into the blender.
Put the quinoa and 1/2 the roasted cauliflower in a large saucepan to one side, then all the other ingredients into the blender along with 2 cups (16 fl oz) of the water. Blend until smooth.
Pour the soup out of the blender into the saucepan with the quinoa, and use the remaining 2 cups (16 fl oz) water to rinse the blender out into the saucepan.
This wet curry is mildly spicy, with slight floral tones from the fresh ginger and raisins. Since the vegetables are cooked separately before adding the curry sauce, you can use left over plain veggies, here. I like to serve mine on a bed of basmati or jasmine rice which has been cooked up with a good pinch of ground turmeric to give it a rich, golden hue. I’ve made this one vegan by using raisins, but honey could also be used as a sweetener, though you would need a lot of it!
Initially, when I made this curry, I used an awful lot of honey, and an awful lot of almonds. I rather balked at both the cost and the calories, and found that ground almonds simply didn’t have a strong enough flavor on their own to be noticed over the spices and chili, anyway. On top of that, the large amount of ground almond in the sauce tended to make it stodgy. My husband assured me it was supposed to be like that, but I decided that substituting raisins for the honey, and using almond essence were a good way to go, and I let him add the ground almonds to his curry, separately.
Tips:
Blending the sauce thoroughly will tend to thicken it slightly before it even reaches the saucepan.
Slicing the fresh ginger across the grain before adding it to the blender makes it easier to avoid ginger strings being left in the sauce, though a microplane works even better.
Adding the vegetables towards the end of cooking allows their flavors to remain distinct.
Adding the almond flour just before serving retains its flavor better.
This curry should be pleasantly hot. Jalapeños vary wildly in how hot they are. I’ve stated 1/2 a fresh jalapeño in the recipe, but the other day I had a mild batch and had to use 1 1/2 chilies to get the right heat.
This curry should also be mildly sweet. If the raisins aren’t making it sweet enough, add up to about 1/4 cup sugar.
Variation: Use 4 oz of soy curls instead of the potatoes and green beans by putting it into a bowl with the liquid smoke (if using), and barely covering with water to rehydrate (for 10 mins or as per packet instructions), then adding to the onion and mushrooms to fry when the former are nearly finished cooking.
Serves 6
1 lb baby/diced waxy potatoes
8 oz green beans
1 tbsp coconut oil (or other cooking oil)
1/2 large onion (6-8 oz), 3/4″ cubes
8 oz mushrooms, 3/4″ cubes
1/2 fresh jalapeno chili, deseeded (or to taste)
1/2 – 1 oz fresh ginger, skinned and cut into thin slices across the grain or grated on a microplane
14 oz can of coconut milk (not low fat)
4 oz (~1 cup) raisins, or similar volume of honey
14 oz can of diced tomatoes
4 oz tomato paste
1/2 tsp liquid smoke
3/4 tsp almond extract/essence
sugar to taste
1 tsp salt (or to taste)
2 tbsps garam masala
1/2 tsp amchur (ground, dried mango)
1 tsp ground ginger
1/4 tsp ground cardamon
1/4 cup ground almonds/ almond flour per person
Bring a pot of salted water to the boil, and add the potatoes and green beans. Simmer until the potatoes are cooked but not disintegrating, and the beans are soft.
Warm the oil in a medium sized saucepan over a medium high heat, then add the onion and cook for 5 minutes, stirring frequently.
Turn the heat up to high, and add the mushrooms to the onion. Cook for another 5 minutes, stirring frequently.
Put the fresh chili, fresh ginger, coconut milk, raisins, tomatoes, and liquid smoke, almond essence, and sugar into a blender, and blend until completely smooth. Check the flavor, and blend in more jalapeno / raisins / honey / sugar, if desired.
Gather together the salt and spices, then sprinkle them over the onions and mushrooms, and allow to cook for a minute while stirring.
Drain the vegetables (or soy ‘meat’, if using), and add them to the onion and mushroom mix. Stir to coat.
Pour the tomato/coconut mixture into the saucepan, and stir. Bring to a simmer, remove from the heat, then either stir in the almond flour just before serving hot over rice, or hand round the almond flour so diners can add it themselves.
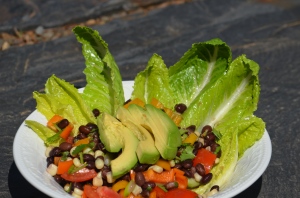
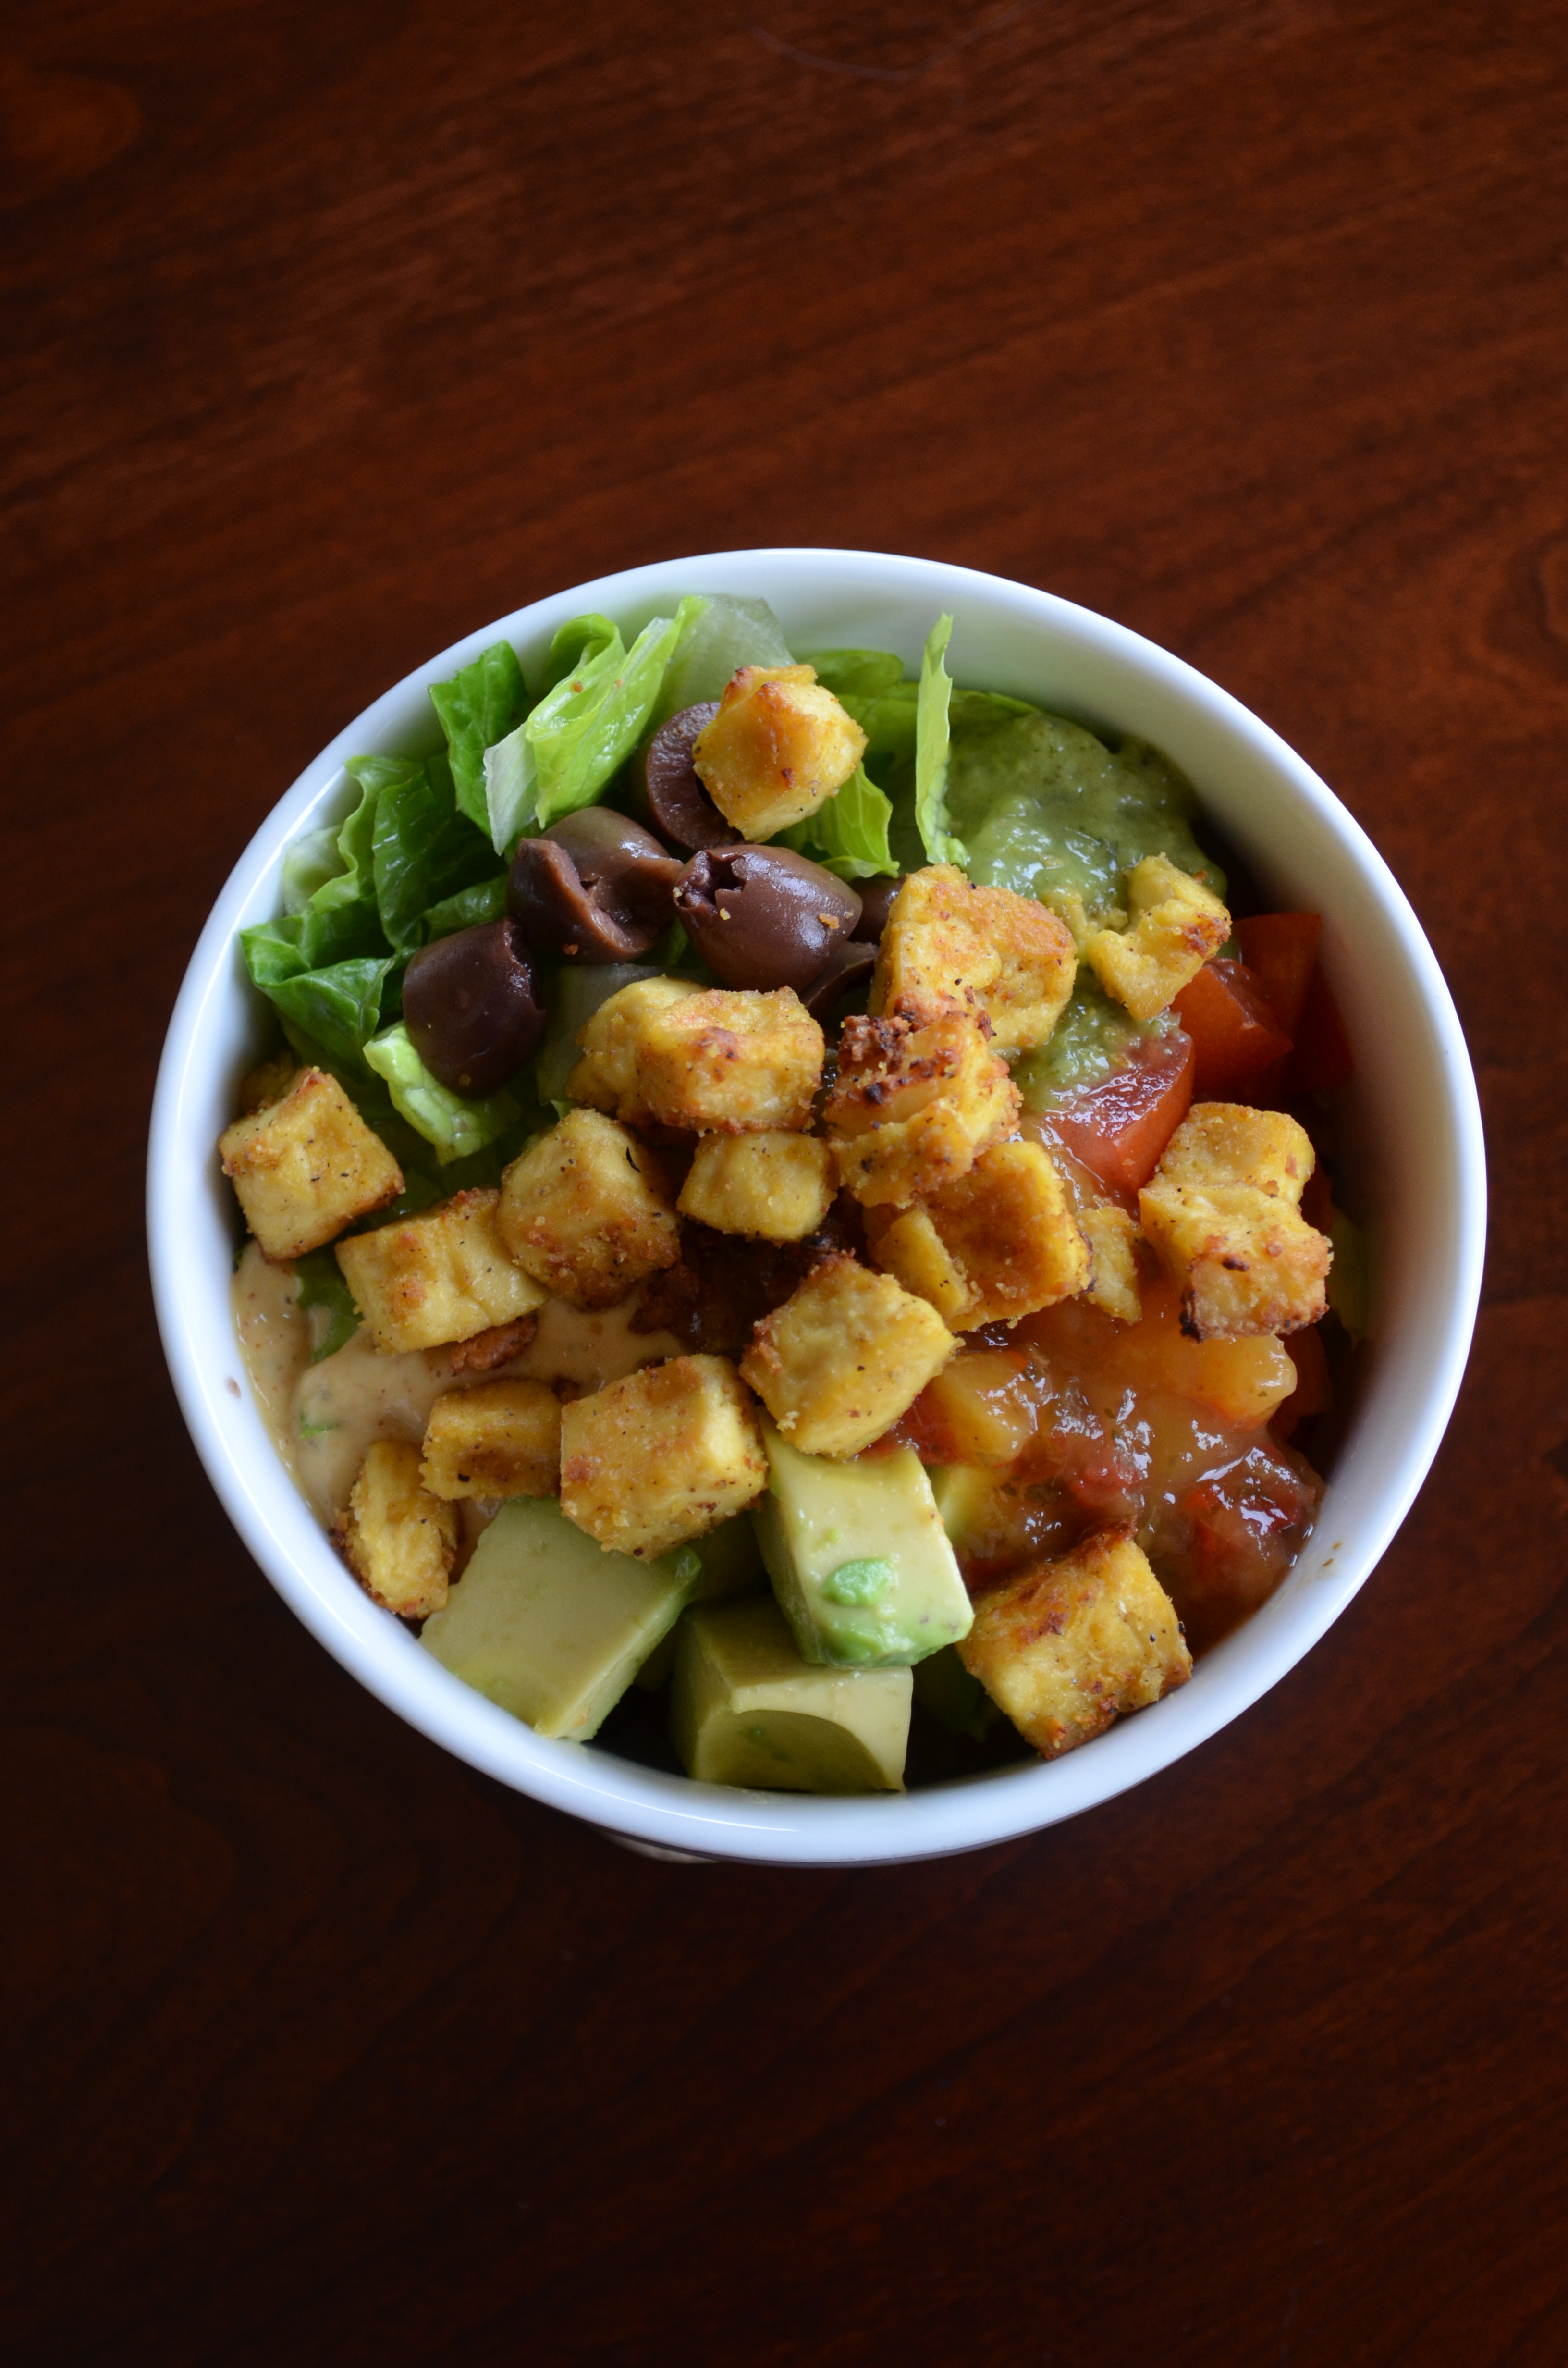
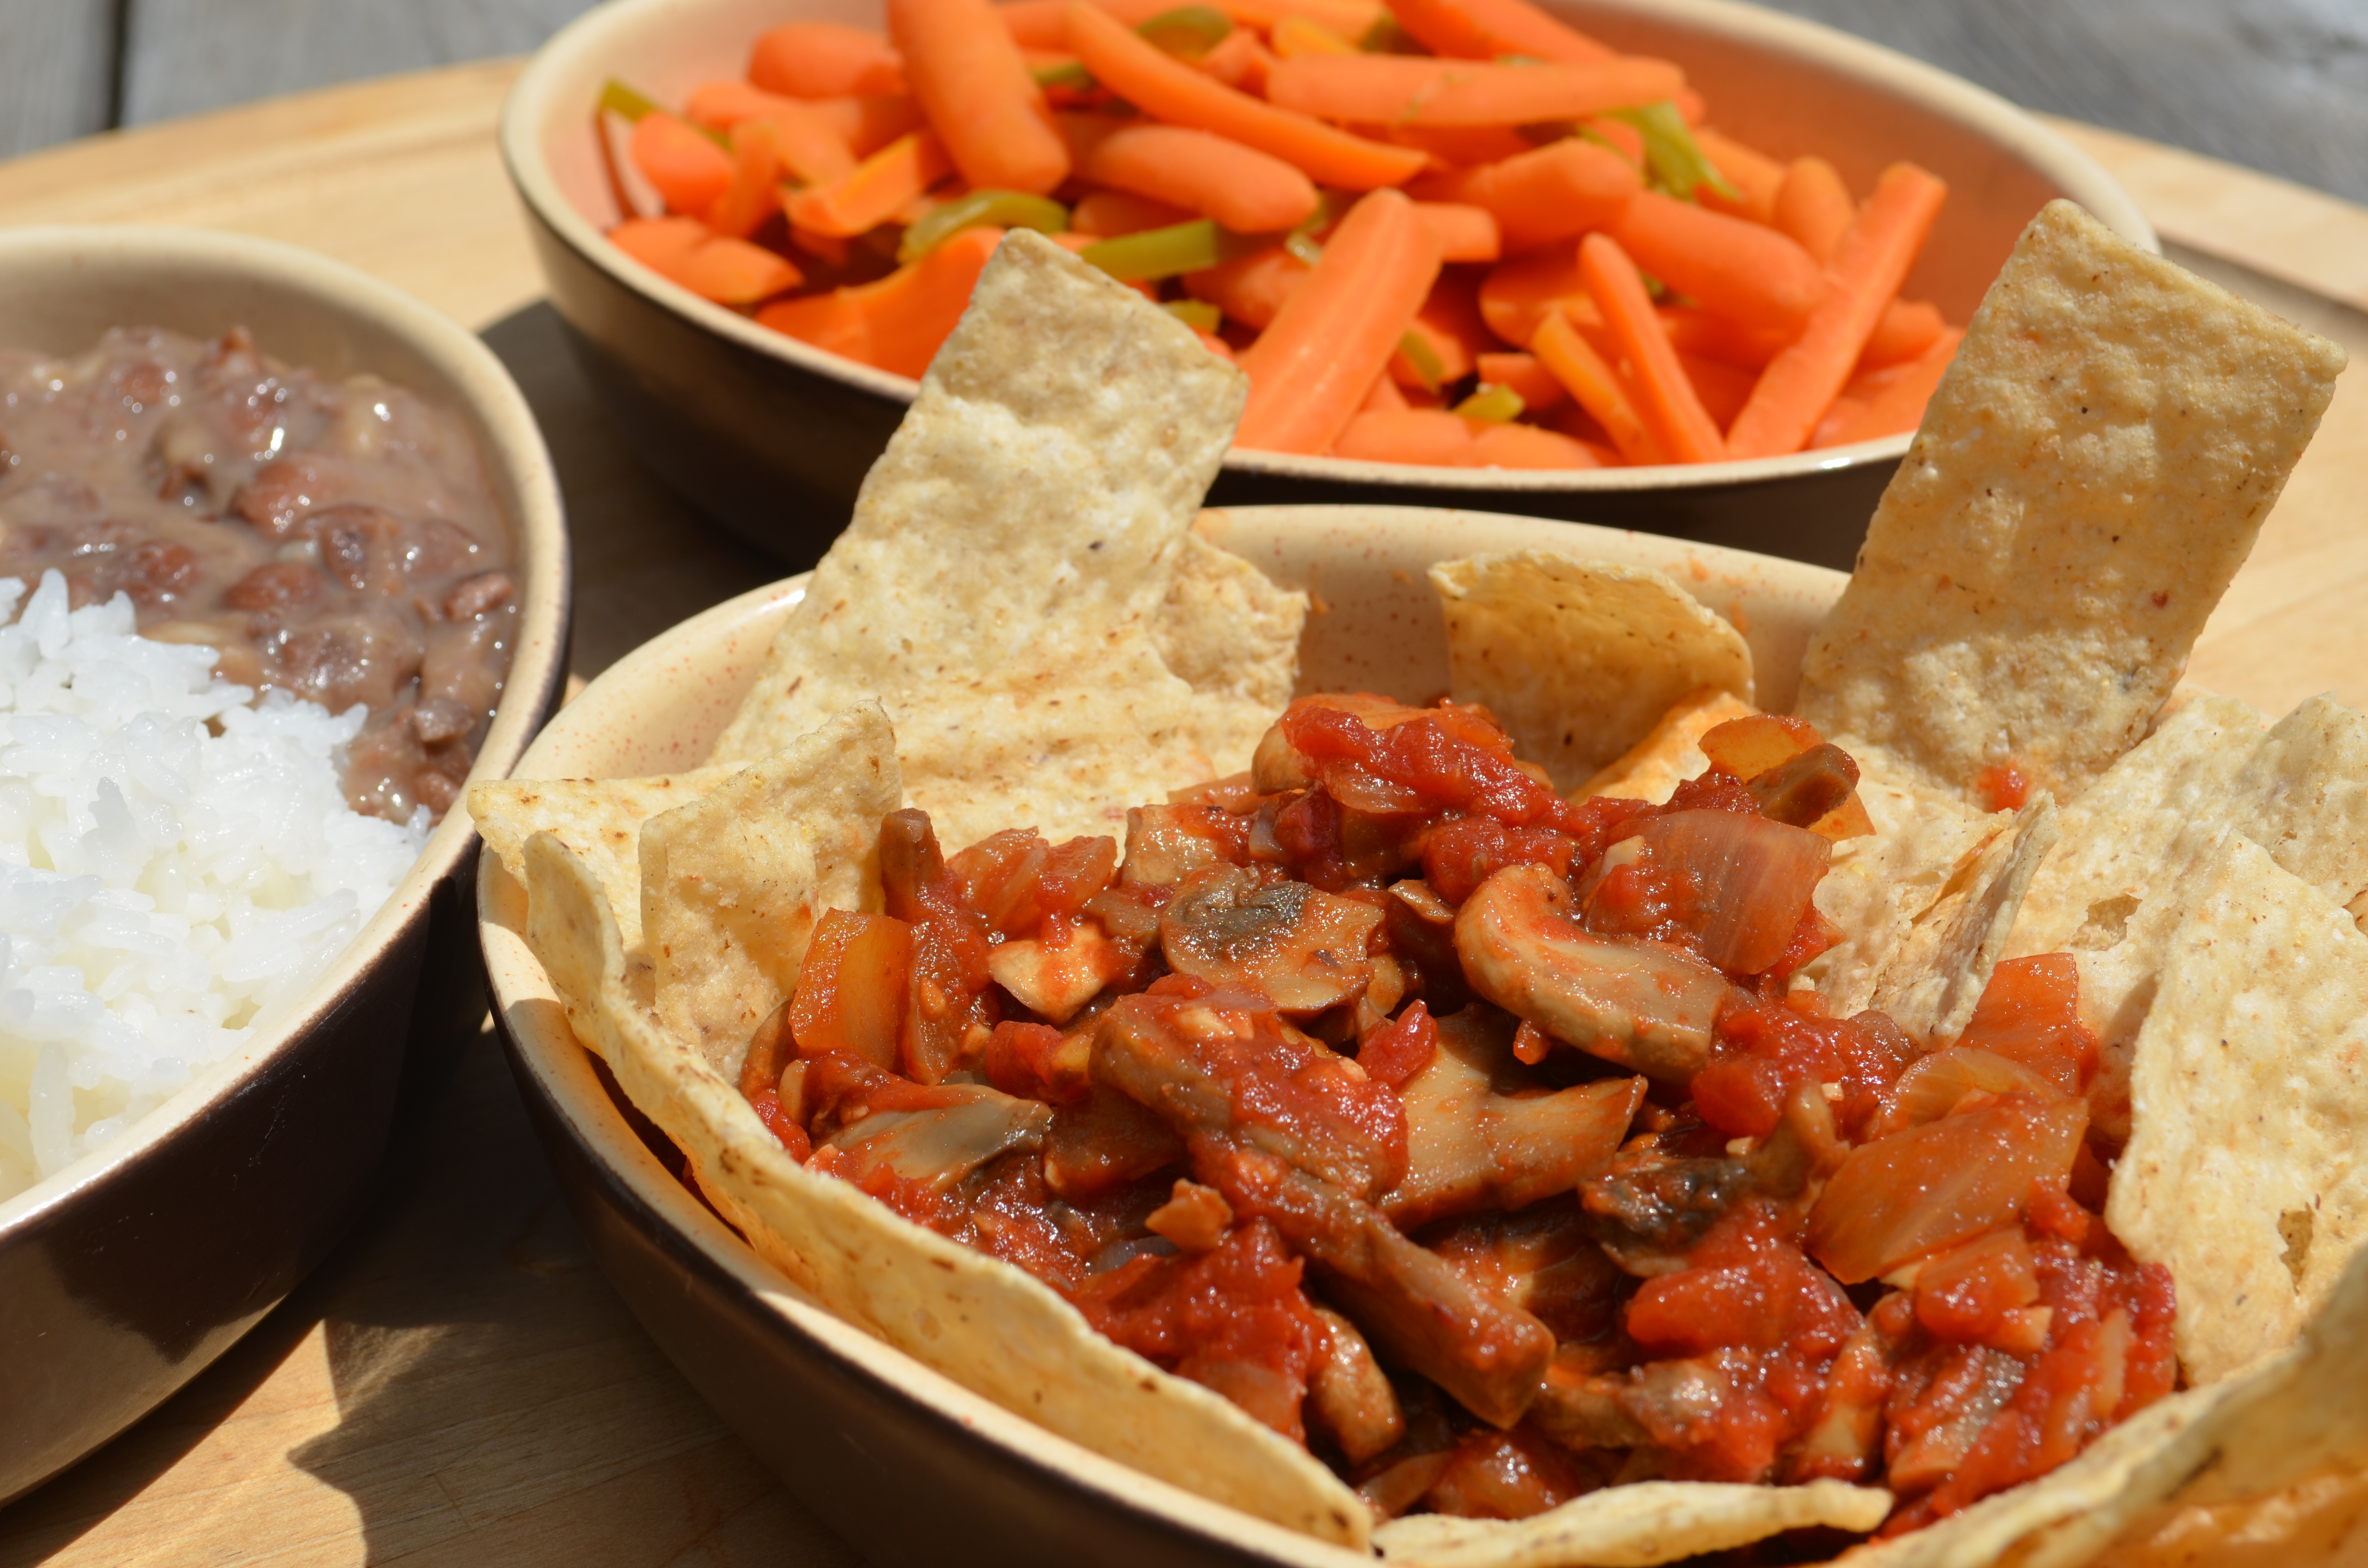
To be honest, this is just a template. A tasty template, but one that is open to countless variations. This is a bowl of rice and beans with various accoutrements. It’s very satisfying, tasty, and nutritious, and we love it!
Clockwise from top left: lettuce, crispy tofu, black bean chili, fresh tomato, yummy sauce, green salsa, avocado chunks, brown rice, and black olives in the center.
Serves 3-4
1 cup brown rice
1/2 tsp salt
2 cans black beans
1″ chipotle chilies in adobo sauce
1/4 tsp salt
14-16 oz firm tofu
3/4 tsp salt
3/4 tsp onion powder
2 tsp nutritional yeast
cooking spray
yummy sauce
salsa (home-made or commercial)
lettuce, shredded
fresh tomato, diced
black olives, halved
fresh cilantro to garnish
1 avocado
Put the rice in a saucepan with double the volume of water (2 cups) and 1/2 tsp of salt, and put to one side to soak for at least 1/2 hour.
Cover the rice, bring to a simmer, and cook until almost all the water has been absorbed. Turn off the heat, leave the rice covered to finish cooking in its own steam.
Drain the black bean liquid into a blender. Put the beans in a medium sized saucepan, and the chipotle chilies and salt in the blender with the bean juice.
Blend the bean juice, then pour it into the saucepan with the beans and bring to a simmer. Turn off the heat, and allow to steep.
Cut the tofu into 1/2″ cubes, put in a mixing bowl, and dry the surface of the tofu with a couple of paper towels. Sprinkle the salt, pepper, onion powder, and nutritional yeast over the tofu, toss to coat. Bring a grill/broiler up to high heat. Spray a baking sheet with cooking spray, add the tofu, and place ~6″under the grill/broiler. Toss around on the baking sheet at intervals to encourage even browning, until the tofu is crispy on most sides.
Assemble the bowls: Put a quarter of the rice in each bowl, top with a quarter of the drained beans. Put a large splash of the salsa across one side of the beans, and a large splash of the yummy sauce on the other. Arrange the lettuce, tomato, black olives, cilantro and avocado slices on top.
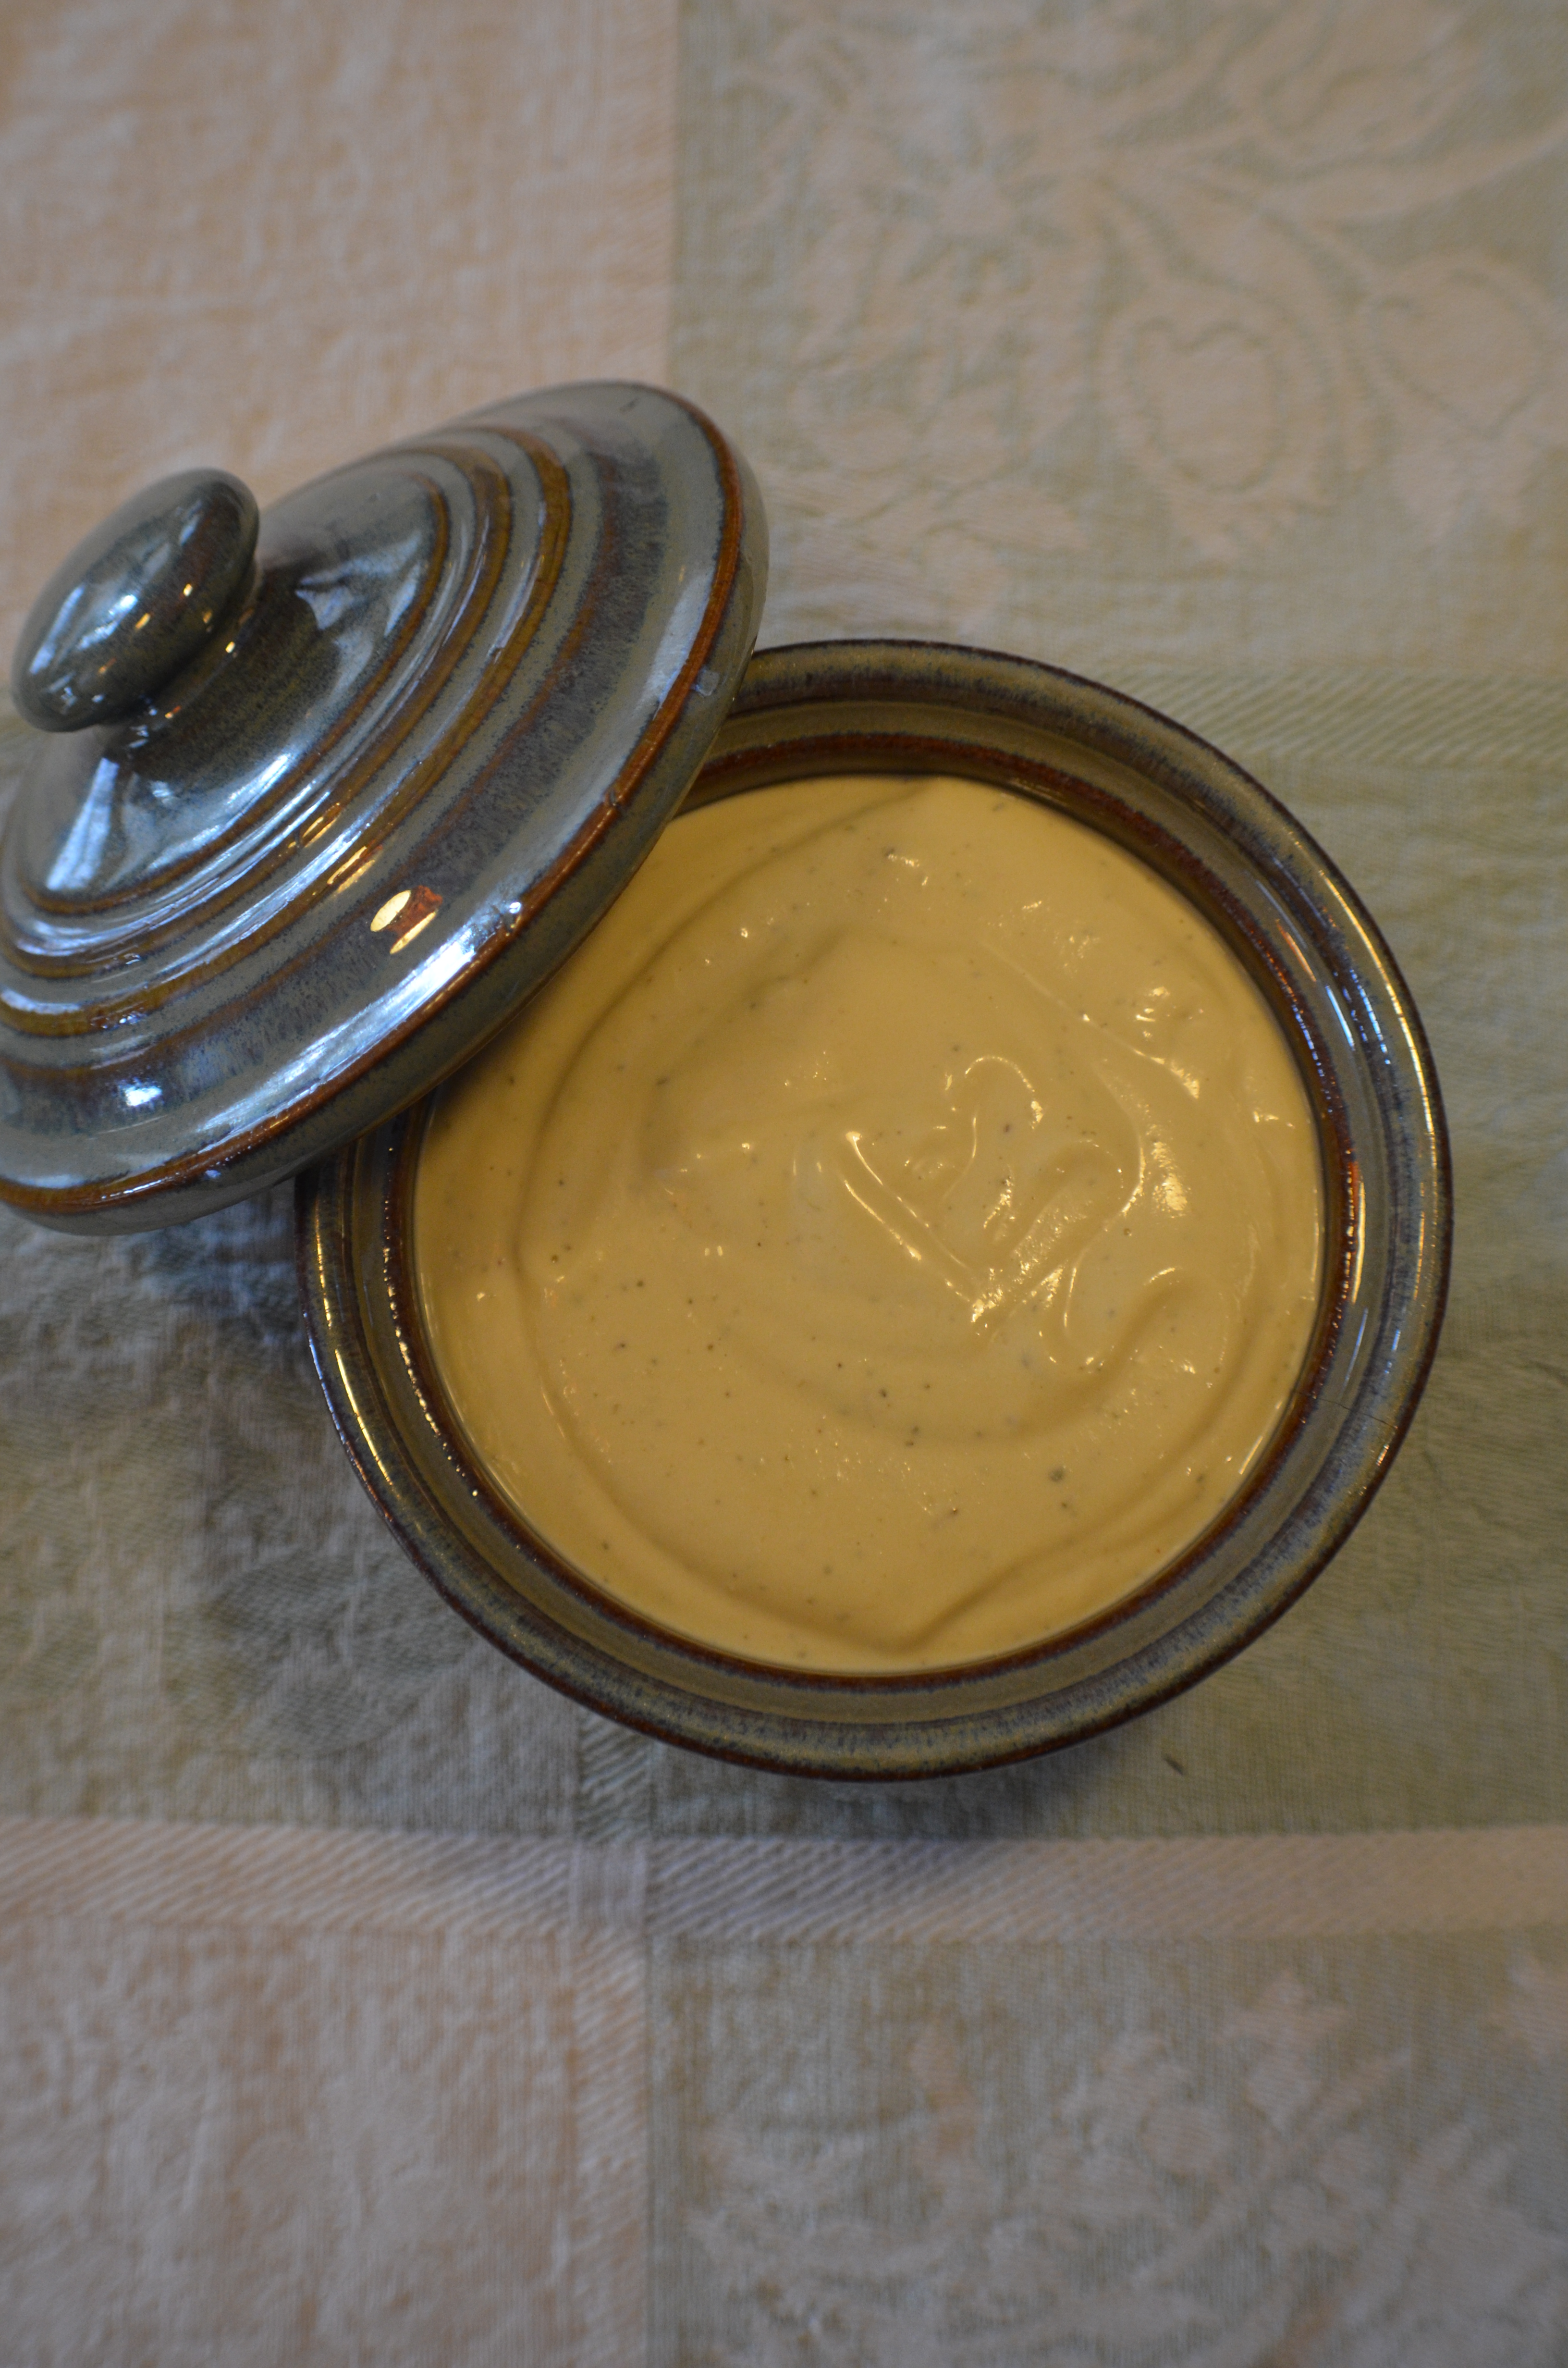
I should probably point out that I do not earn money from this blog, and so this endorsement is my actual opinion and does not include a mercenary bias. I got the idea for this salad/side dressing from Cafe Yumm! which has locations in Oregon and Washington, but not elsewhere. It’s a thick, pungent sauce for jazzing up salads & beans & rice & quinoa & suchlike. Cafe Yumm! sells the sauce in large bottles so you can make versions of their ‘bowls’ at home, but since they don’t appear to sell the sauce online at the moment, if you don’t happen to live in either of those states, you’ll have to make your own!
This sauce is strongly flavored! The dominant flavors are lemon juice, thyme, nutritional yeast, and probably more lemon juice. The original appears to be almost an emulsion made with oil, which does make it taste gorgeous, but without the oil, this stuff looks like health food, so that’s what I aimed for, to start off with, until my youngest convinced me to try it with oil, and it really is better that way. The sauce is also not smooth, so you may want to only partially blend the chickpeas/garbanzo beans. However, I should point out that this doesn’t seem to have much punch if it’s turned into mayonnaise by blending the oil into the other ingredients, and the texture isn’t right, so I very briefly stir in the oil at the end.
I don’t know how long this sauce would last, but I’ve managed to keep a bowl of it in the fridge for a week without anything untoward happening.
One last point, make sure your oil is neutral flavored. I made the mistake of using olive oil once, and ended up pouring the whole lot away as it tasted far too strong.
1/2 cup almonds (or almond flour)
1/2 cup (8 tbsp) lemon juice
1/2 cup water or plain, unsweetened, soy milk
1 tsp dried thyme (I’m sure fresh thyme would be even better)
6 tbsp nutritional yeast
2 cloves garlic
1/2 tsp salt
3/4 – 1 cup (1/2 can) cooked chickpeas/garbanzo beans
1/2 cup neutral flavored oil
Put the almonds in the blender with the water/milk, lemon juice, thyme, nutritional yeast, garlic, and salt, and process until it’s as smooth as you can get it.
Add the chickpeas/garbanzo beans, and process until almost smooth.
Add the oil and process only long enough to combine (about 5 seconds on lowest setting, if that).
This is my simplified version of dhansak, a lentil based Indian curry. I have made it with cauliflower, and I have also made it with mushrooms. Just substitute mushrooms for the cauliflower in this recipe. Both are good. I’ve also made it with split mung dal (when I found myself without lentils), and that worked well too. Unless they’re old, there’s no need to soak the mung: just put a lid on them while they’re cooking, and make sure they’re soft before you stir in the cauliflower.
Dhansak should be at least warm with the chili, but otherwise it can be as hot as you care to make it. It is dominated by a deeply earthy tone with sweet/sour accents supplied by the tamarind. It also happens to be my youngest daughter’s current favorite and one of the healthiest curries I make, being low in fat and high in fiber, beans, and vegetables. A real comfort food!
As with many curries, leftovers taste even better (and generally slightly hotter) the next day.
12 oz (1/2 large head) cauliflower, cut into thin florets OR sliced mushrooms
6 cloves garlic, finely minced
1 1/2 tsp salt
2 tbsp chopped, fresh coriander
Gather together the dried spices in a small bowl.
Heat the oil in a large frying pan over a medium/high heat, and cook the onion and fresh chili, stirring occasionally, until browned (~20 minutes).
While the onions brown, put the lentils into a large saucepan with 16 fl oz (2 cup) of water and the curry base sauce; bring to a simmer and cook gently until softened. (~10 mins)
Add the cauliflower florets or mushrooms to the onion, and stir to coat with oil, and cook for 5 minutes.
Add the garlic to the onion, and allow to warm through for a minute.
Add the spices to the onion, and stir to coat.
Once the lentils have completely softened, scrape the vegetables into the lentil pot, add the salt, and simmer until the cauliflower/mushrooms are just soft, and the lentils have almost disintegrated into a sauce.
Check for seasoning. If it looks at all dry (or the cauliflower hasn’t finished cooking), add a little more water and simmer for 2 minutes to integrate it (or until the cauliflower has finished cooking) before serving hot with rice or GF chapati, garnished with fresh chopped cilantro/leaf coriander.
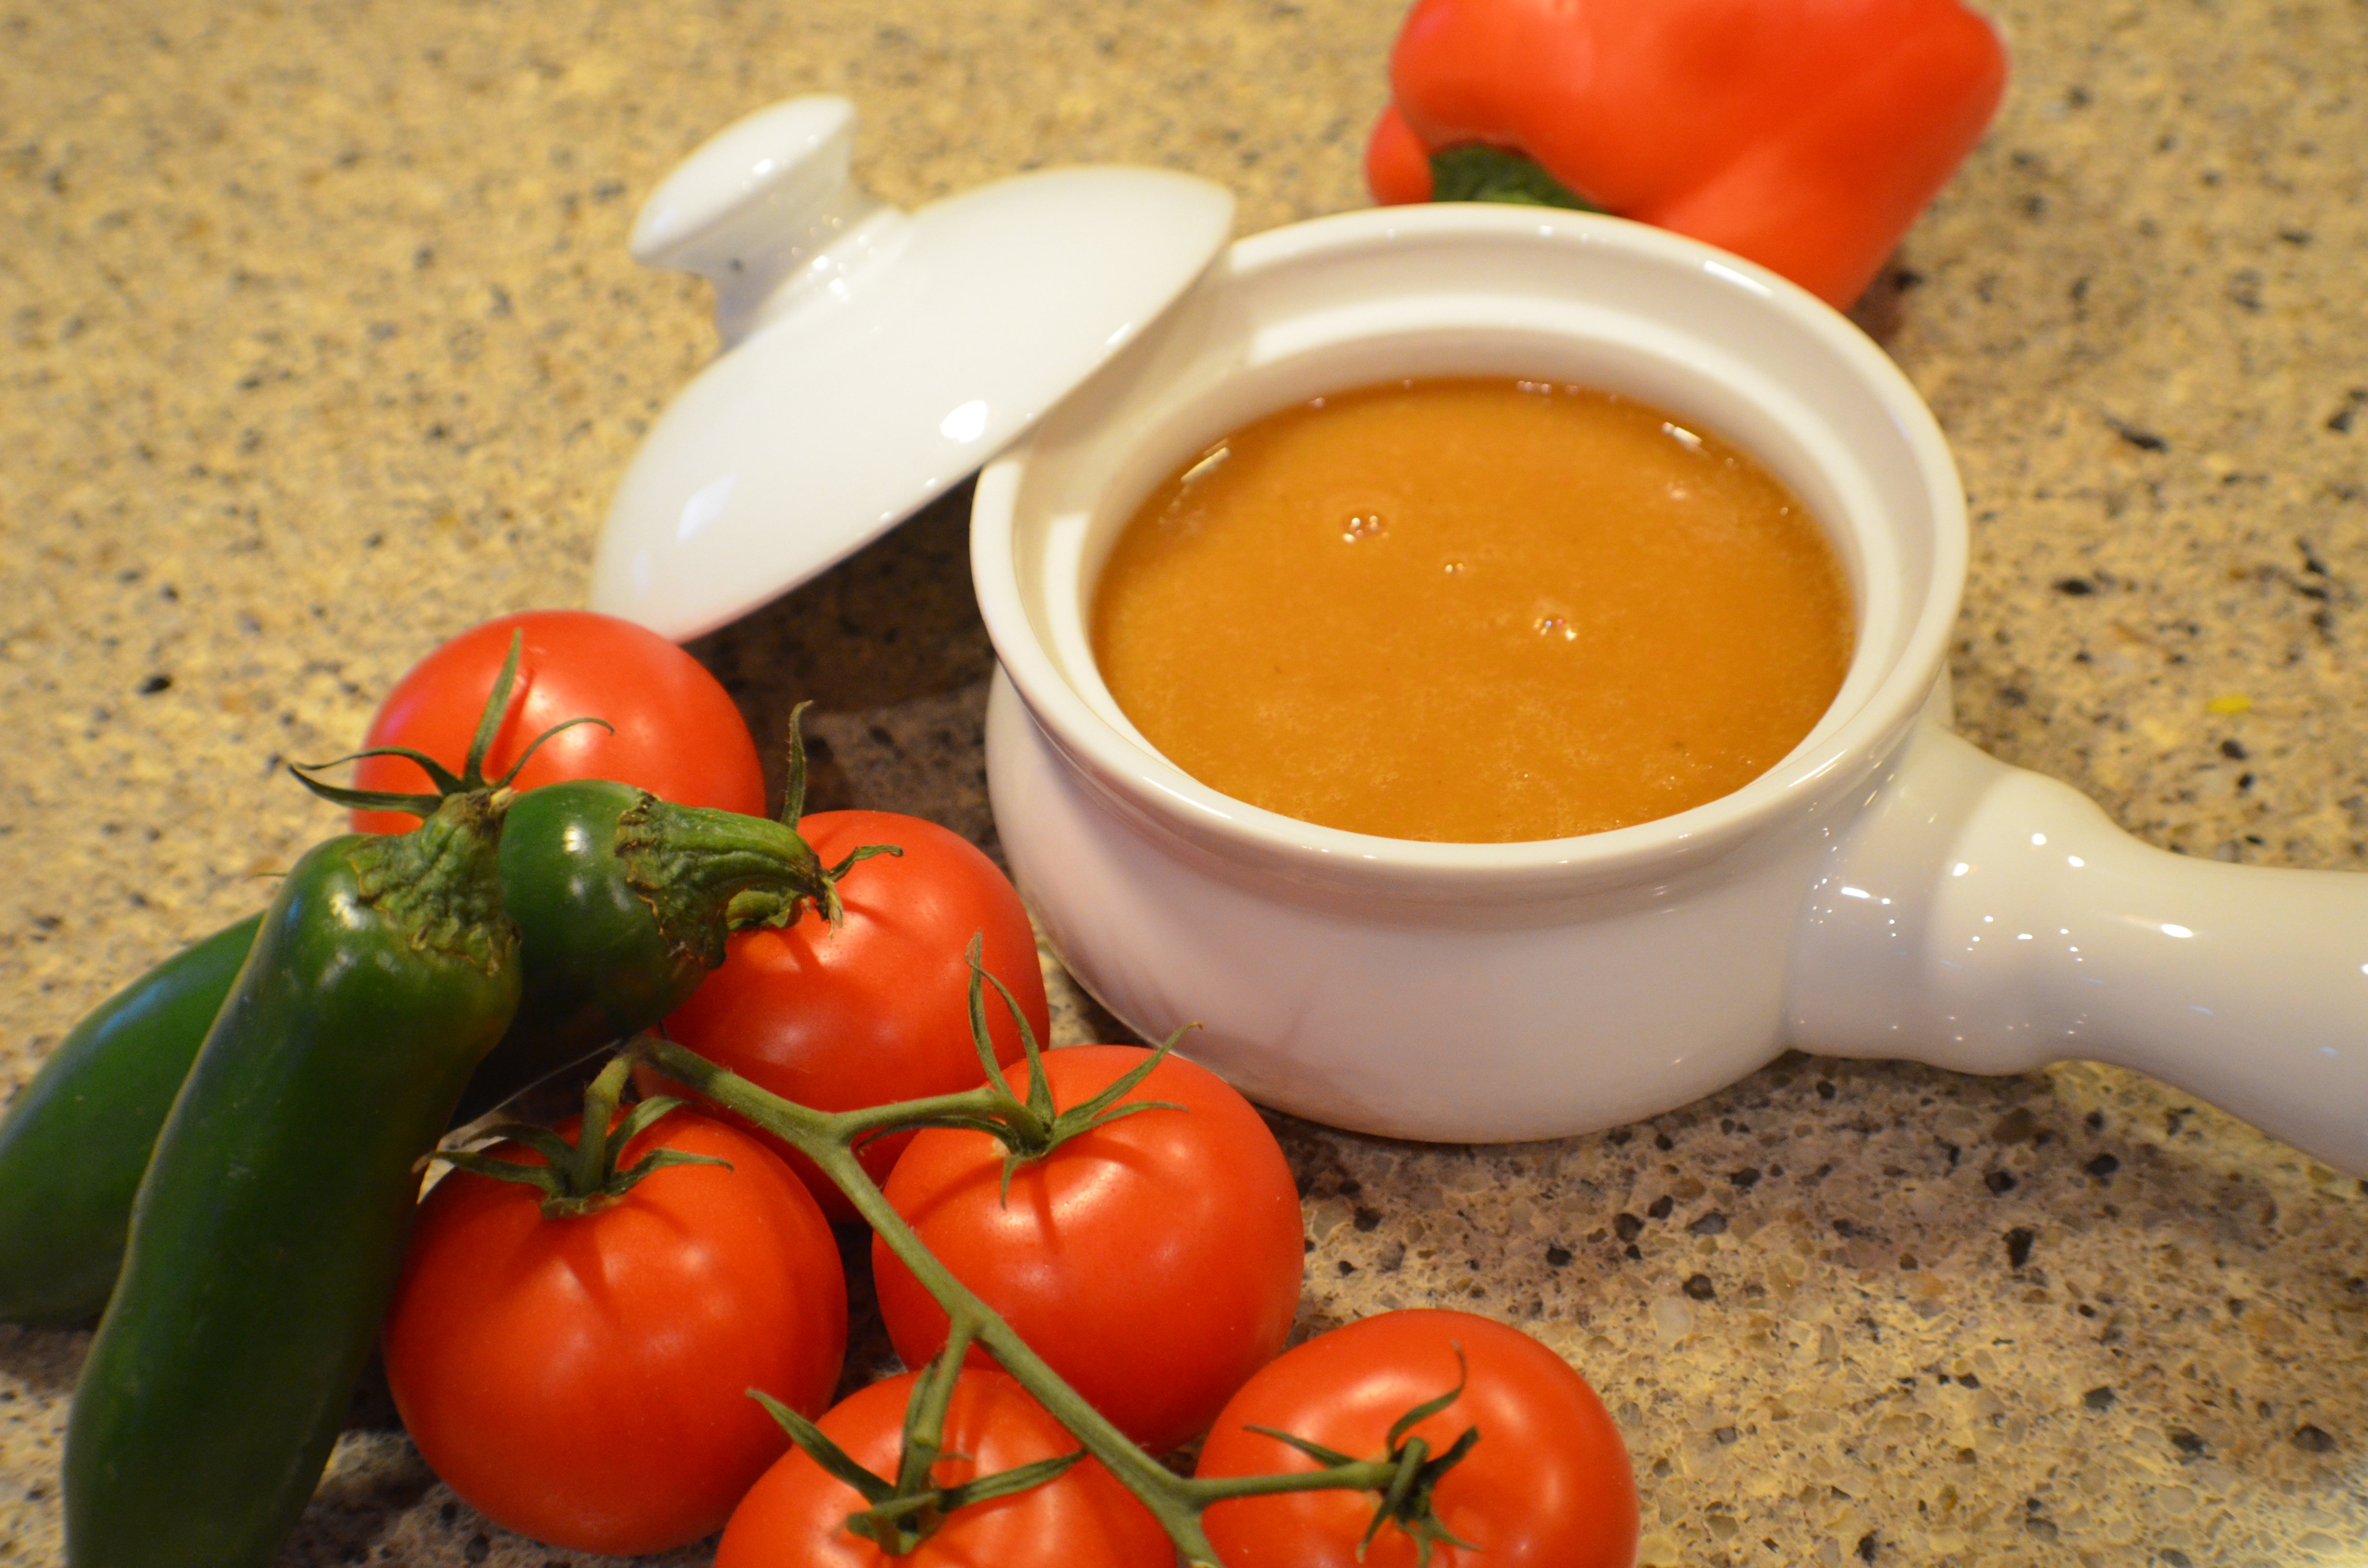
A smooth, warming, lightly spicy soup, this is a great way to make use of the cauliflower stalk that so often gets thrown away. Note that this started off life as a way to use up the last bit of ranchero sauce that I had in the fridge one day when I was thinking fondly of a cream of tomato soup that I used to have as a child. If you find yourself in that situation, 8 floz / 1 cup / 1/4 litre ranchero sauce, 8 oz / 250g cauliflower cooked in 24 floz / 3 cups / 700ml of water with 1/2 tsp salt will get you a small amount of this soup in a jiffy.
Makes ~13 cups / 3 liters of soup @ ~36kcals per cup
1 tsp margarine (I use Earth Balance) or cooking oil/spray
6 oz (1/2 of a large) onion, diced
1 lb / 454g red/yellow/orange sliced peppers (frozen is O.K.)
1 jalapeño chili, seeds removed and flesh roughly diced
1 lb / 450g cauliflower
2-3 cloves garlic, minced
1 tsp dried oregano
14 oz / 400g chopped tinned tomatoes, with juices
2 tsp salt
1 tbsp of sugar if necessary to counteract acidic tomatoes
Heat the oil in a saucepan over a medium high heat, then cook the onion, peppers/chili, and cauliflower until the onion is translucent (~10 minutes), stirring occasionally.
Add the garlic and allow it to warm through for a minute.
Add the remaining ingredients along with 32 fl oz / 4 cups/ 950 ml of water, and simmer until the cauliflower is soft (~10 minutes).
Blend until smooth; pour back into the saucepan and use another 16 fl oz / 2 cups / 475 ml of water to rinse the blender out into the saucepan.
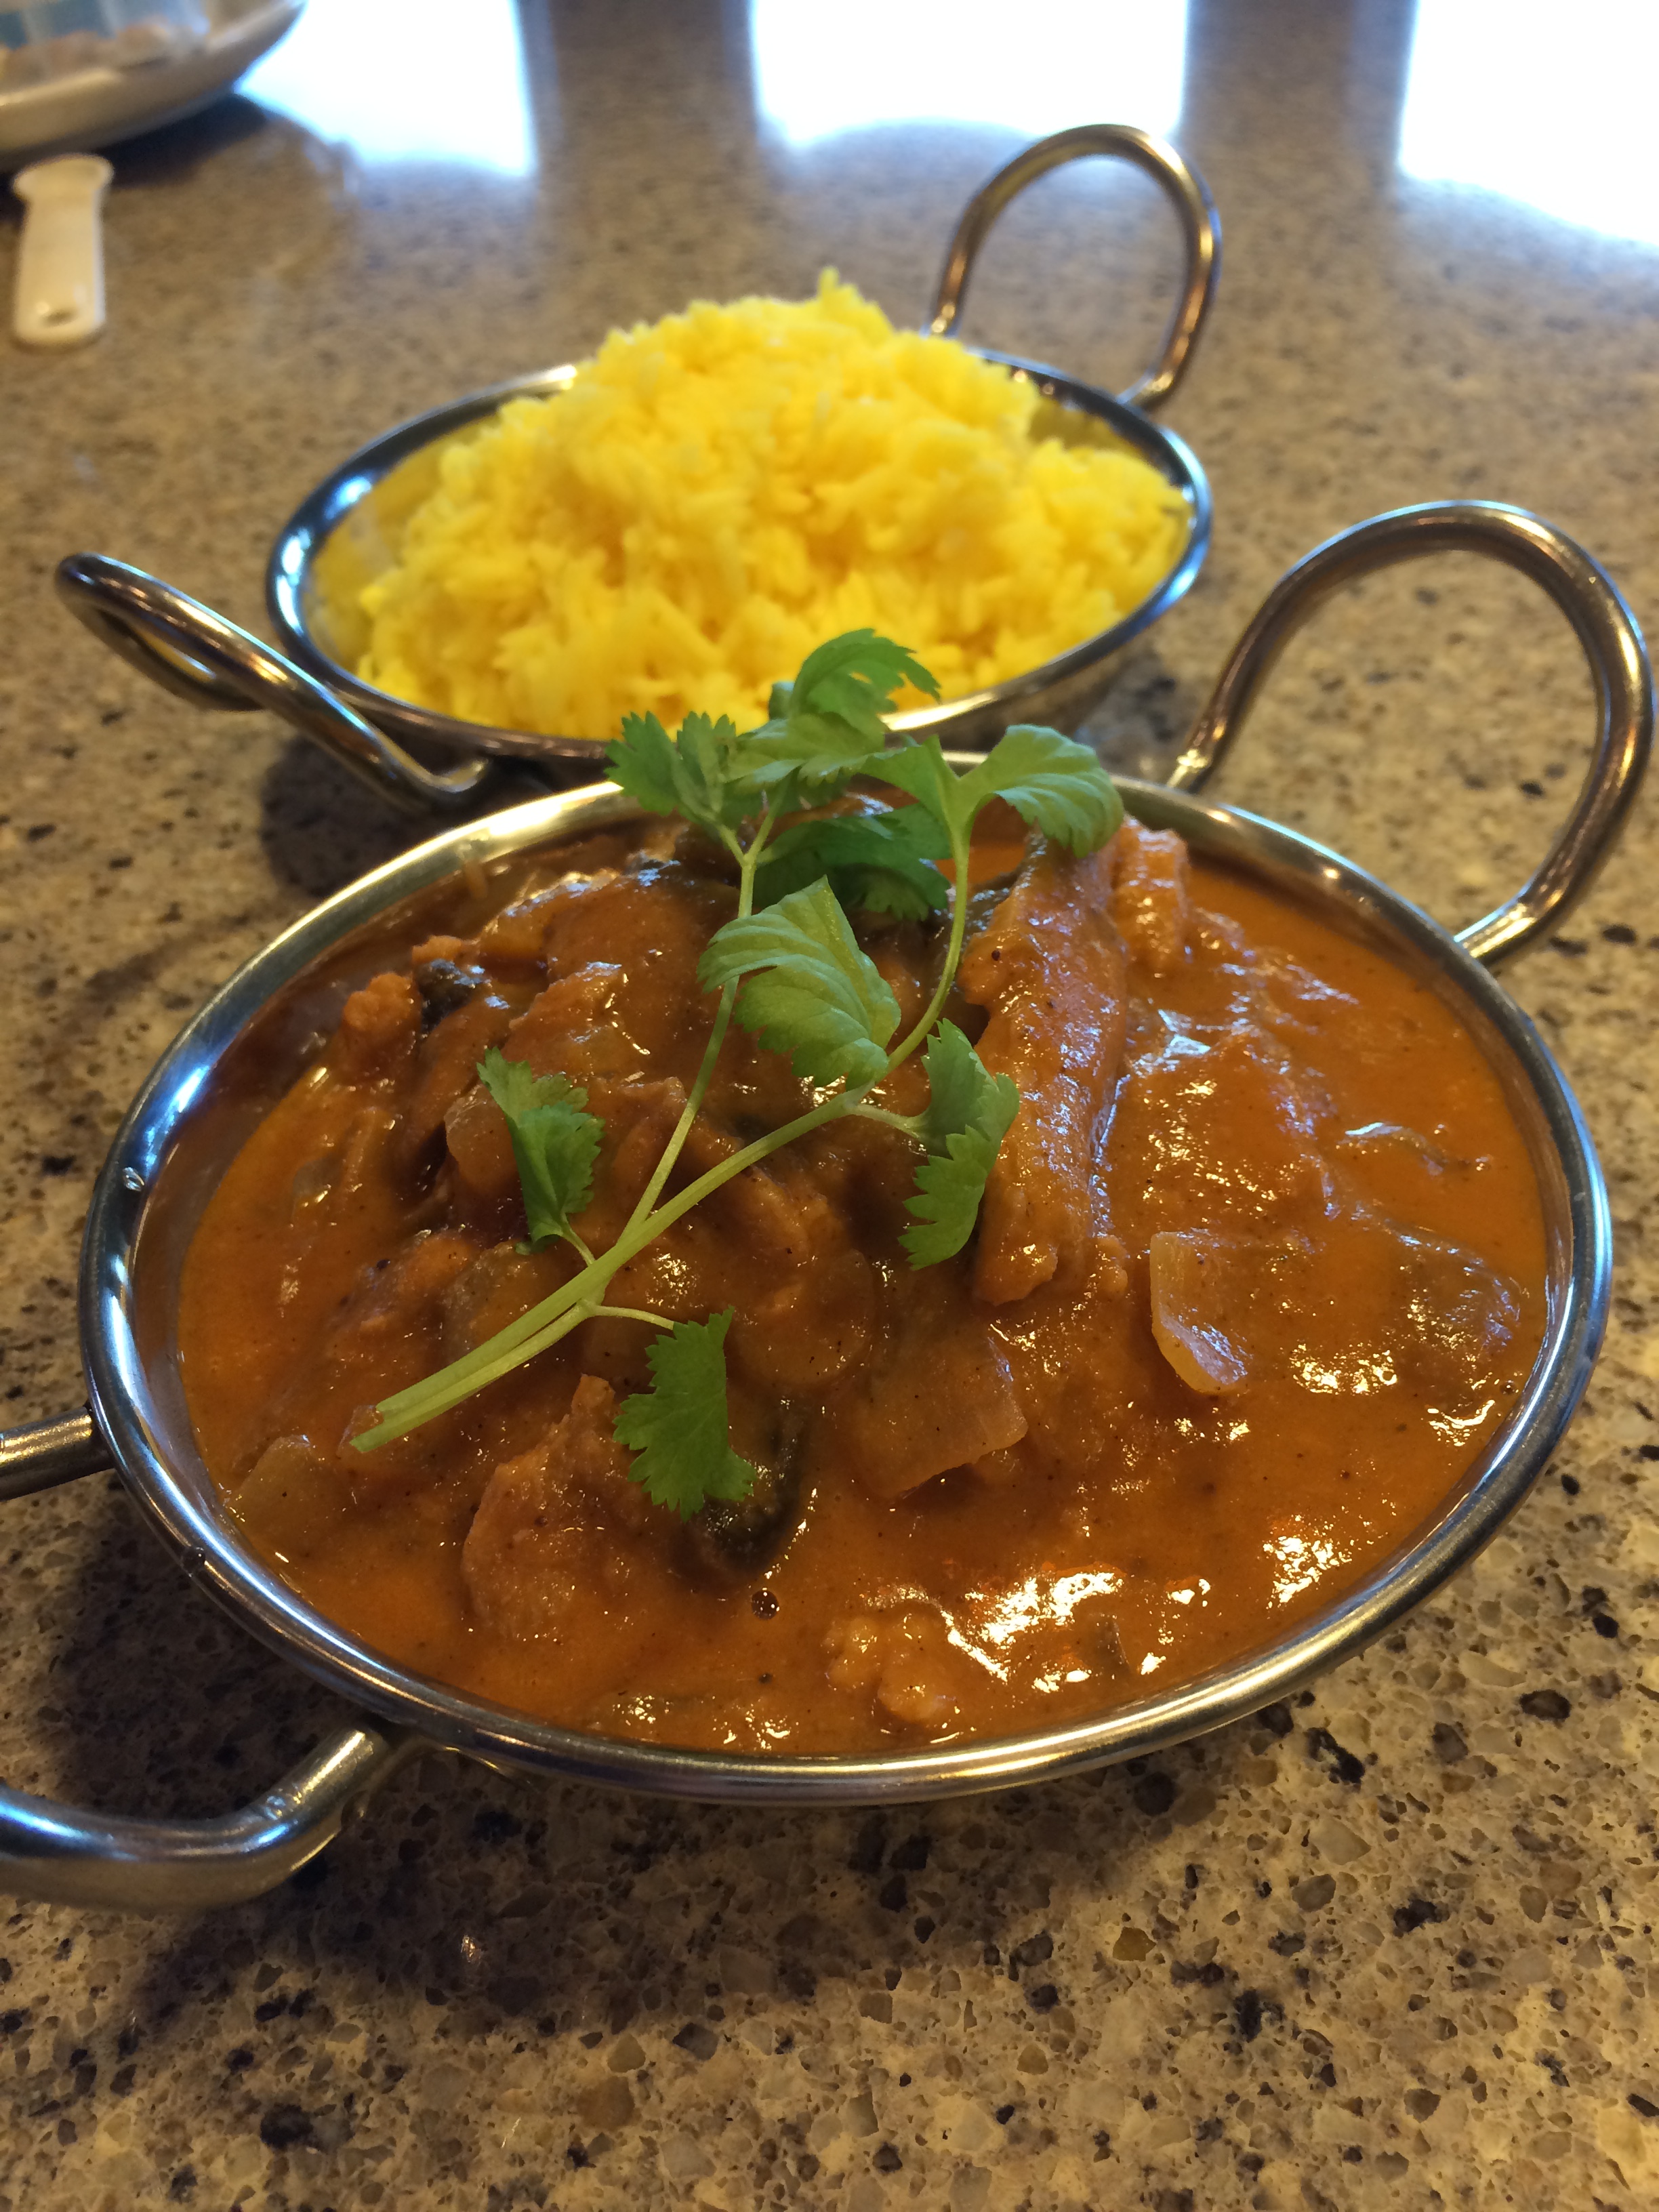
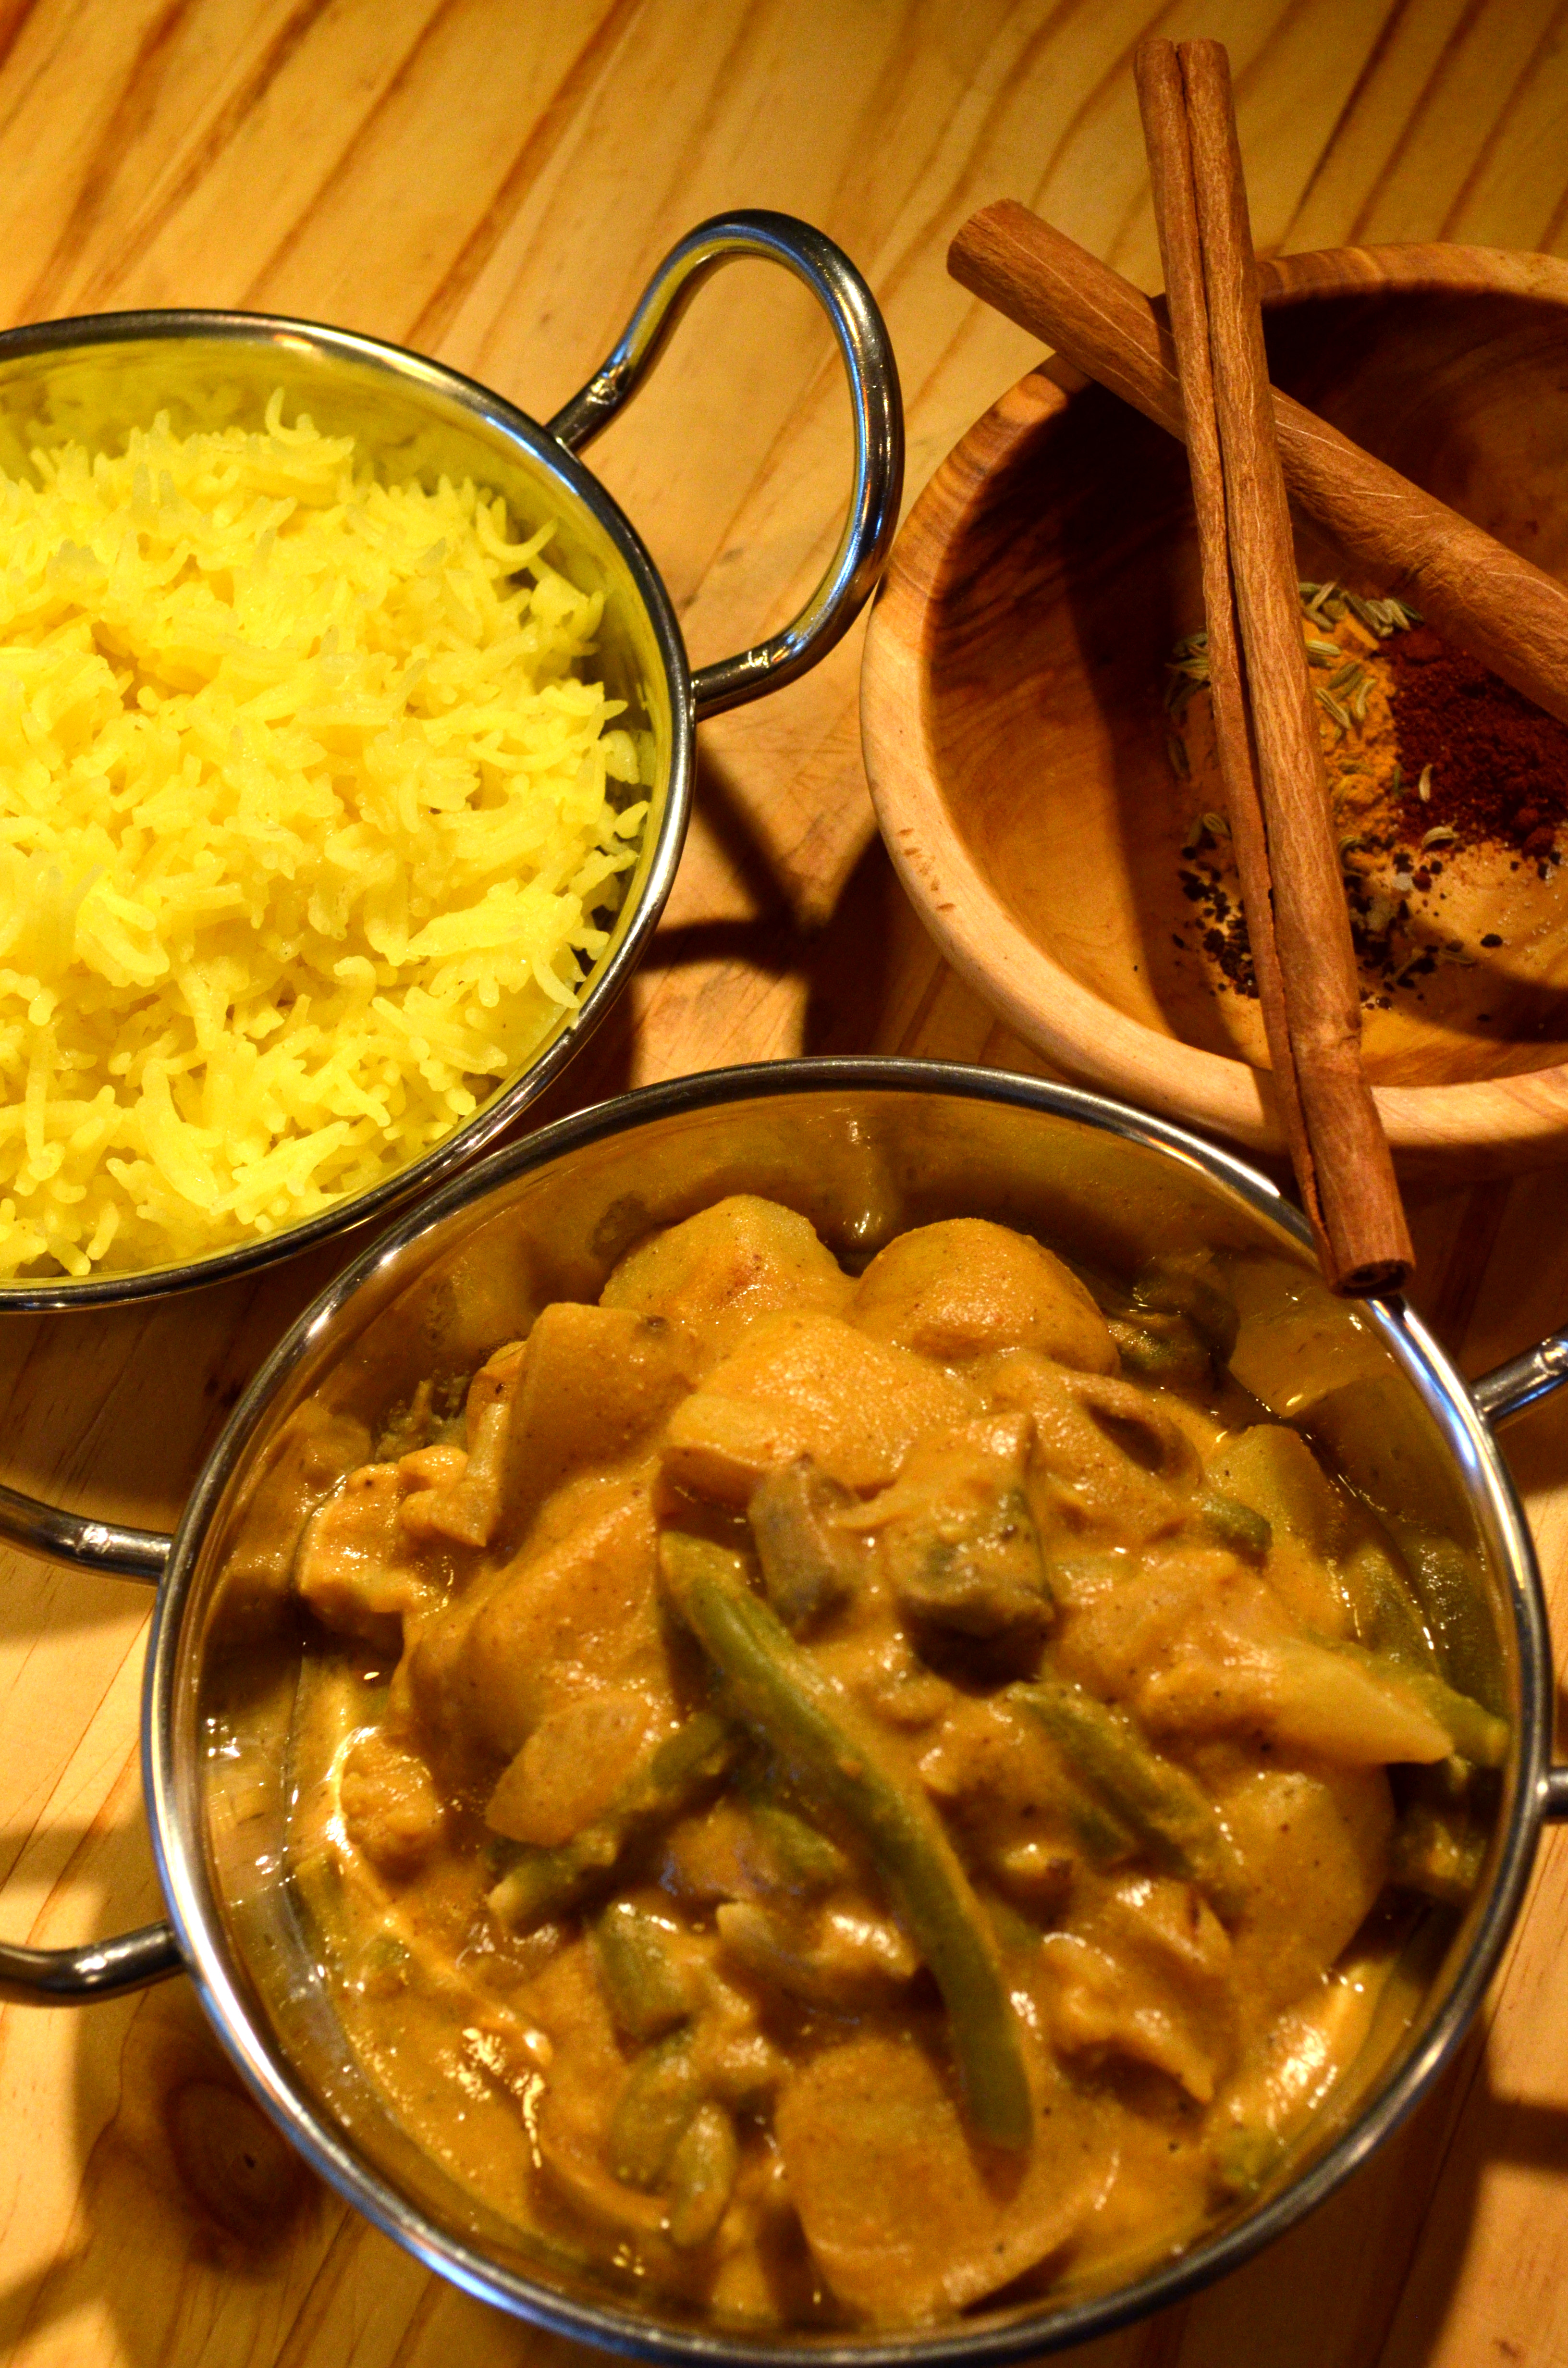
This is a mild, creamy, slightly sweet curry which is great for introducing kids to curry.
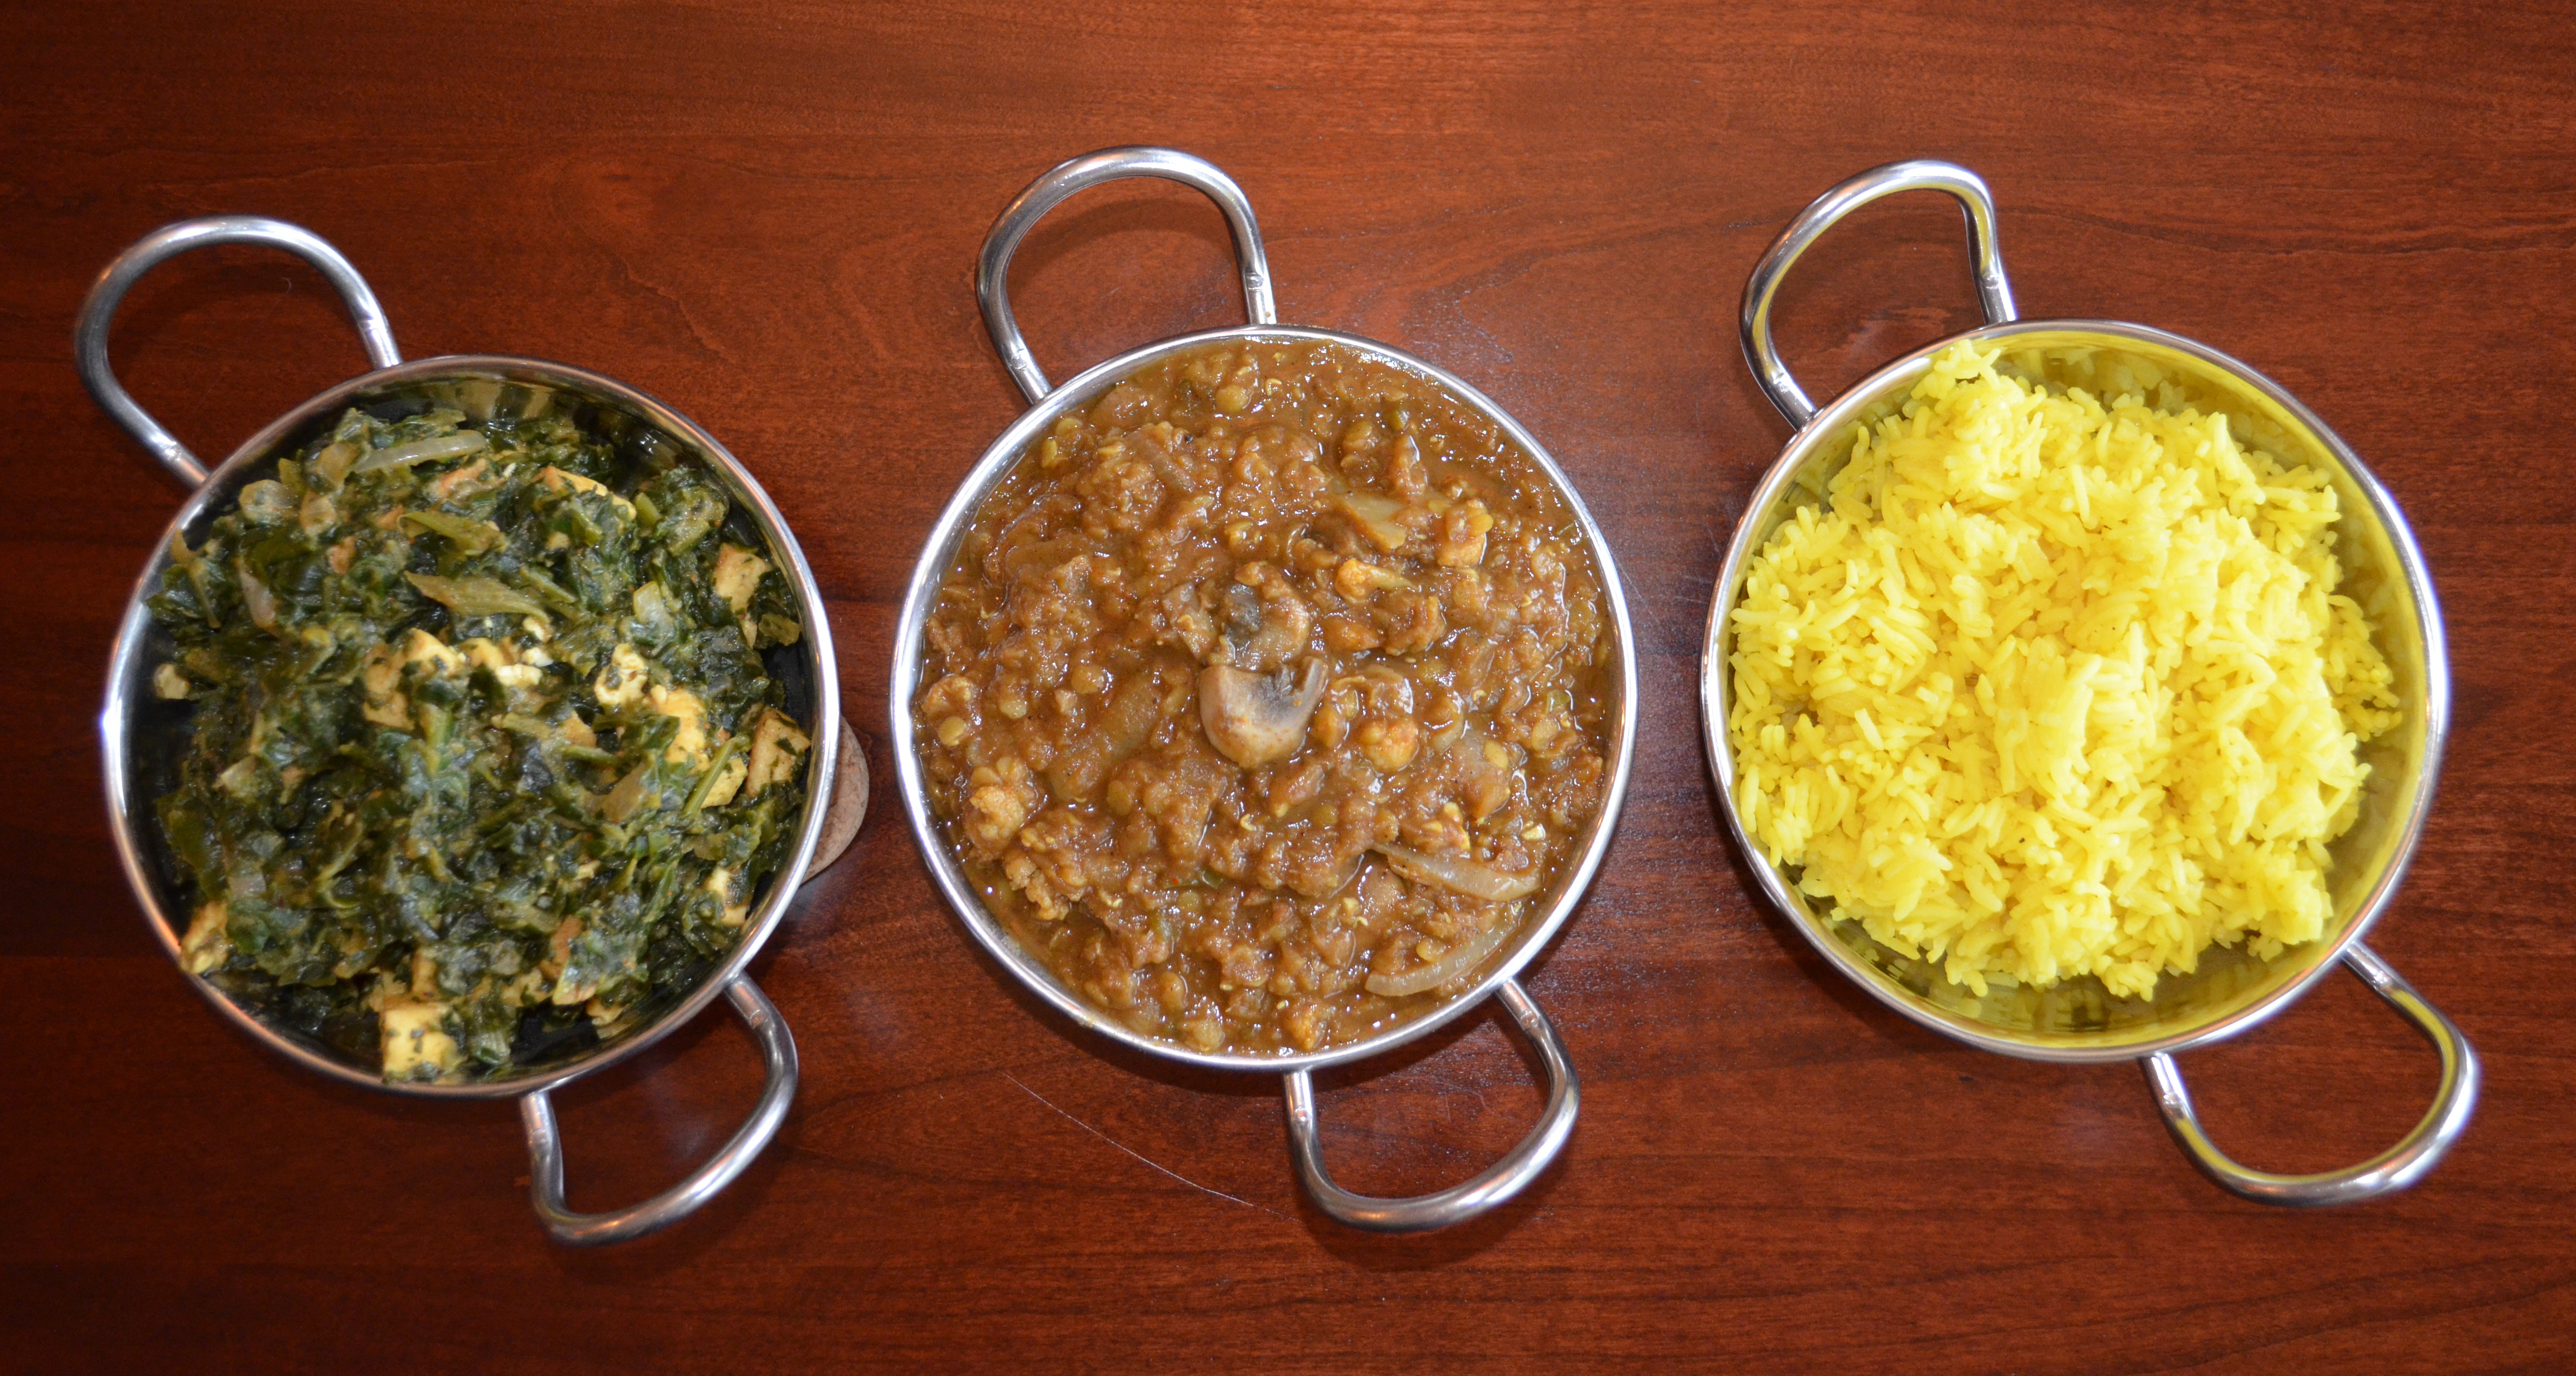
Vegan Vegetable Korma with turmeric tinted rice
One thing I have noticed about potatoes is that if you cook them in a tomato based sauce, they develop a tough skin that my kids are not keen on, so I cook the potatoes in boiling water before I add them to the dish. To be honest, this is a good way to use up left over cooked vegetables as the veggies used can be adjusted to suit your preference. Good contenders are mushrooms, peas, potato cubes, small cauliflower florets, green beans, carrot cubes, or fried tofu cubes as prepared for Tofu Florentine. Although you could add canned beans, I feel they’re a bit savory/heavy for a korma. Aim for 1.5 – 2lbs veggies in all.
For the record, I did try this dish using honey instead of sugar, and tamarind instead of lemon juice, but the more familiar ingredients actually tasted better. The less familiar amchur and star anise which I did use are easily available in specialty stores and Amazon.
Serves 4
12 oz potato, cut into 3/4″ cubes
4 oz green beans
1 tsp – 4 tbsp coconut or vegetable oil
3 oz (1/4 of a large) onion, diced
8 oz mushrooms, sliced or quartered
1/4 tsp salt for the mushrooms
1 1/2 cups curry base or lower calorie curry base
2 1/2 oz (1/2 cup) raw cashews
1/2 tsp lemon juice
1 tsp salt for the sauce
1 tbsp sugar (or to taste)
1 tsp garam masala
1/4 tsp ground star anise
1 tsp amchur (dried mango powder)
1/4 cup chopped fresh coriander
Bring a medium pot of water to the boil, and add the potatoes and green beans (and any other veggies that you’ve added that can be cooked by simmering. e.g. cauliflower or carrots)
Bring back to a simmer, and cook until the potatoes have softened but are not falling apart. (~10 minutes)
Put the curry base, cashews, lemon juice, salt, and sugar, into a blender or food processor, and process until smooth.
Heat the oil in a large frying pan over a medium high heat, then add the onion and mushrooms, sprinkle with 1/4 tsp of the salt, and sauté until the onion starts to become translucent, and the mushrooms soften.
Sprinkle the spices over the cooked onions, and allow to warm through for a few seconds.
Drain the potatoes and green beans, and scrape the onion and mushroom mixture into the potatoes; scrape the smooth sauce out of the blender and into the pan with the vegetables.
Use 4 fl oz (1/4 cup) of water to rinse the blender out into the saucepan.
Heat through, adjust consistency with more water if needed to produce a sauce that clings and runs, and seasonings to taste, then serve hot with a generous leaf coriander garnish, and plain cooked rice or chapatis.
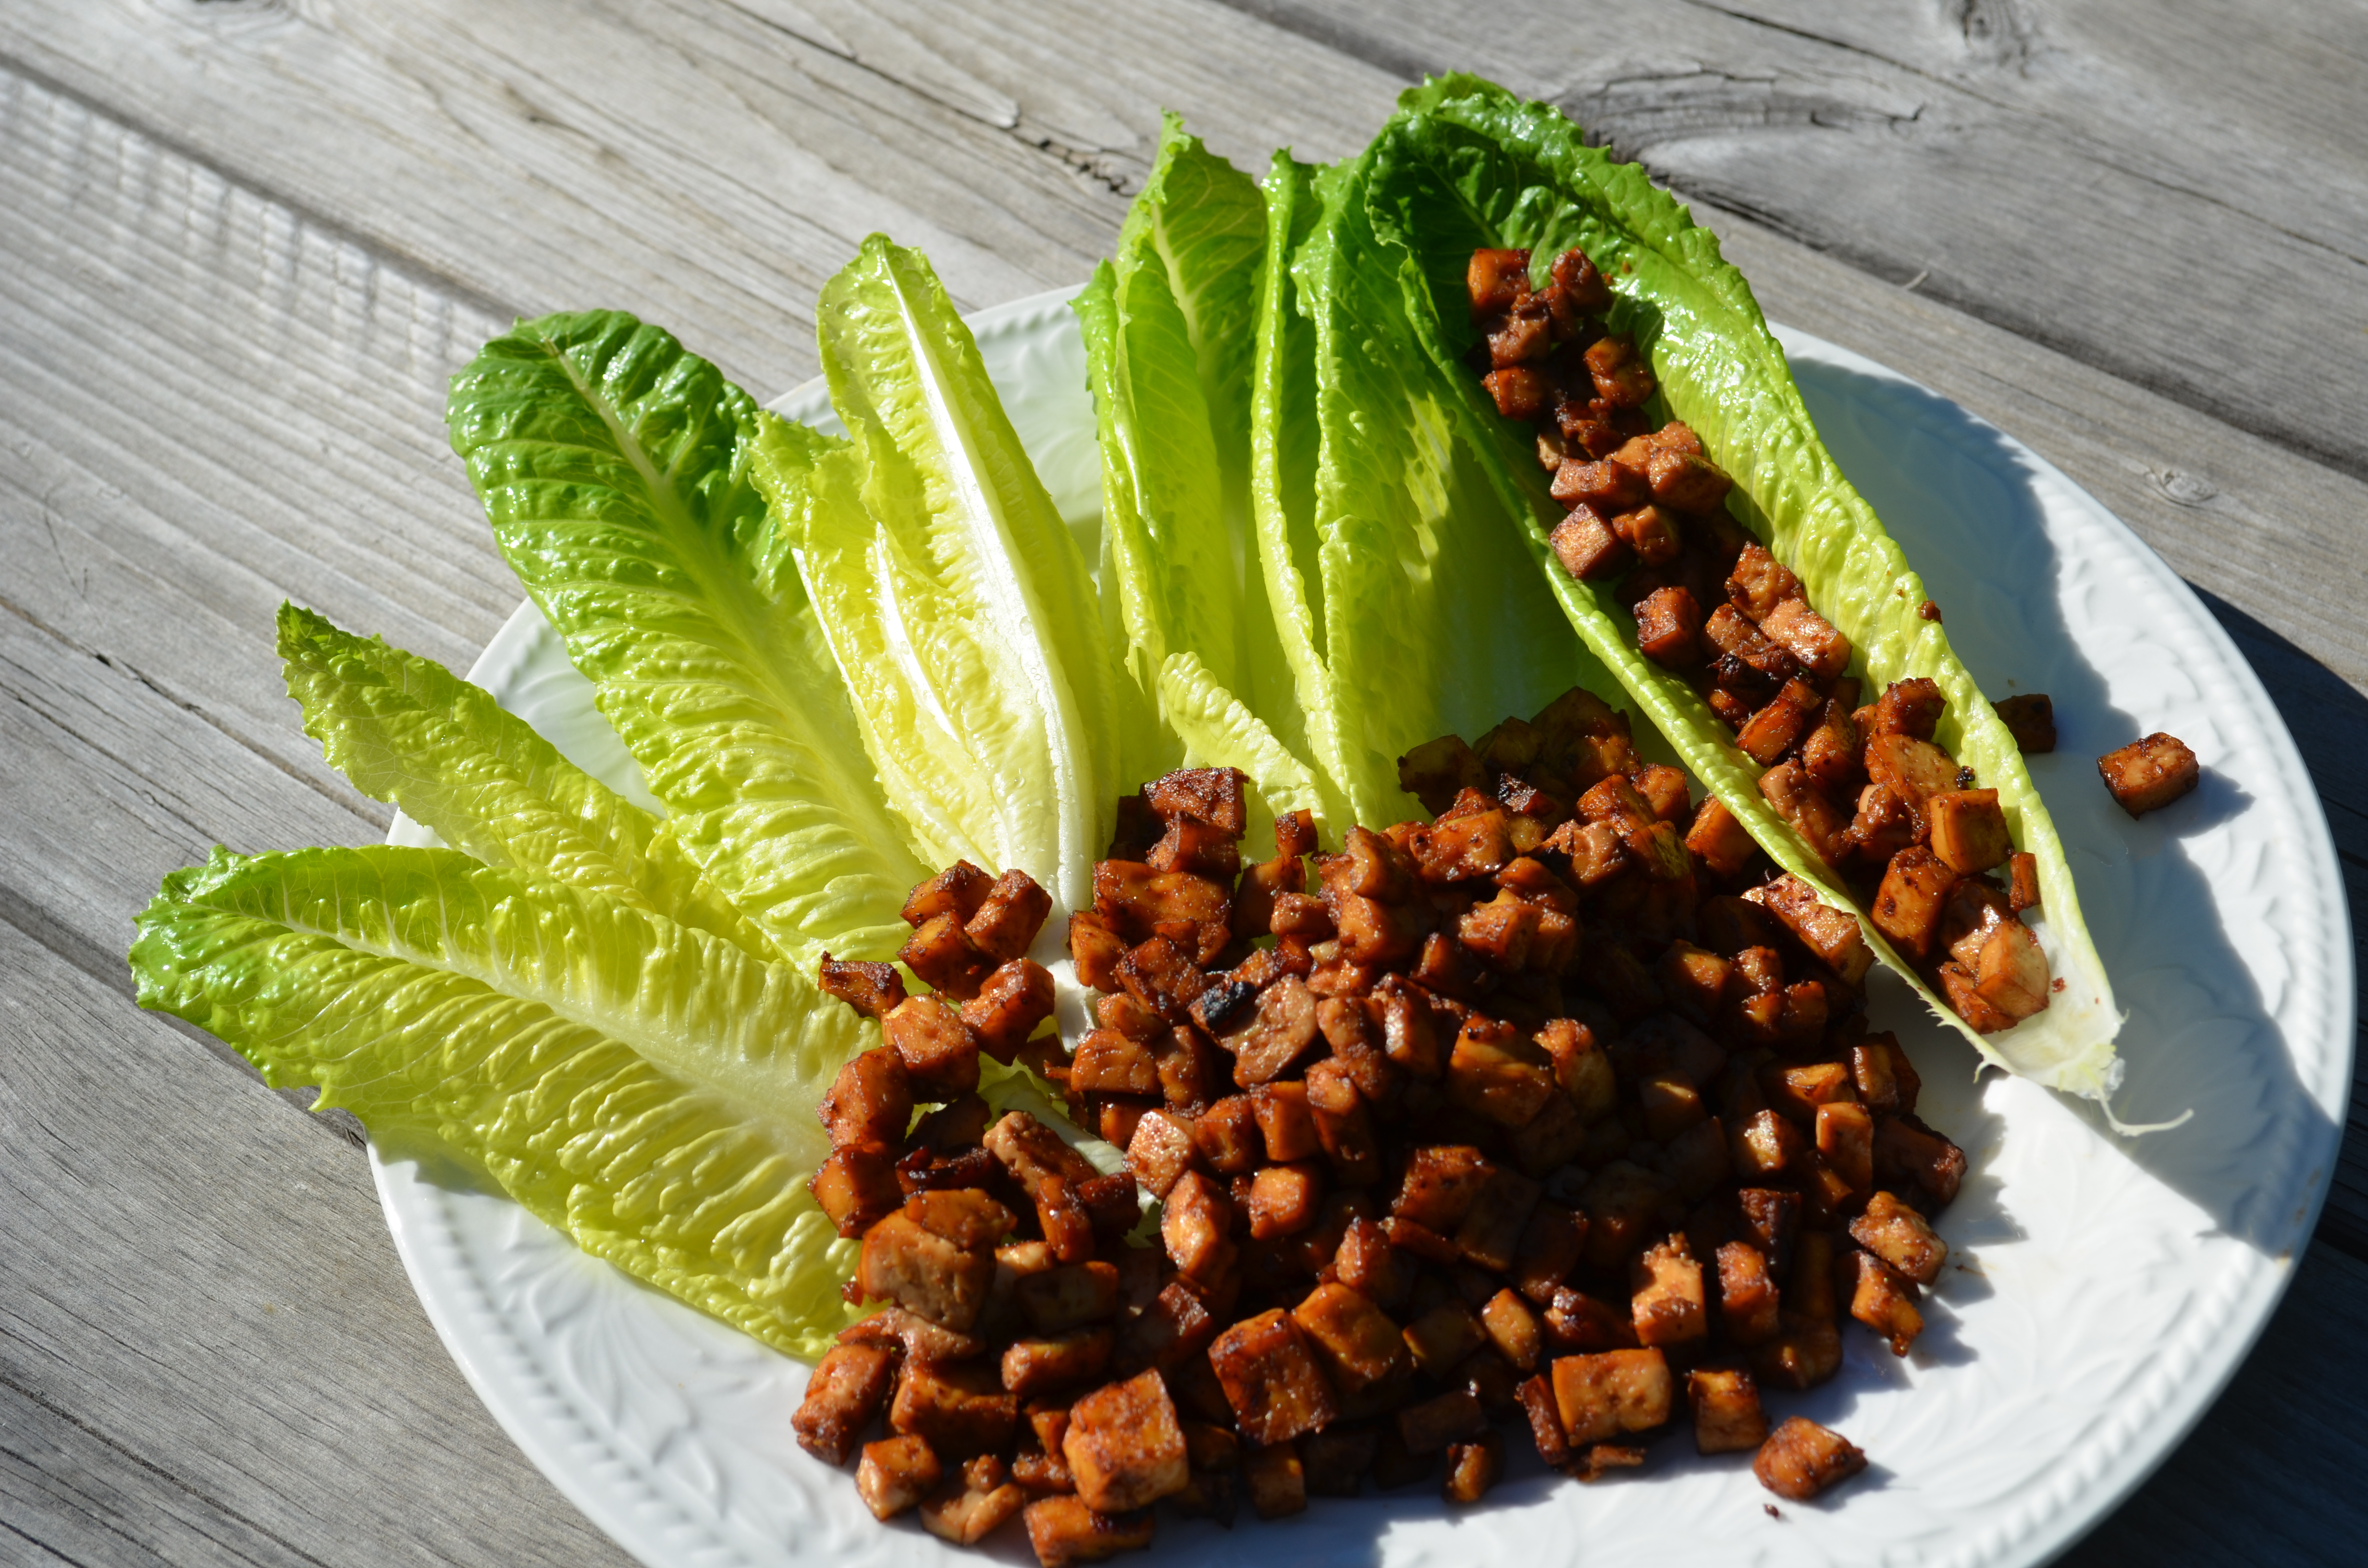
I got the idea for this appetizer from P.F. Chang’s restaurant. Unfortunately, their version is not gluten free, so I haven’t had it for years. My version is ridiculously easy to make. When I first made it, I used 3 tbsp of gluten free soy sauce, which was verging on too salty, even for me …. but if you like salt, and want that flavor kick, then 3 tbsps works well; these can also be added to salads to provide salty, tangy highlights, if you do that.
… and if you’re interested, this total recipe works out at 360kcals plus that needed for lettuce (or peppers etc.) that’s used for scooping.
Serves 3 as an appetizer
1 (~14 oz) packet of firm tofu, drained
2 tbsp Braggs Aminos (or other gluten free soy sauce)
1 tbsp Hoisin Sauce (check for gluten first)
1/8 tsp ground ginger
cooking spray or oil for the pan
1 iceberg/cos/romaine lettuce
Slice the tofu into 1/4″ thick cubes.
Pour the Braggs into a large bowl, stir in the hoisin sauce and ginger, and then add the cubed tofu. Stir to coat. You can check the seasoning at this point.
Pre-heat the broiler/grill (not the BBQ variety).
Spray a baking sheet with the cooking spray (or smear with the oil) and tip the tofu out onto it, spread so that the layer is only one cube deep.
Put the tofu ~5″ under the grill/broiler and cook until browned and chewy, stirring occasionally to prevent sticking and encourage even browning. (~10-15 mins)
Serve in a bowl with an iceberg or romaine/cos lettuce on the side. Eat by spooning a small amount of the tofu into an individual lettuce leaf, and eat as finger food.
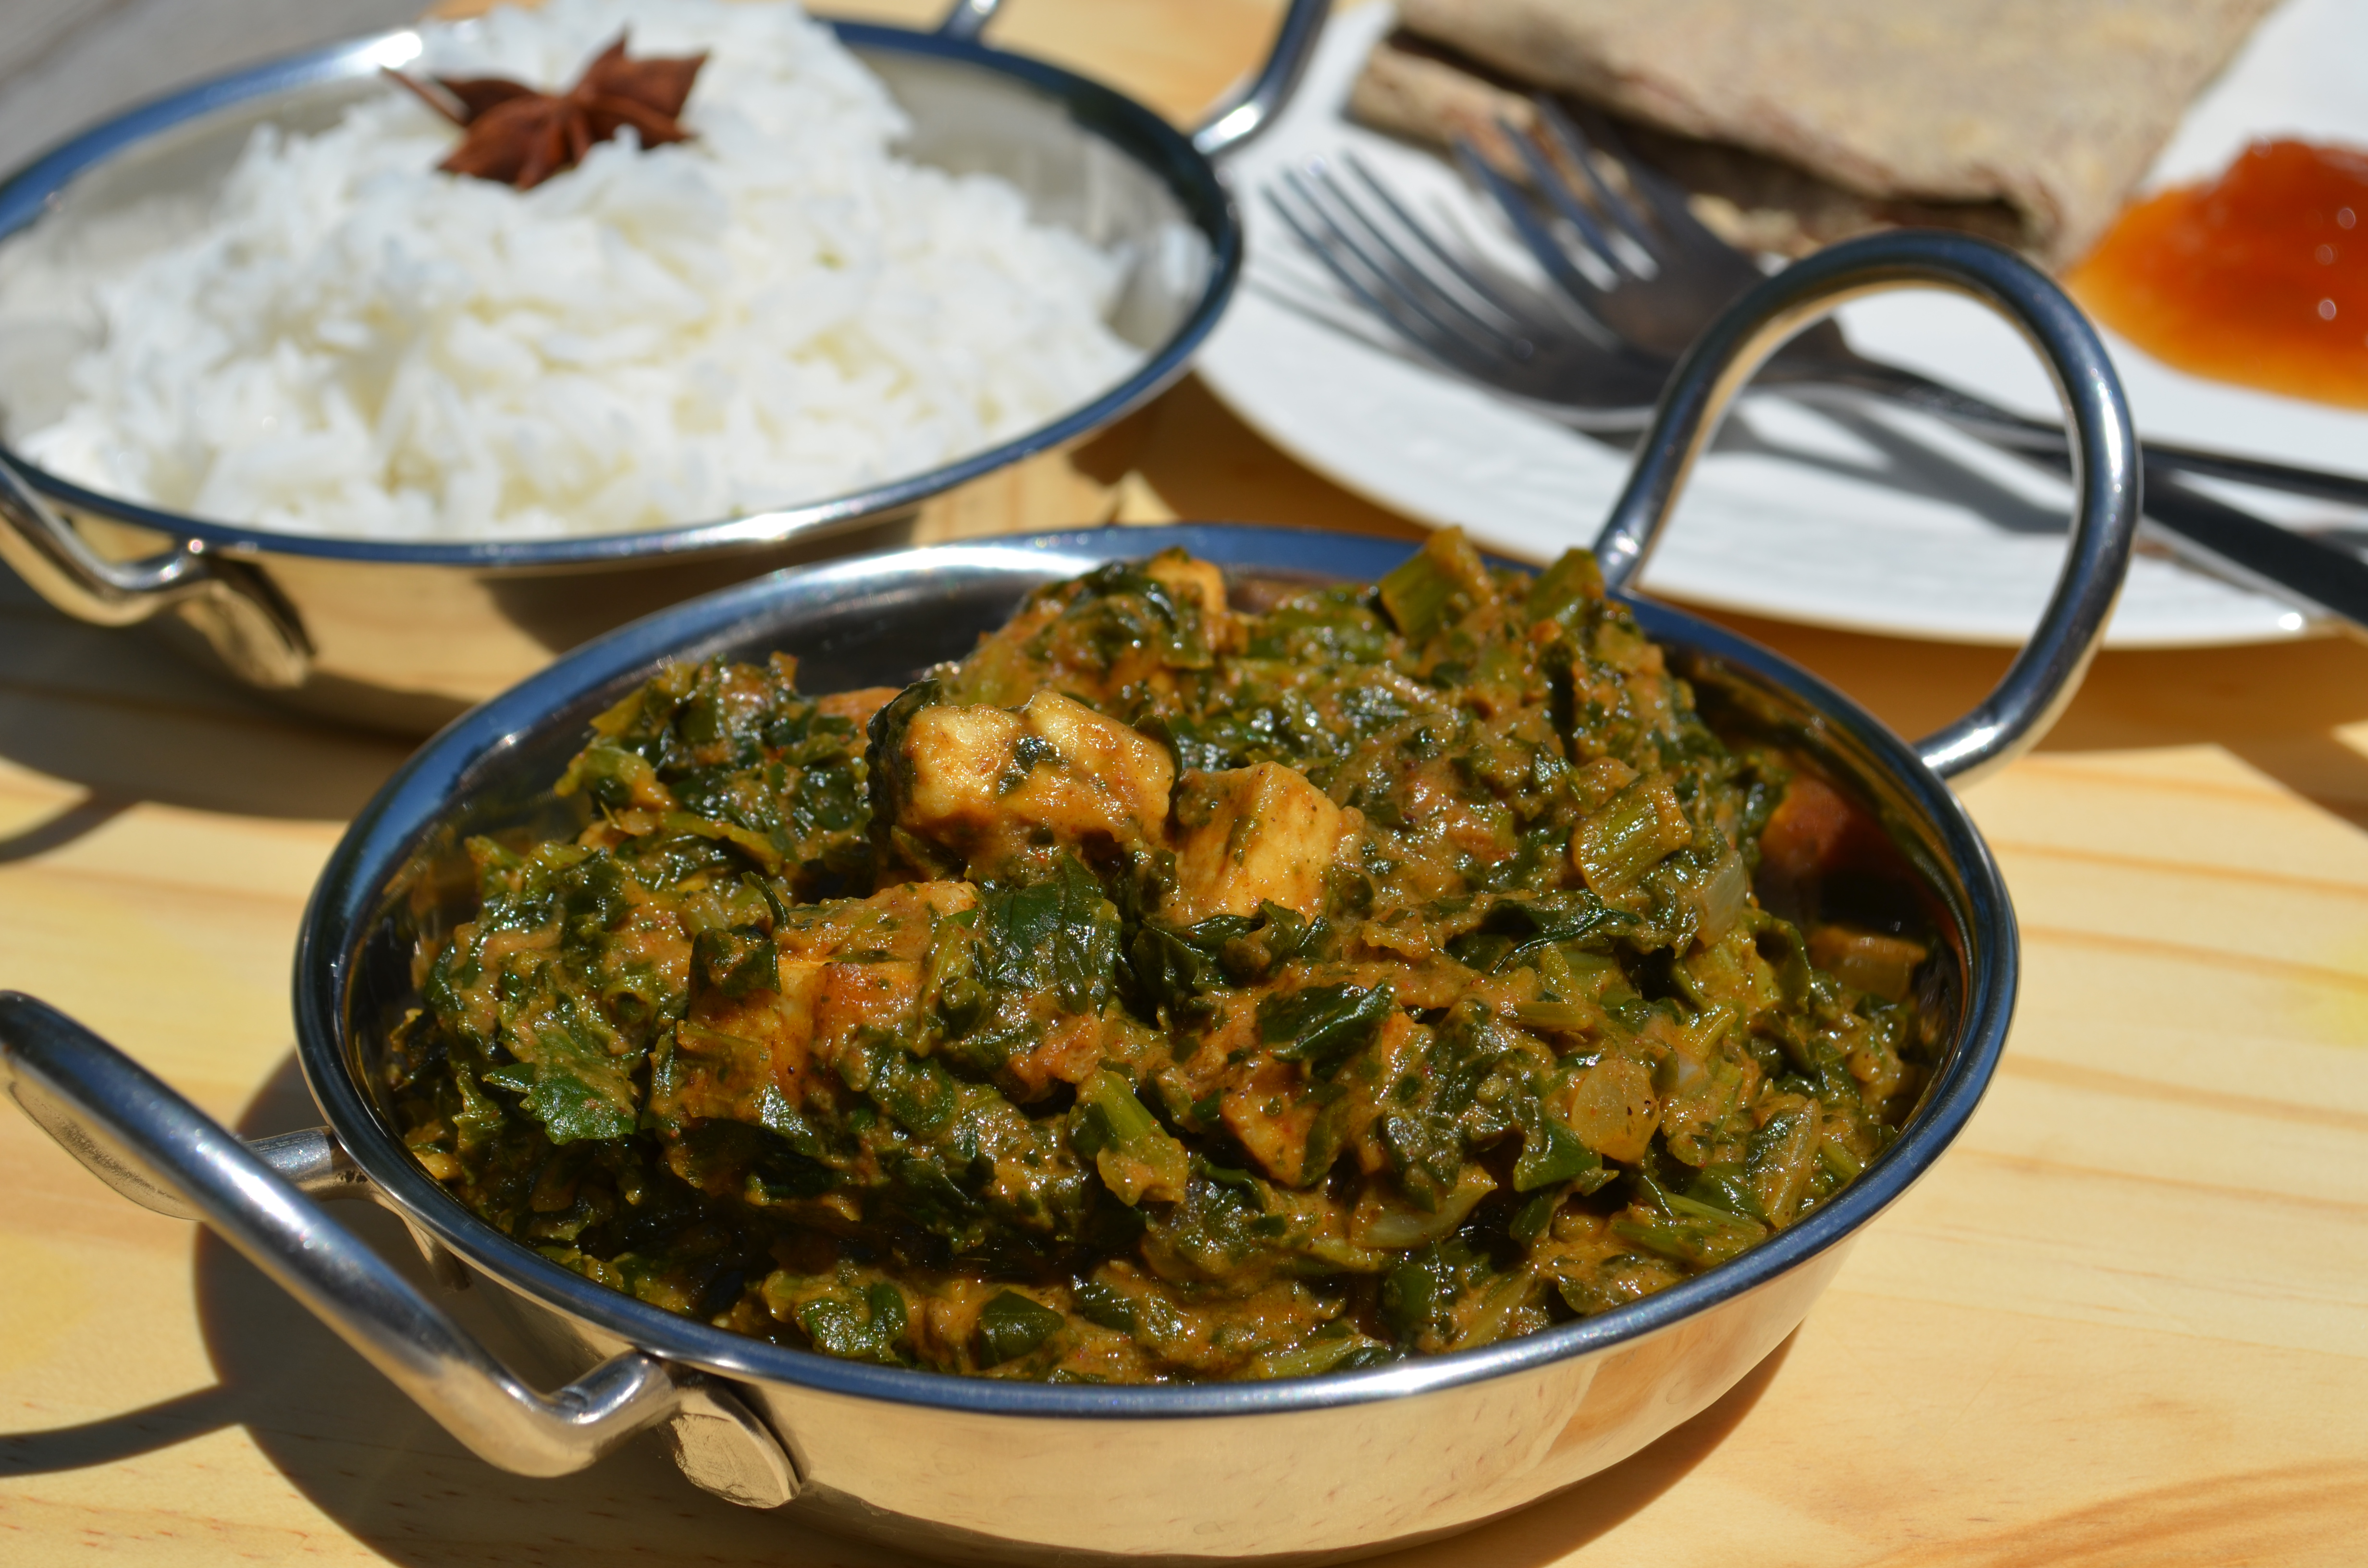
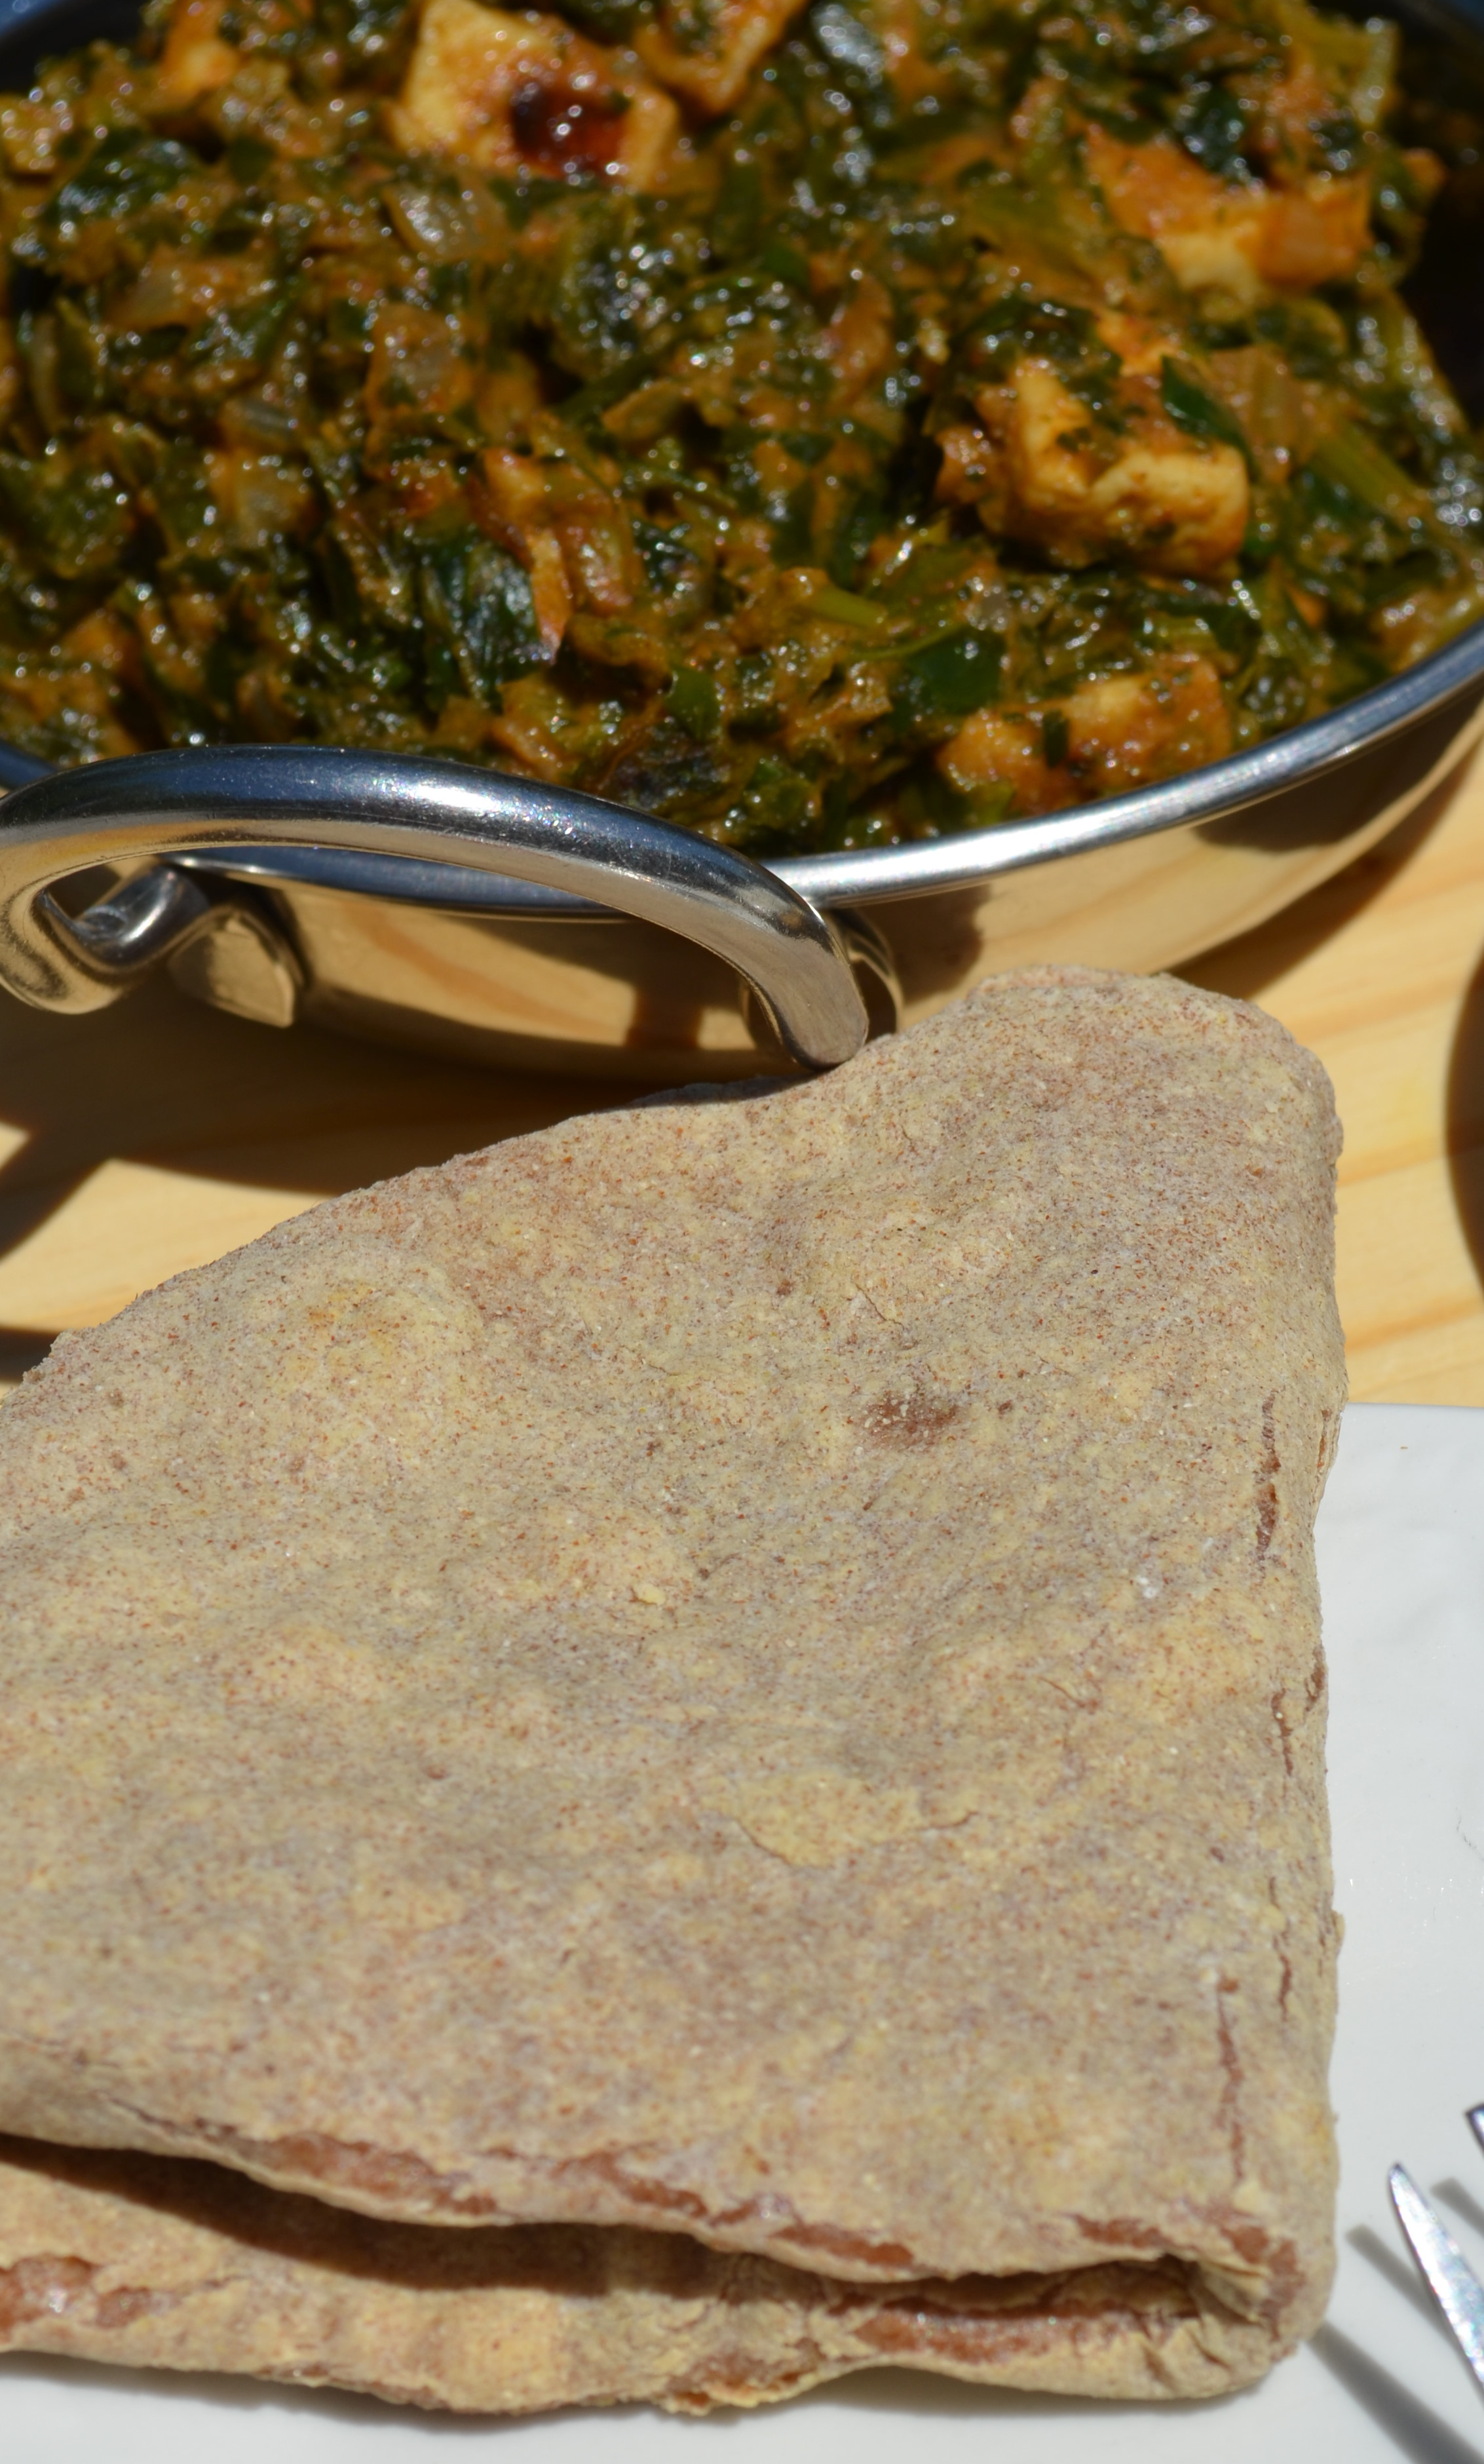
This curry is for spinach lovers, and is utterly delicious. It started out as my version of Saag Paneer (which I’ve never tasted as I can’t eat the Paneer cheese) … so this isn’t a vegan Saag Paneer … it’s a dish in its own right. It’s mildly hot, with sweet undertones from the fried onion and tomato in the curry base sauce.
Serves 4 with accompaniments
1 (14 oz) pkt of firm tofu
1 lb frozen spinach, defrosted and drained
3/4 tsp salt for the spinach
1 tbsp coconut oil/Earth Balance margarine
1/4 large (3-4 oz) onion, finely diced
1/8 tsp nutmeg
2 tsp garam masala
1/8 tsp chili powder, or to taste
Lay a clean cloth kitchen towel on the work-surface, and line it with kitchen paper. Arrange the tofu on the kitchen paper, cover the tofu with more kitchen paper, then fold the towel over the top to help soak up excess moisture. Leave this for 1/2-3 hours. The tofu will have firmed up and have a drier surface when it’s ready, which makes it less likely to stick in the pan while it’s frying.
Put the spinach in a saucepan along with the salt for the spinach. Heat over high heat to remove excess moisture.
Heat 1/2 the fat in a frying pan over medium high heat; add the tofu, sprinkle over with the salt for the tofu, and cook (turning frequently) until the tofu starts to brown and become crispy on the outside. If it sticks to the pan at all, scrape it off with a thin edged spatula (these bits taste good, too).
Once the tofu has become crispy / chewy, scrape it out into the spinach, melt the remaining fat in the frying pan, and fry the onion over medium heat until completely soft and starting to brown (~15 minutes). Add the nutmeg, garam masala, and chili powder at this point, stir to combine (and allow to warm through), then scrape into the spinach saucepan.
Put the curry base sauce and the cashews into a blender, and blend until smooth. Add this to the spinach, stir and heat, then serve hot with rice or GF chapati.
This dish is super easy and quick to make once the Curry Base Sauce has been prepared. It’s even better if it’s been allowed to sit for a while and then reheated, as the flavors combine and seep into the beans. It’s mildly hot, and is good for about 4 people when served with rice, or a vegetable side such as my Aubergine Curry. My husband made the suggestion that small chunks of dried apricot would also be a good addition (and it is … we tried it), however, mango chutney on the side is really all that is required … but regardless of whether apricots are added or not, daughter #2 is a happy girl. She loves British Indian Restaurant style curries!
1/2 oz (1/8 cup) raw cashew nuts
2 cups of curry base sauce or lower calorie curry base
1/2 – 1 tsp salt
1/8-1/4 tsp chili flakes or 1/4 fresh jalapeno or to taste
2 tsp garam masala
2 cans garbanzo beans/chickpeas, drained
Put the cashews, curry base sauce, salt, chili flakes, and garam masala together in a blender, and process until smooth.
Scrape the sauce into a saucepan, and use 2-4 fl oz (1/4 – 1/2 cup) water to rinse the blender out into the saucepan.
Add the beans, and simmer until hot.
Serve hot with chapati, or basmati rice and mango chutney.
I do like curry. The authentic stuff is ok, but the stuff that I love is the British Indian Restaurant kind which can be fabulous! Apparently, restaurants generally rely on a curry base sauce which allows the production of many different curries really quickly as it contains ingredients common to many curries: onion, garlic, ginger, a few basic spices. It’s a base flavor that you tweak when making the actual dish, a bit like a flavored broth/stock. The secret is to have a spice combination that you particularly like … and not to skimp too much on the oil! If you do need a lower calorie (and faster) version, I have developed such a thing!
Oil: Apart from the taste aspect of the oil, it seems to help in the last section where everything has been blended together and you’re skimming off froth which is sometimes quite bitter. I tried to make an oil free version once, and ended up putting it in the bin!
Onion: I’ve also seen recipes that simply boil the onions to start off with, but once you’ve had your house filled with the smell of boiled onions, you won’t want to do it again. Don’t talk to me about authenticity …. I won’t be boiling any more onions as I’d like my husband to continue living with me.
Salt: Note that my version doesn’t contain any salt. This is not a mistake. Some of the dishes that I’d want to use it in require salt in their preparation (such as salting aubergine/eggplant or mushrooms to draw out their juices), and I’d rather put it in at that stage, than risk putting in too much.
Garlic: Generally, I expect to buy bulbs of garlic and peel the cloves as and when I need them, as they keep better this way. However, for this dish I find the ready peeled stuff really useful! My store (Trader Joe’s) sells ready peeled garlic in 1 oz packets! So convenient! I don’t even have to weigh them.
Blender: I use the blender 3 times in moderately quick succession in this recipe … and am going to admit that I don’t do anything more than rinse it out into the pot between uses. The flavors are all going to end up in the same dish, anyway.
This recipe makes enough for 2 – 4 family meals, depending on how much the chosen recipe uses. I wouldn’t want to make it in any smaller quantities, though. Check out these recipes that use it (this list will get longer as time goes by): Chana Masala (Chickpea/garbanzo bean Curry), Saag Tofu, Vegan Vegetable Korma.
Makes 4-5 cups of curry base (~190kcals/cup).
1 + 3 tbsp coconut oil/Earth Balance/vegetable oil
1 lb (1-1.5 large) onions, skinned and thickly sliced
8 fl oz (1 cup) tinned tomatoes in juice
1/2 tsp turmeric
1/2 tsp paprika
1/8 tsp fennel
1/16 tsp cloves
1 oz (~2″) fresh ginger, peeled
1 oz (just less than 1 bulb) fresh garlic, skinned
Heat 1 tbsp of the fat in a large saucepan; cook the onion gently over a medium heat in the fat for 20 minutes until completely soft and browned, stirring occasionally.
Put the tomato into the blender, and blend until completely smooth.
Gather the dried spices together into a small bowl.
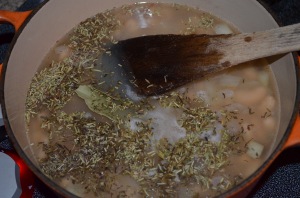
Note the oil separating out on the right hand side of the pan.
Heat 3 tbsp of the fat in a second saucepan. Add the spices to this second saucepan, and almost immediately add the blended tomato to prevent the turmeric from burning. Cook this mixture for 10-15 minutes, stirring occasionally, until the fat can be seen separating out at the edges of the tomato or as smooth, dark patches on the top.
Put the ginger, and garlic into the blender with 8 fl oz of water, and blend until smooth.
Once the onion has completely softened and browned, pour the ginger and garlic into the onion pot. Rinse the blender out into the onion pot with another 8 fl oz of water. Simmer for about 20-30 minutes with a tight fitting lid (or 5 minutes at pressure in a pressure cooker) until the onion is almost disintegrating.
Put the cooked onion mixture into the blender, and blend until totally smooth.
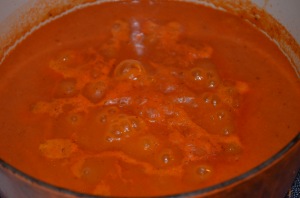
Simmering curry base sauce. Note the smooth sauce in the middle of the pale froth that needs to be skimmed off.
Pour the onion mixture into the tomato mixture. Stir once to combine, then simmer over a low heat for a further 20 – 40 minutes without stirring. During this time, skim off any froth that rises to the surface by dragging the edge of a metal spoon lightly over the surface; try to avoid stirring it in. This removes a harsh flavor. You’re not going to get all of it, but you should get as much as your patience can cope with.
Once the simmering has finished, cool the sauce, and store it in the fridge in air-tight containers, using as needed. I use mine up within a week. I’ve seen some recipes that say it’s OK to freeze this, but I also know that garlic changes its flavor quite dramatically in the freezer, so I’d rather use mine fresh.
Chapati are Indian flatbreads, essentially wholewheat, Indian counterparts for Mexican tortillas.
They are tasty, slightly chewy, moist, and pliant, and are good for scooping up mouthfuls of curry. They’re also quick and easy to make. If you find they’re too stiff, they’re over cooked and you should raise the cooking temperature a little (so that they get their brown spots before drying out) or shorten the cooking time. I find that as I’m cooking more chapatis, the cast iron pan gets hotter and I have to turn down the heat so I have time to roll out a chapati while the previous one is cooking.
Quantities to serve 4
1 oz (1/4 cup) teff flour
1 oz (1/4 cup) garfava (or garbanzo bean) flour
2 oz (1/2 cup) tapioca flour
1/2 tsp salt
1/2 tsp baking powder
3/4 tsp xanthan gum
4 fl oz (1/2 cup) water
Preheat a griddle or cast iron frying pan on medium high heat (don’t use oil, these shouldn’t be fried).
Stir all the dry ingredients together in a bowl, then add the oil and water.
Beat all together with a butter knife until a smooth, soft, moist (but not too sticky) dough is formed. Add a little more water or flour as necessary.
Dust the work-surface with a little more of one of the flours. Take enough dough for one chapati (the size of a large egg or 1/4 of the dough), dust a rolling pin with the flour, and roll out the dough into an even, 8″ round.
Put the uncooked chapati onto the heated pan, and cook until small brown spots appear on the bottom (~2 minutes). Turn the chapati over, and cook on the other side for about a minute until it too has small brown spots on it.
Eat immediately, or place between two pieces of kitchen paper until you’re ready to eat, to prevent them drying out.
When the urge for pizza strikes in our household, it’s usually a fair rush to get it cooked and on the table … but that’s really only possible if the cheese, and tomato sauce are already made! The second easiest option for making pizza (after opening a jar of ready made pizza sauce and a packet of store bought cheese), is to have both available as blender foods. This cheese goes well with my instant pizza sauce.
1/2 cup raw cashews
1 tsp salt
3 tbsp corn starch
1 tsp white balsamic vinegar
1 tsp lemon juice OR 1/4 tsp lactic acid
1 tsp chickpea miso (or other light colored miso)
12 fl oz water
UNLESS you have a high speed blender, soak the cashews in water for about an hour before draining and continuing with the recipe.
Place all ingredients in a blender along with ~4 fl oz (1/2 cup) water, and blend until completely smooth (~20 seconds).
Scrape the mixture into a saucepan, rinse the blender out into the pan with the remaining 8 fl oz of water, and cook until bubbling, stirring frequently (especially as it starts to thicken) to prevent burning. Initially, the cheese will thicken where it touches the bottom of the pan, and might look a little lumpy, but just keep stirring and that will sort itself out.
Spoon dollops over the pizza before cooking, and brown the top under a grill/broiler, if required.
My daughter and I developed this pizza sauce after she ‘suffered’ a craving for take-out pizza after a particularly frustrating day at school. A little analysis of what it was that made the pizza what she wanted revealed a need for oily, cheesy fare, with a sauce that was pureed rather than chunky, and flavored with a hint of fennel. I’m pretty sure the original had tarragon rather than fennel in it, but since I was out of tarragon, fennel hit the mark … after a bit of time spent adjusting the seasonings, stirring, tasting, and conferring.
This recipe makes enough sauce for pizza to serve about 12 people generously, and is crazy fast to make for those emergency pizza moments. Pair it with pan fried pizza base and some dairy-free cheese.
1/2 large onion, diced
1 large clove garlic, crushed
28 oz tin tomatoes (whole/diced in juice)
2 tsp dried basil
1 tsp dried oregano
1 tsp fennel powder
1 tbsp sugar
1 tsp salt
3 tbsp tomato puree or similar volume of sun-dried tomatoes in olive oil
1/2 tsp chili flakes, or to taste
Blend all ingredients together until fairly smooth, then use to sauce pizza as required.
We’ve just got back from a 5 day jaunt to Mexico where we ate fruit and vegetables almost exclusively because most other dishes contained contraband. Although I did have a couple of occasions where I was craving carbs (for some reason, there wasn’t a tortilla chip in sight), I came back home with a slew of ideas for dishes to add to our repertoire, and I didn’t put on any weight!!!!!
The only non-main-stream ingredient here is Chipotle in Adobo Sauce, which is available in standard food stores in California and here in Washington, and I’m guessing it’s available pretty much everywhere in the States, but I’m not so sure about other places in the world. A quick Google search shows that amazon.co.uk sells it, so if you’re in England, you can get hold of it. You’ll probably want to freeze the chipotles that you don’t use here in a freezer bag or box, as you won’t be using a whole tin of the things in this dish.
This recipe is moderately hot by my standards. If you’re not into hot foods, reduce the amount of chipotle to 1 or 2 tsps and check before adding any more. I’ve eaten it scooped up on tortilla chips, and as a sauce with rice, but I think it could also be included as a side for any Mexican meal, or as a relish on a veggie burger.
Serves 2 as a main, or 4 as a side dish/relish
1 tsp margarine/oil
1/2 large (~6 oz) onion, diced
8 oz mushrooms, sliced
1/2 tsp salt
1 large/3 small cloves garlic, minced
1/2 tbsp chipotle in adobo sauce
8 fl oz (1 cup) tinned tomatoes
Heat the fat in a saucepan, and cook the onions for 5 minutes over a medium heat.
Wash and slice the mushrooms, and add them to the onion along with the salt, and continue cooking on a medium high heat, stirring occasionally, until the vegetables are completely soft.
Once the veggies are soft, add the garlic, and allow to warm through for a minute or two.
Put the chipotle in adobo sauce in the blender with the tomatoes, and briefly blend to get a chunky sauce.
Add the tomatoes to the mushrooms, and simmer for 5 minutes until the flavors have developed.
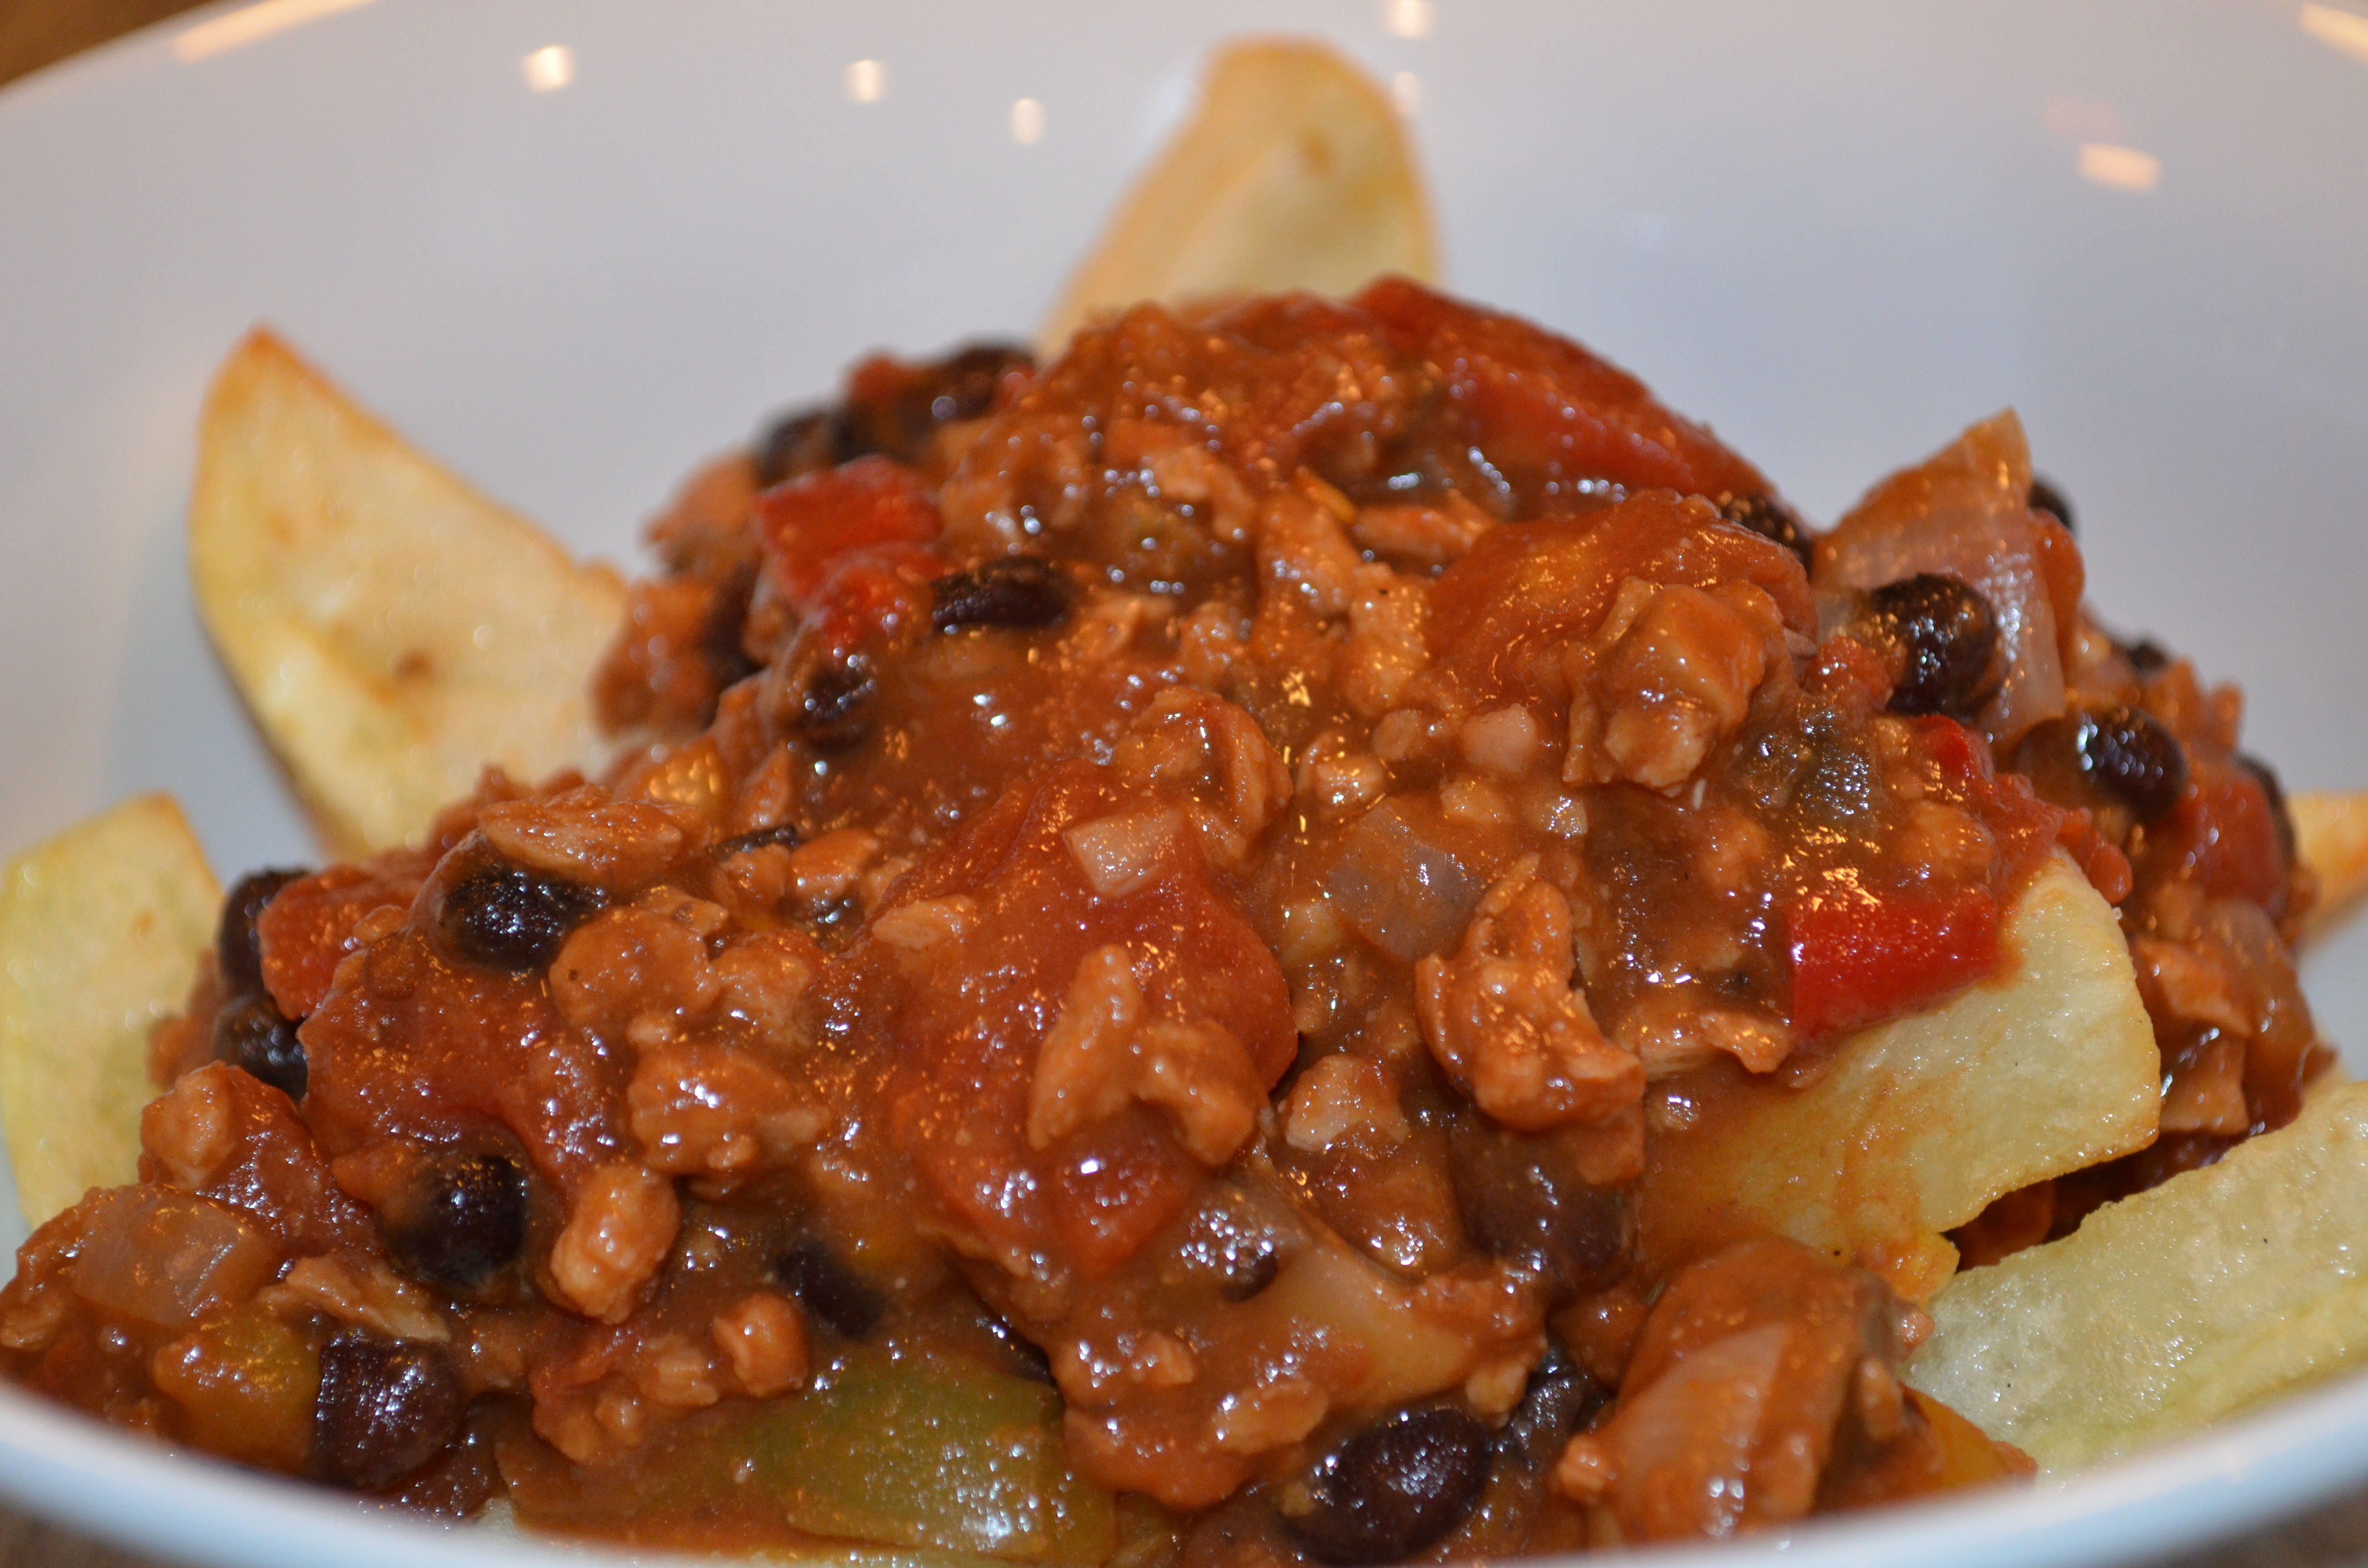
I don’t use meat substitutes much. The vast majority of the meat substitutes that I’ve seen include gluten for texture, stretch and bulk. We recently happened upon some gluten free, tinned vegan chili which my husband loves for chili cheese fries, but it doesn’t have anywhere near enough vegetables in it for my liking. Yes, I know! Chili cheese fries is an indulgence, not a health food ….. but here we can leave the indulgence for the potatoes, and the chili can be loaded with veggies and fiber, and just look and taste the part.
I also know that Textured Soy/Vegetable Protein has a bad name. Somewhere in the dim and distant past I read about it containing chemicals that you don’t really want to be eating, so we haven’t had it. Upon a more recent review, however, I found that the chemicals are indeed used in the standard version of TVP (apparently removed before it’s sold …. uh huh), but the organic stuff doesn’t even get a whiff of those chemicals in the first place. Yes, it is more expensive, but if it means I’m happy we can eat it and I can widen the variety of food stuffs that I can eat, and I have yet another way to present veggies to my kids, then that’s the price I pay.
Serves 6-8
1 cup organic TVP/TSP
1 tbsp mushroom powder
1 1/4 tsp salt
1 tsp oil/margarine
1/4 of a large onion (1/2 cup), diced
1 lb mixed vegetables cut into <1″chunks (e.g. pepper strips, mushroom chunks, courgette/zucchini slices – quartered, tiny broccoli/cauliflower florets)
1 fresh jalapeños, finely minced or 1 tsp chili flakes
1 large clove garlic
1 tbsp ground coriander
1 tbsp paprika
1/2 tsp ground cumin OR 1/4 tsp caraway seeds (for a change)
1/4 tsp lemon juice
~14 oz diced tinned tomato in juice (this won’t look enough to start off with)
2 tbsp tomato paste OR minced sun-dried tomatoes
8 – 16 oz cooked, drained, pinto or black beans
Put the TVP, mushroom powder, and salt in a bowl, and stir in 1 cup of boiling water, and leave it to soak.
In a large pan, heat the fat and fry the onion and any hard vegetables (such as broccoli and cauliflower) for 5-10 minutes.
Once the onions have softened, add the garlic, and spices to them, and heat through for a few seconds, then add the remaining vegetables (except tomatoes) and cook for another 5-10 minutes until they too have started to soften.
Add the TVP, lemon juice, tomatoes, tomato paste, and beans, and simmer for 30 minutes, or until the juice has thickened and the TVP has browned slightly.
Adjust seasoning to taste, and serve in flat breads, with rice, crusty bread, jacket/baked potatoes, or (of course), chunky cut potato fries/chips and a sprinkling of vegan cheese.
This enchilada pie is remarkably similar to a lasagna … just with more hot peppers, and corn tortillas instead of pasta. The magic is in the spicy, creamy, cashew sauce which tops the pie. It makes a wonderful entree for a family or close friends’ dinner party, along with rice, salad, salsa and tortilla chips, and maybe vegetable fajitas and margaritas. You can ring the changes by substituting refried beans for the black bean chili.
Serves 5-6
1 batch of Black Bean Chili
2 batches of Ranchero Sauce
6 oz (1 1/2 cups) raw cashews
1 1/2 tbsp light colored chickpea or millet miso
1 1/2 tsp lemon juice
3/4 tsp salt
1/2 tsp crushed, dried chili pepper (or to taste)
pinch of nutmeg
10-12 six inch corn tortillas
Make the Black Bean Chili.
Make the Ranchero Sauce, and blend until roughly smooth.
Put cashews, miso, lemon juice, salt, chili pepper, nutmeg, and 16 fl oz (2 cups) of water into a blender, and blend until completely smooth.
Transfer the cashew sauce to a saucepan, and heat until thick and bubbling, stirring frequently.
Cover the bottom of a lasagna pan (~12″ x 8″) with 1/2 of the ranchero sauce.
Take one of the corn tortillas and place about 1/4 cup of black bean chili in a stripe down the middle, then roll the tortilla around the filling and place (seam side down) in the lasagna pan. Repeat with the other tortillas.
Spoon the remaining Ranchero Sauce over the enchiladas, followed by the cashew sauce. Cover lightly with parchment paper or tin foil, and bake at 200C (400F) for 50 minutes, or until heated through.
This isn’t your run of the mill marinara sauce that gets trotted out to kids as a standard in restaurants all over the U.S. The sun-dried tomatoes and black olives make this somewhat more sophisticated.
1 tbsp Earth Balance vegan margarine, olive oil, or oil used to store the sun dried tomatoes
1/2 large or 1 medium sized onion, finely diced
2 large cloves garlic
1 28 oz can of chopped tomatoes in juice
1 tsp salt
1/8 tsp ground black pepper
1 tsp dried basil
1/4 cup sun dried tomatoes in olive oil, minced
1/2 cup black olives, drained and cut in half
1-3 tbsp of sugar, depending on tartness of the tomatoes
This sauce is good with pasta and as a pizza sauce, if you’re looking for something a little different.
Warm the fat in a large saucepan, then gently fry the onion over a medium low heat, until it has completely softened and started to brown (~10-15 minutes)
Add the garlic, and allow to warm through for a couple of minutes.
Add the remaining ingredients, and simmer for 30 minutes until the tomato chunks have started to disintegrate, and the sauce is thick and rich.
Check seasoning, and add more sugar or salt as necessary.
Sunshine! Spring is showing its face here in the Pacific NorthWest, and it is far too warm to resist the urge to make salad, today. I’ve made variations of this salad over the last year, but I’ve finally come to the conclusion that less is more when it comes to the dressing for this flag-bearer of a salad. Here we have the quintessential SouthWestern ingredients, all dressed in little more than the sharp floral flavors of fresh squeezed lime. If you love avocado the way we do, add an additional one (in cubes) to the salad before using the final one to decorate the top. I’ve not given a quantity for the chili, as different chilis have such a variation in heat, and different people have such a variation in desire for heat. You should add enough chili to just feel the heat, here, but not overpower all the other flavors. I’ve been using 1-3 tsp of minced, fresh/frozen Hatch chilis, which seems to be about right for my family.
Serves 4 as a main course salad or 8 as a side
1 cup frozen sweet corn, defrosted
2 14oz tins of black beans, drained
minced fresh chili, to taste
2 spring onions, cleaned
7-8 small red/yellow/orange bell peppers
3 salad tomatoes
1/4 cup fresh cilantro
juice of 1/2 a fresh lime (or more, to taste)
1 small head cos/romaine lettuce
1 large avocado (or 2, if your budget copes with it)
Mix the corn and black beans together in a large bowl.
Stir the minced chili into the beans.
Slice the spring onions on the diagonal into 1/2″ pieces, and the bell peppers, and tomatoes into cubes.
Mix these into the corn and beans, stir in the chopped cilantro, and dress with the lime juice.
Rip the bigger leaves of the cos/romain lettuce into bite-sized pieces and form all the lettuce into a bed in a large (or individual) bowl/s.
Pile the bean mixture onto the lettuce bed, decorate with the avocado, and squeeze some additional lime over the top, if desired.
Serve as is, or with tortilla chips or in GF tortilla shells.
I’ve recently got the curry bug, again. Here on the western side of The States, even up here near Portland, Oregon (which prides itself on its cuisine) good Indian curry isn’t really available. The problem with Indian curry is finding a blend of spices that appeals. Cooking the curry itself isn’t difficult, but many curry powders rely too heavily on cumin (a relatively cheap spice), in my opinion, which has left me searching for blends that please.
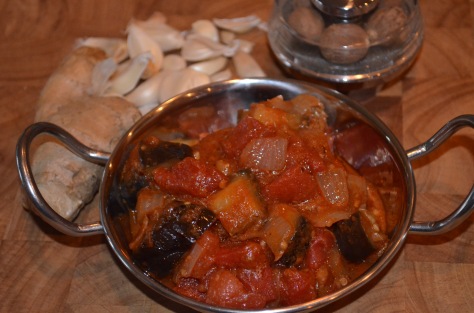
Warmly spicy and intensely flavored, this tomato based curry pairs well with sweet mango chutney, and plain, boiled, rice.
One thing you’ll notice about this recipe is the huge variation in oil that is suggested. For a home-style (and healthier) curry, use the lesser amount. For a rich, indulgent, restaurant style dish, use the greater amount. Aubergine has a reputation for absorbing all the oil in a pan in seconds flat, but it will absorb much less oil and stick less when it cooks (and consequently leave oil in the pan to cook the spices), if it has been salted before cooking and the oil is sizzling hot when the aubergine is added.
Note: if your aubergine/eggplant is a bit on the small side, add a 14 oz can of drained chickpeas/garbanzo beans along with the tomatoes.
Put the aubergine (eggplant) cubes in a bowl, and sprinkle with the salt. Allow to sit for at least 1/2 hour to soften and draw out some of the juices.
Gather the spices together in a small bowl.
Heat the fat in a medium sized saucepan, over a medium/high heat.
Wait for the oil to get hot, then add the onions, and cook for 5 minutes until starting to soften.
Drain the aubergine (eggplant), and pat dry with kitchen paper.
Add the aubergine (eggplant) to the onions, and cook (stirring occasionally) for about 10 minutes.
Add the garlic, and allow to warm through. (~30 seconds)
Sprinkle the spices over the veggies. Stir and allow to warm through. (~30 seconds)
Turn down the temperature, add the tomatoes, cover, and cook until they have broken down into a sauce, and the aubergine is completely soft.
Taste, and add extra salt (~1/4 tsp) and/or sugar to taste.
This recipe was updated Feb 28, 2020 to reflect how I make it with dried beans. The previous version follows at the bottom of the page.
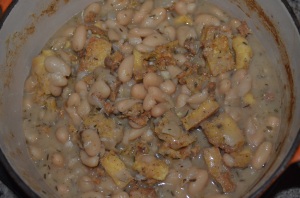
Cassoulet is a classic comfort food from France: a thick, bean-y stew which clings to your ribs. I had it as a pre-vegetarian teenager, when we vacationed there years and years ago, and was so enamored of it, that when I turned vegetarian, I wanted to retain the ability to eat it.
When I first devised this veganized and simplified version, I was still eating wheat, and instead of tofu, I used 4 large spiced veggie sausages which were utterly yummy here, but much to my frustration were wiped off my menu when I realized I had to ditch the wheat. It took me a fair few years to get around to figuring this gluten free version.
Now, I should point out that ‘normal’ cassoulet not only has meat in it, it also has everything cooked together for quite a long time to cook the beans, tenderize the meat, and form a rich tasting crust which forms due to all the meat fat floating on the surface. We don’t have all that fat here, and tofu isn’t going to be improved by a long slow cook in bean juices: it’s quite tender enough, and if anything, it needs to be firmed up, which is why I grill/broil mine first.
Serves 3-4 people
For the beans:
1 tsp oil or margarine
1/2 large (or 1 medium) onion, coarsely diced
2 cloves garlic
1 cup (6 oz) dried great northern, haricot/navy, or other small white bean, picked over for debris andsoaked overnight, or quick soaked by pouring boiling water over, and leaving for an hour.
1 bay leaf
1 tsp dried thyme
1 tsp dried rosemary
1/4 tsp pepper
1 tsp salt (or to taste – don’t add until after the beans have cooked)
For the tofu:
1 tsp salt
1 tbsp nutritional yeast
1 tsp garlic powder
1 tsp onion powder
1/4 tsp pepper
dash of cayenne pepper (optional)
1 tsp oil
14-16 oz firm tofu (regular, not silken), drained
Heat the oil for the beans in a saucepan or pressure cooker pan, and fry the diced onion over medium heat until medium brown (~10-15 minutes).
Add the beans and bean seasonings (garlic, bay leaf, thyme, rosemary, pepper) and 1 1/4 cups (10 floz) water to the onion. If you’re using a pressure cooker or Instant Pot, bring this up to pressure for 12 minutes, then allow to come down from pressure naturally. If using a regular saucepan, cover tightly and simmer for ~1 hour until the beans are soft, but still hold their shape. Add more water and time as necessary. (Don’t add the salt for the beans until after you’re sure they’re cooked to the required texture.)
Cut the tofu into 3/4″ cubes or chipolata, and put to one side to drain for a few minutes.
In a large bowl, stir together the tofu seasonings (salt, nutritional yeast, garlic powder, onion powder, pepper, and chili if desired).
Grease a cookie sheet/baking tray with the oil for the tofu.
Pat dry the tofu with kitchen paper, and use your hands to toss the tofu gently with the seasoning mixture.
Spread the tofu out on the baking/cookie sheet, and place about 6″ under a hot grill/broiler for about 10 minutes until starting to firm up around the edges and sizzle. Stir and turn over the tofu occasionally to prevent sticking.
When the tofu is ready (firmed up on the outside and chewy), stir it into the beans.
Serve hot with crusty GF bread or freshly cooked tortillas, a salad, and warm fluffy blankets next to a roaring fire.
The following is the previous recipe I used to make cassoulet.
The tofu can either be fresh, or frozen and defrosted before use. Defrosted tofu has a different texture to that of fresh which releases its water more easily, and may well have a more acceptable texture for those folks who don’t normally eat tofu.
Serves 3-4 people
2 tsp oil or margarine
1/2 large (or 1 medium) onion, coarsely diced
2 cloves garlic
2 cans great northern, haricot/navy, or other small white beans (not drained)
1 bay leaf
1 tsp dried thyme
1 tsp dried rosemary
1/4 tsp pepper
salt to taste (depends on how salty your cooked beans are)
~14 oz firm tofu (regular, not silken), drained
1 tsp salt
1 tbsp nutritional yeast
1/2 tsp garlic powder
1/4 tsp pepper
dash of cayenne pepper (optional)
Preheat the oven to 400F, so the beans won’t cool down too much after being put in.
Heat the oil in a dutch oven, and cook the diced onion over medium heat until medium brown (~10-15 minutes). Add the garlic, beans, the bay leaf, thyme, rosemary, 1/4 tsp pepper, and enough bean liquor / water to cover by 1/2″. Check seasoning (it should taste slightly under salty at this point). Bring all to a gentle simmer, and transfer to the hot oven (uncovered).
Stir together the tsp of salt, nutritional yeast, and one of the 1/4 tsp pepper in a large bowl. Add a dash of cayenne, if liked.
Cut the tofu into 3/4″ cubes or chipolata, pat dry with kitchen paper, and use your hands to toss the tofu gently with the seasoning mixture. (Defrosted tofu is particularly delicate.)
Spread the tofu out on a baking/cookie sheet which has been lined with baking parchment, and place in the oven for about 1/2-3/4 hour until starting to firm up around the edges. (This will depend on how wet your tofu is, and how big the chunks are.)
When the tofu is ready (firmed up on the outside and chewy), stir it into the beans, and continue cooking the beans in the oven until the sauce has finished thickening (a total cooking time of about an hour for the beans).
Serve hot with crusty GF bread, and warm fluffy blankets next to a roaring fire.
Delicata squash has a dense, rich flesh, and a thin edible skin, and it needs only a little salt to bring out the flavor, which is excellent. In my opinion, it is at its best when meltingly soft. I first came across it at a wonderful little diner called Our Bar in Washougal, Washington, where they baked the stuff, and tossed cubes of it into breakfast scrambles and vegetable fried rice.
Stuffed Delicata Squash with Roast Potatoes and (vegan) Creamed, Garlicky, Cruciferous Veggies.
Stuffing the delicata turns them into a vegan, formal dinner center piece. Both my girls gave it the thumbs up … they are very partial to formal dinners with roast potatoes, orange and cranberry sauce, and cashew gravy.
The moist, herby, mushroom stuffing can be made the day before and stored in the fridge until required: a useful trait when there’s a lot of cooking to do! It must be about as damp as you’re going to want to eat it, as it doesn’t dry out much in the oven (and you wouldn’t want it to: quinoa tends to get a bit crunchy and stuck between your teeth if it dries out. Not so good.) If you have any extra stuffing left over after filling the delicata shells, mould it into 3″ round patties, and cook them along side the squash, to eat later as burgers.
Serves 6-8
1 recipe of the stuffing for Cashew and Mushroom Bake
3-4 delicata squash
oil as needed (~1 tsp per squash)
1/2 tsp salt (or to taste)
Preheat the oven to 350-400F (depending on what else you have cooking in the oven).
Wash the squash, then use a hefty knife to cut them in half from stem to blossom end. Use a spoon to firmly scrape out (and discard) the seeds, rub oil over all surfaces, sprinkle lightly with salt, and place (cut side down) on an oiled cookie/baking sheet.
Cook the squash for about 30-40 minutes (or until a fork can pierce the flesh), then turn over, stuff with the mushroom mixture, cover lightly with baking parchment to avoid drying, and continue cooking until the nut mixture is hot (15-30 mins).
After having been in temporary accommodation for exactly a year now, with half to two-thirds of my kitchen in storage, we’re finally looking at moving into a permanent house in a couple of weeks’ time. I’m so looking forward to being able to play in the kitchen again. Amongst other things, I managed to put into storage all my bread tins, so have been experimenting with some glass cookware (that I rarely used before, but somehow ended up taking with us).
Making gluten free bread with eggs is now pretty straight forward, but getting a good rise out of a vegan bread mix has been more challenging.
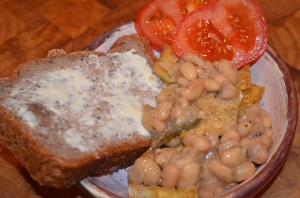
This slice was cut before the loaf had fully cooled, but note the lack of unleavened bread at the bottom of the loaf!
I was toying with my copy of Gluten-Free and Vegan Bread by Jennifer Katzinger (with which I’ve had limited success) a few months ago, when I realized that the logic that she was using for not waiting for the dough to rise before putting it in the oven, could be applied to what I used to do sometimes with wheat bread. Sometimes, I would only wait until the dough was mostly risen, then put it in a cold (but heating) oven so that the slowly rising heat from the oven caused the yeast to go mad, right up until the point that it got hot enough to cook. Jennifer puts her bread straight into a hot oven, but I wanted to experiment putting the dough into a cold oven, so that it only had 15 minutes of rising before cooking at a reasonably high temperature. It seems to me that we still need a certain amount of yeast action to raise the loaf, but (according to Jennifer) we don’t want enzymes to have time to break down the structure, so we’d best be using lots of first generation yeast instead of waiting for successive generations to build up the CO2 in our loaf. This means that I’ve used far more yeast than I would normally use in a loaf …. and at this rate, using individual sachets of yeast is an expensive proposition. I buy my yeast in 2 lb bags in Costco for about the same money that I’ve seen charged for a 4 oz jar in other supermarkets.
The resultant bread is mildish in flavor (but not bland) with a crunchy crust, and a soft, moist mie the texture of REAL bread (as opposed to the pointless, fluffy-white-nothing of mass-produced ready-sliced modern wheat bread, of which I was never particularly fond). The tapioca starch keeps the texture of the mie soft; the almond flour gives a mild but nutritious aspect; the bean flour is great for nutrition and structure (but tends to be rather strongly flavored which is why I’ve diluted it with other flours), and the teff flour is also nutritiously superior, but with a warming, mellow flavor. I think it’s the teff that gives the slight molasses (not sweet) flavor that my daughter noticed. All in all, I really like this loaf. It isn’t as calorie dense as my much loved almond bread, but has good structure and flavor and isn’t reliant on eggs.
2 tbsp chia seeds
6 oz (1 1/4 cups) tapioca flour/starch or arrowroot
2 1/2 oz (2/3 cup) almond meal
2 1/2 oz (1/2 cup) garbanzo/garfava bean flour
5 oz (1 cup) teff flour
1 1/2 tsp salt
2 1/2 tsp xanthan gum
3 tbsp olive oil
2 tbsp instant yeast
2 tbsp maple syrup/1 tbsp sugar
Measure the chia seeds out into a small container, add 4 fl. oz (1/2 cup) of water and put to one side to swell. (Minimum 15 mins. Hot water speeds up the process.)
Into the food processor, put the starch, almond, bean, and teff flours. Add the salt, xanthan gum, oil, and yeast.
Into a jug, measure 1 1/2 cup of warm water and the maple syrup. (Warm water speeds up the rising.)
Once they’re ready, add the soaked chia seeds to the processor (the mixture will have thickened). Start processing the mixture and slowly (~10 seconds) add the water/syrup mixture. Process until the ingredients are fully amalgamated (~60 seconds). Add another tbsp or two of water, if your processor is having a hard time mixing this.
Heavily grease a 2lb loaf pan, scrape the dough into the pan and smooth the top with a spatula.
Cover loosely with a sheet of baking parchment (not foil which increases the cooking time) to avoid over-browning.
Place the wannabe loaf in the oven, then turn on the oven to heat up to 360F and cook for 1 hr (from cold).
When cooked, the loaf will have pulled away from the side of the pan slightly. Tip it out, and allow to cool (ha ha … I never manage this bit) before slicing.


 To be honest, this is just a template. A tasty template, but one that is open to countless variations. This is a bowl of rice and beans with various accoutrements. It’s very satisfying, tasty, and nutritious, and we love it!
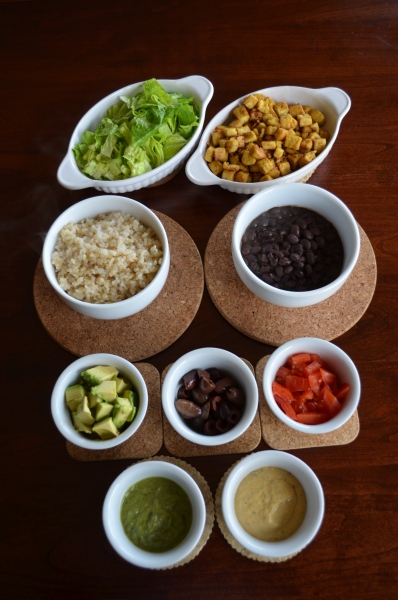


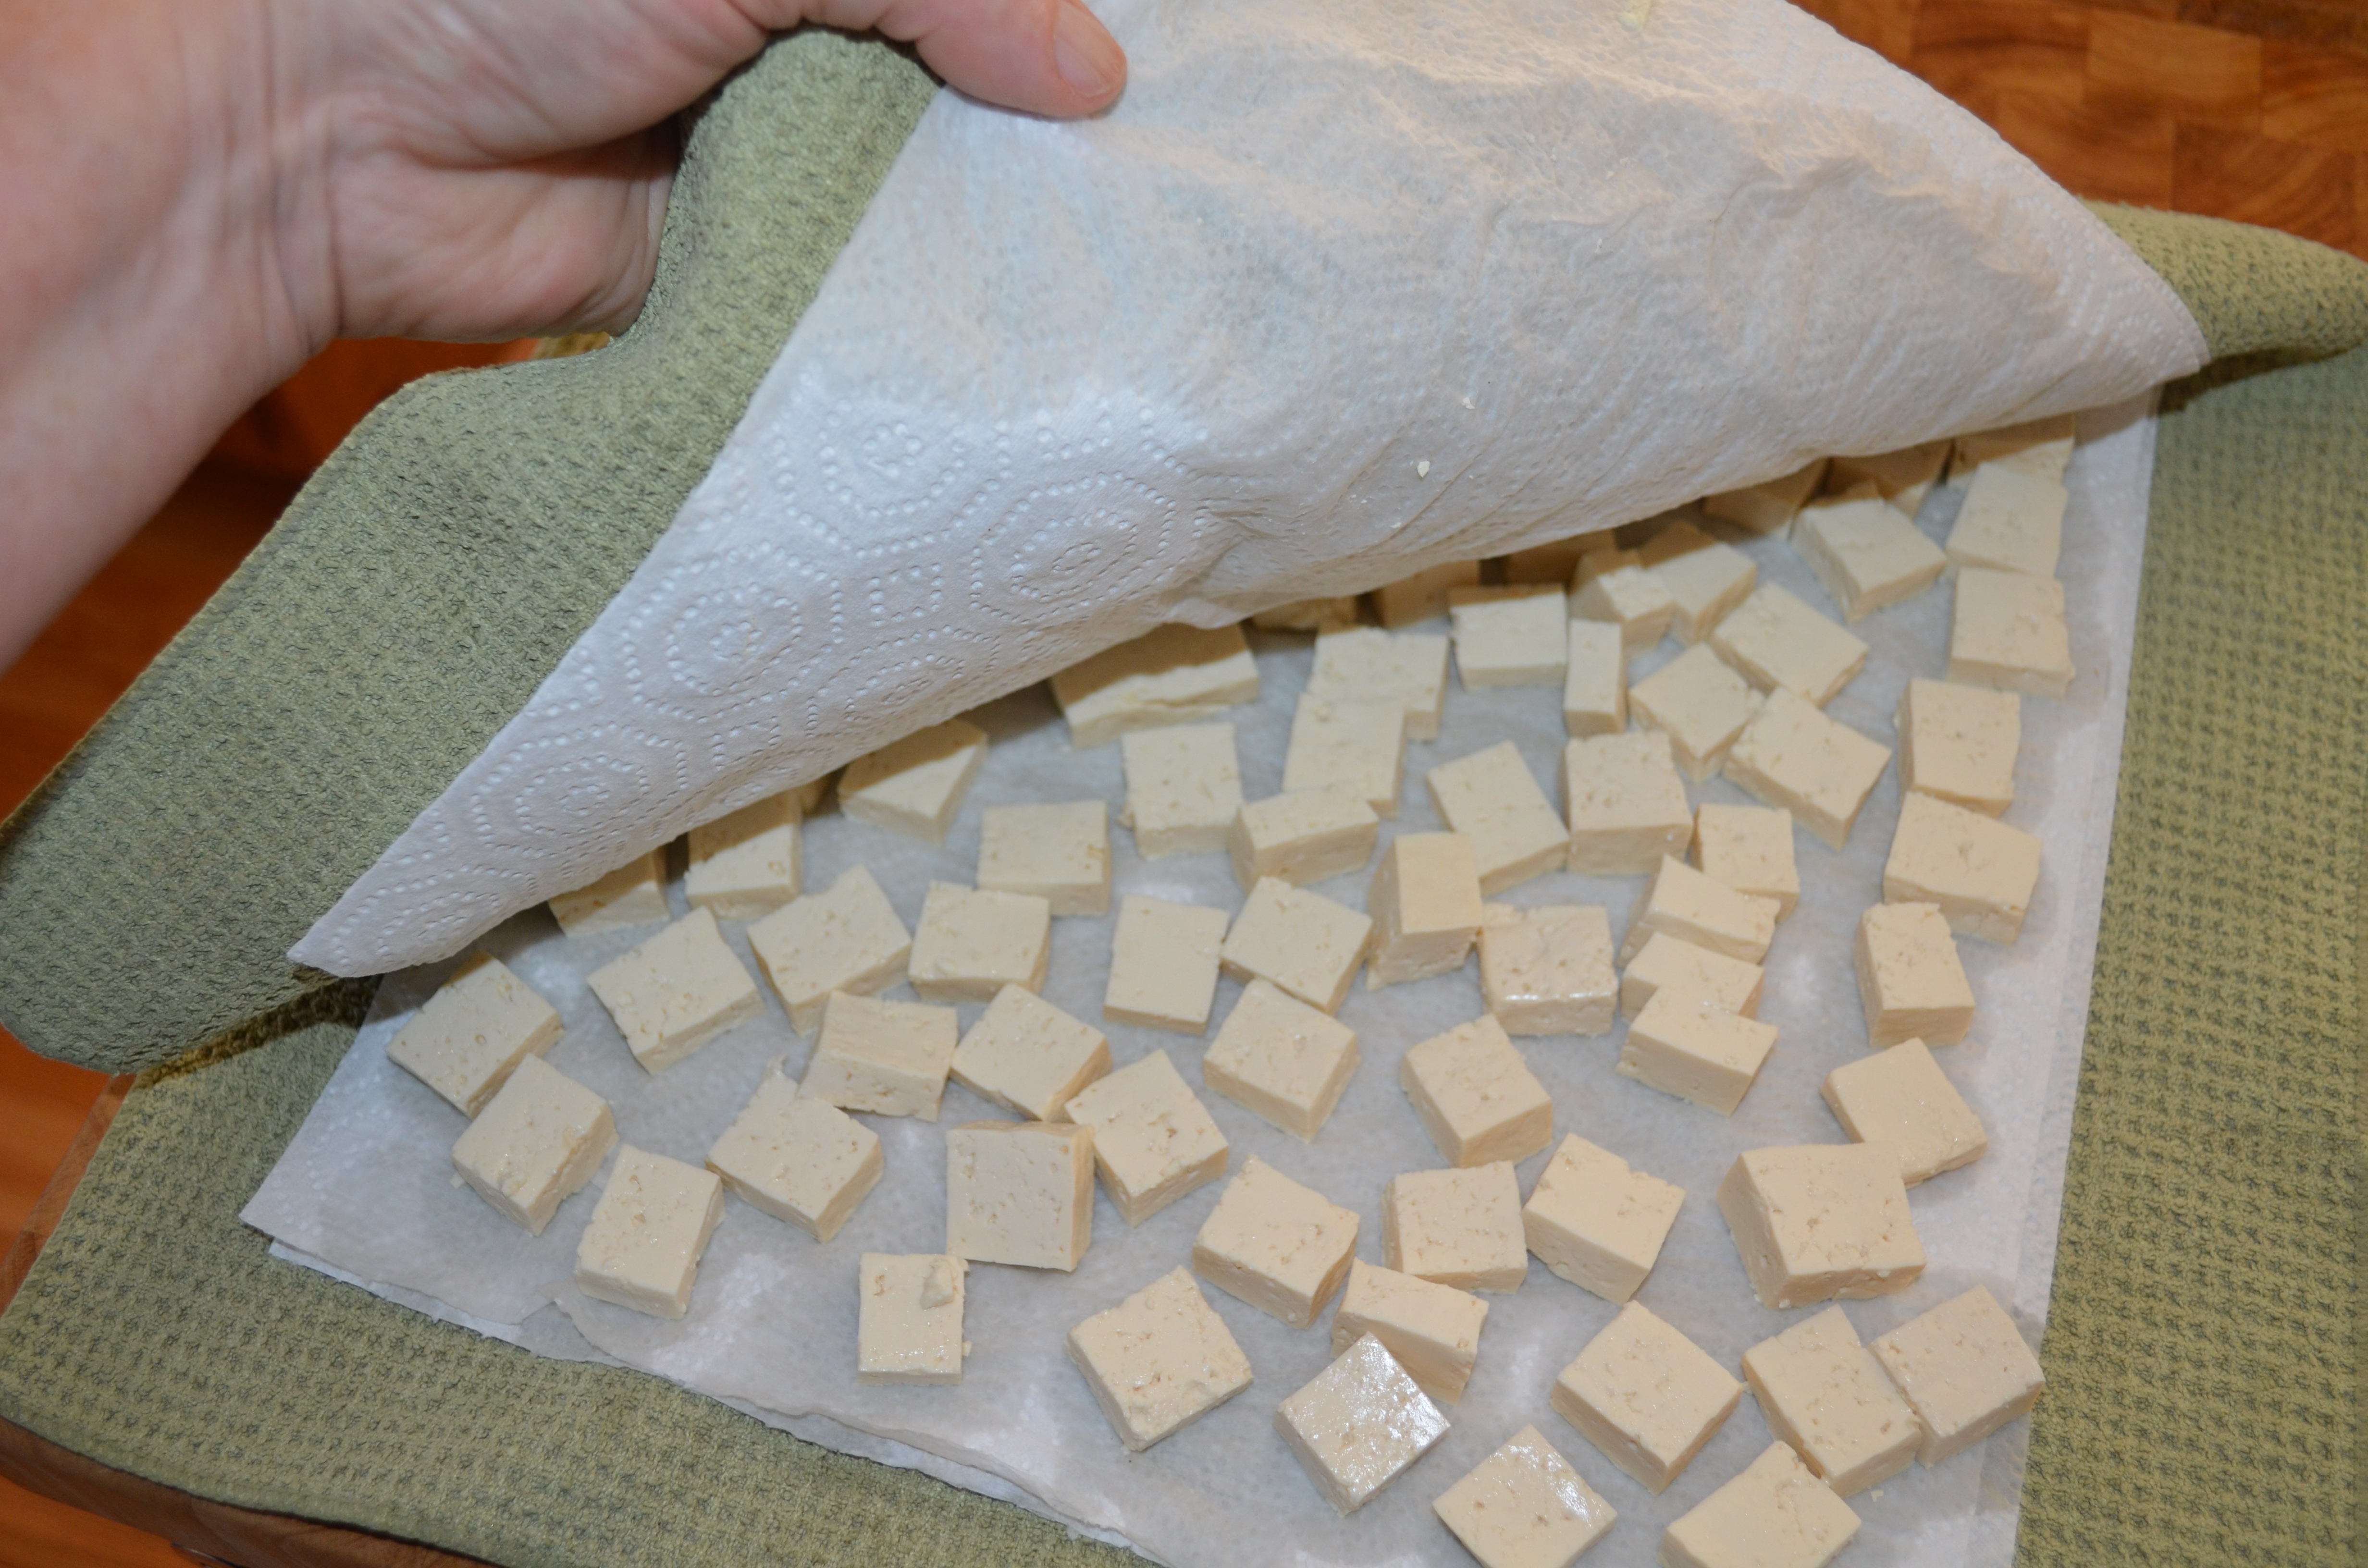 Lay a clean cloth kitchen towel on the work-surface, and line it with kitchen paper. Arrange the tofu on the kitchen paper, cover the tofu with more kitchen paper, then fold the towel over the top to help soak up excess moisture. Leave this for 1/2-3 hours. The tofu will have firmed up and have a drier surface when it’s ready, which makes it less likely to stick in the pan while it’s frying.
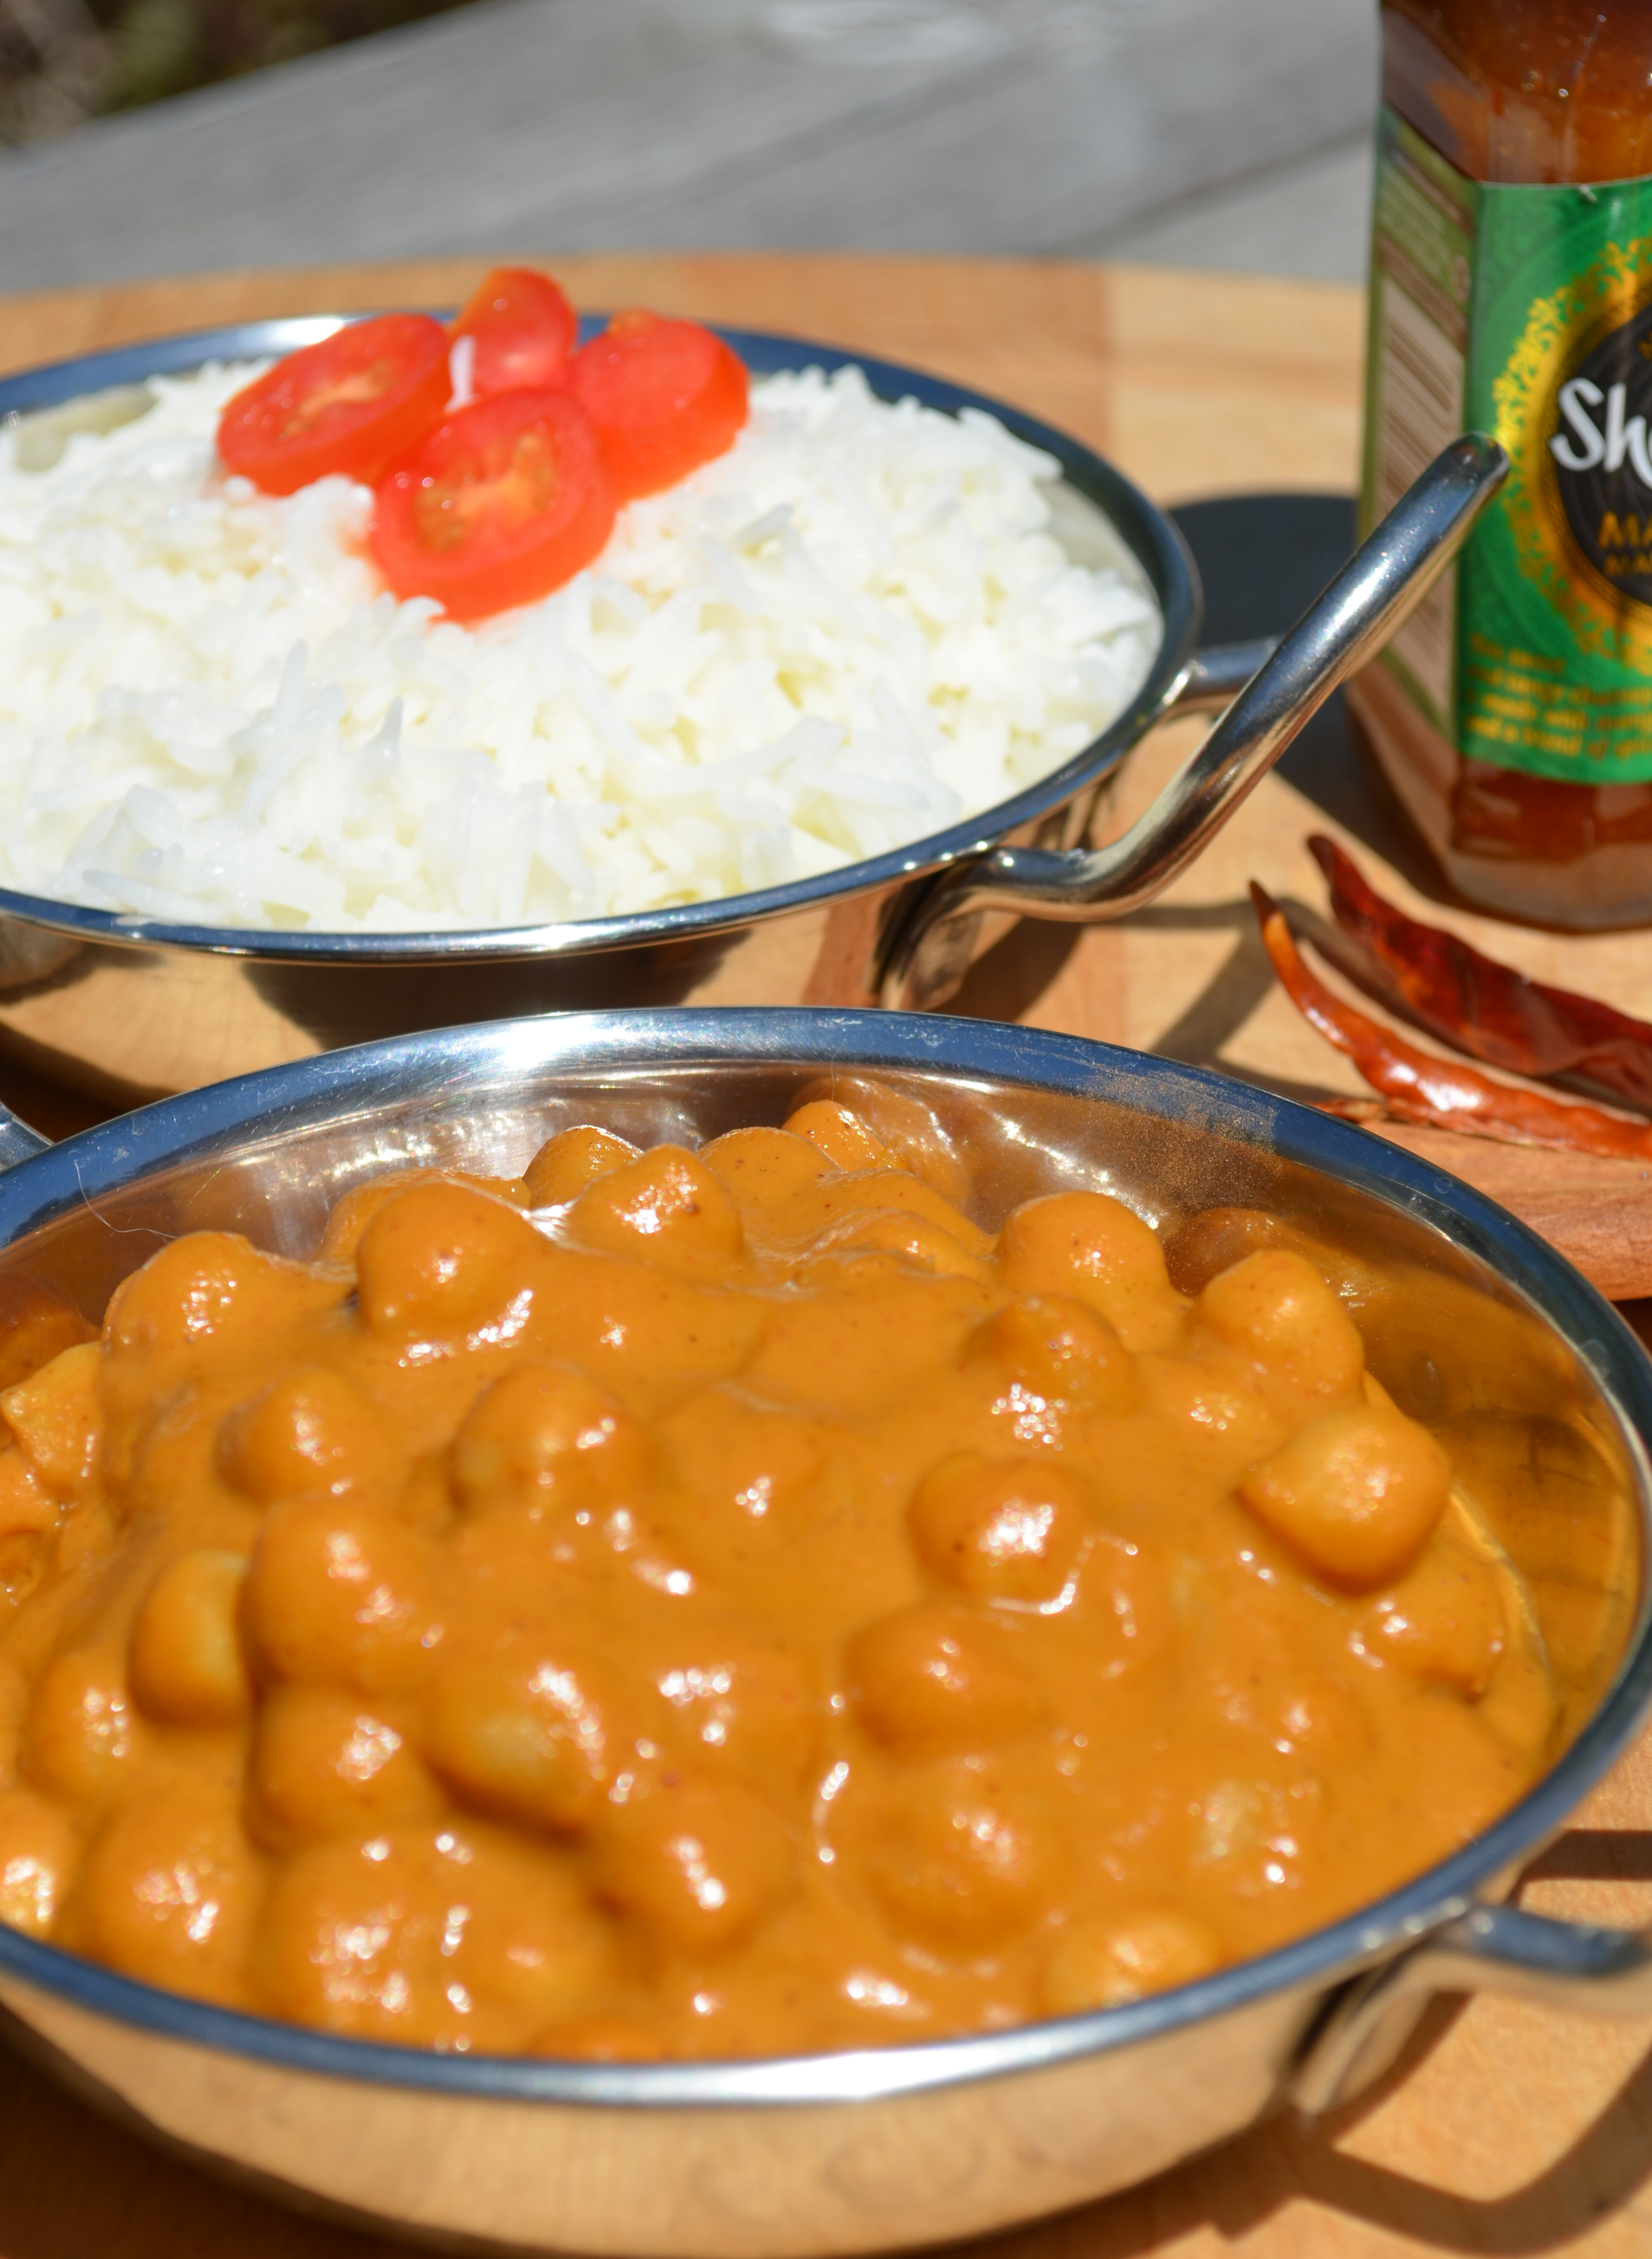 This dish is super easy and quick to make once the Curry Base Sauce has been prepared. It’s even better if it’s been allowed to sit for a while and then reheated, as the flavors combine and seep into the beans. It’s mildly hot, and is good for about 4 people when served with rice, or a vegetable side such as my
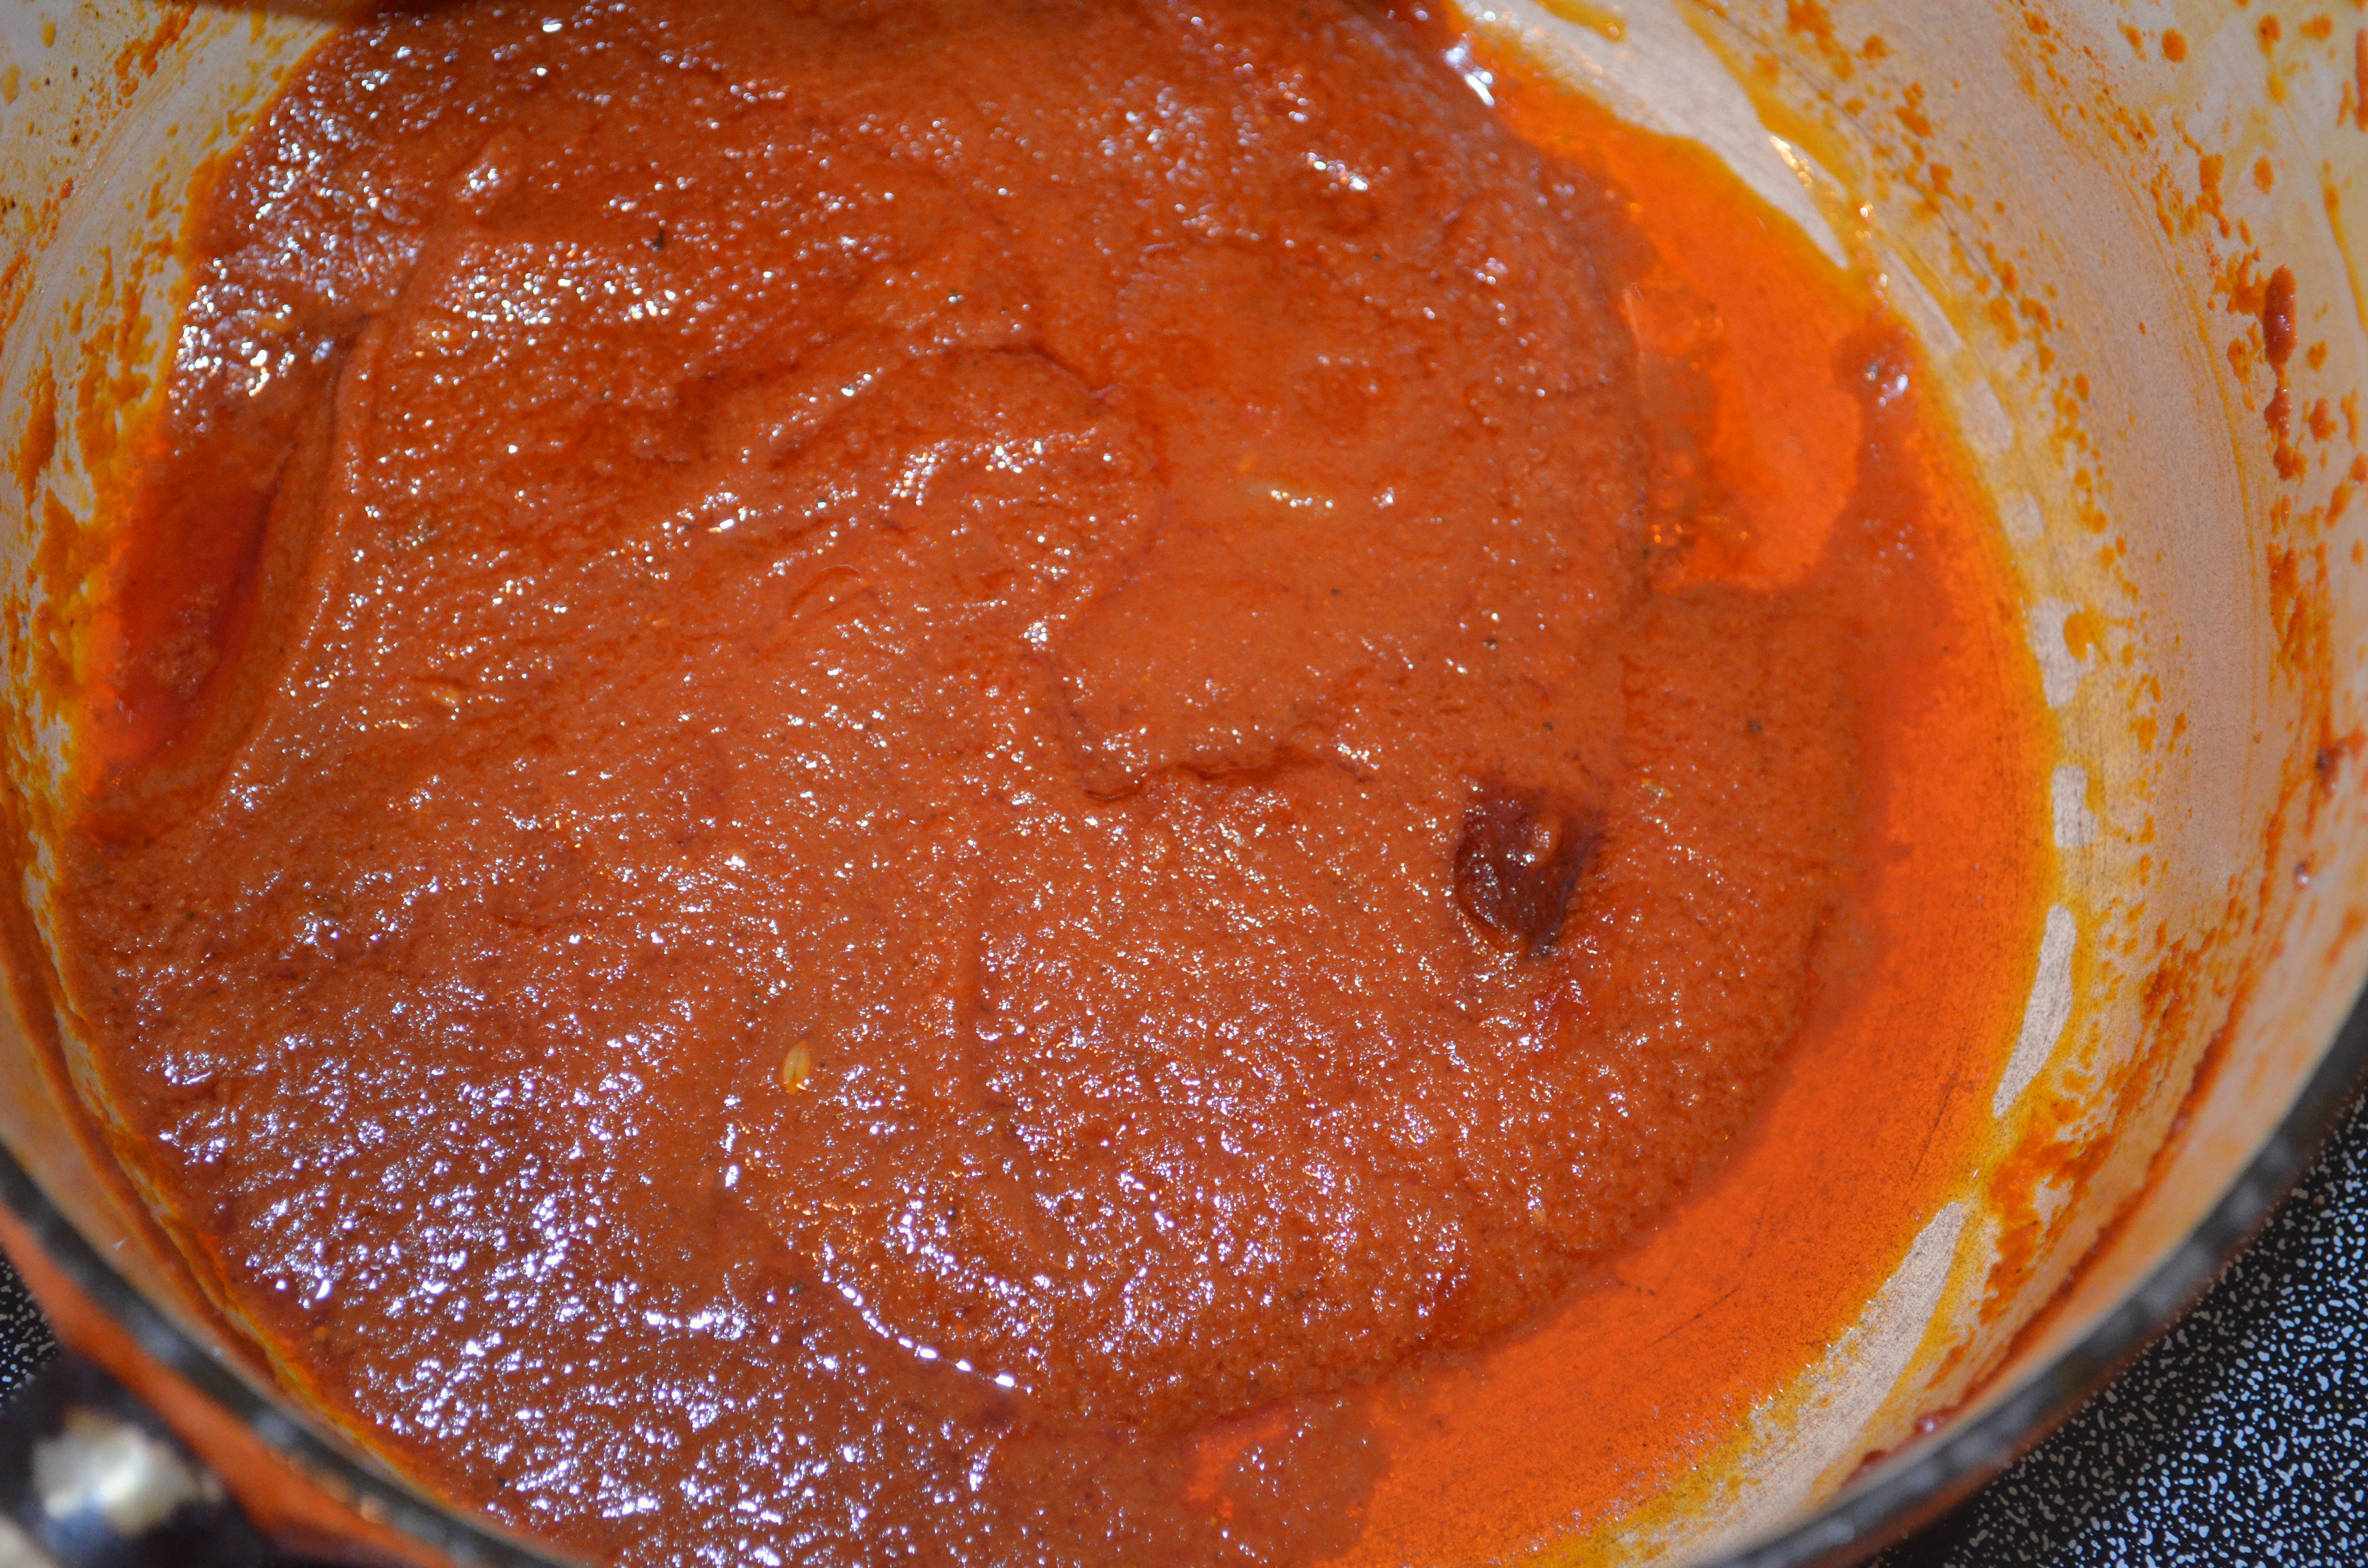


 I don’t use meat substitutes much. The vast majority of the meat substitutes that I’ve seen include gluten for texture, stretch and bulk. We recently happened upon some gluten free, tinned vegan chili which my husband loves for chili cheese fries, but it doesn’t have anywhere near enough vegetables in it for my liking. Yes, I know! Chili cheese fries is an indulgence, not a health food ….. but here we can leave the indulgence for the potatoes, and the chili can be loaded with veggies and fiber, and just look and taste the part.
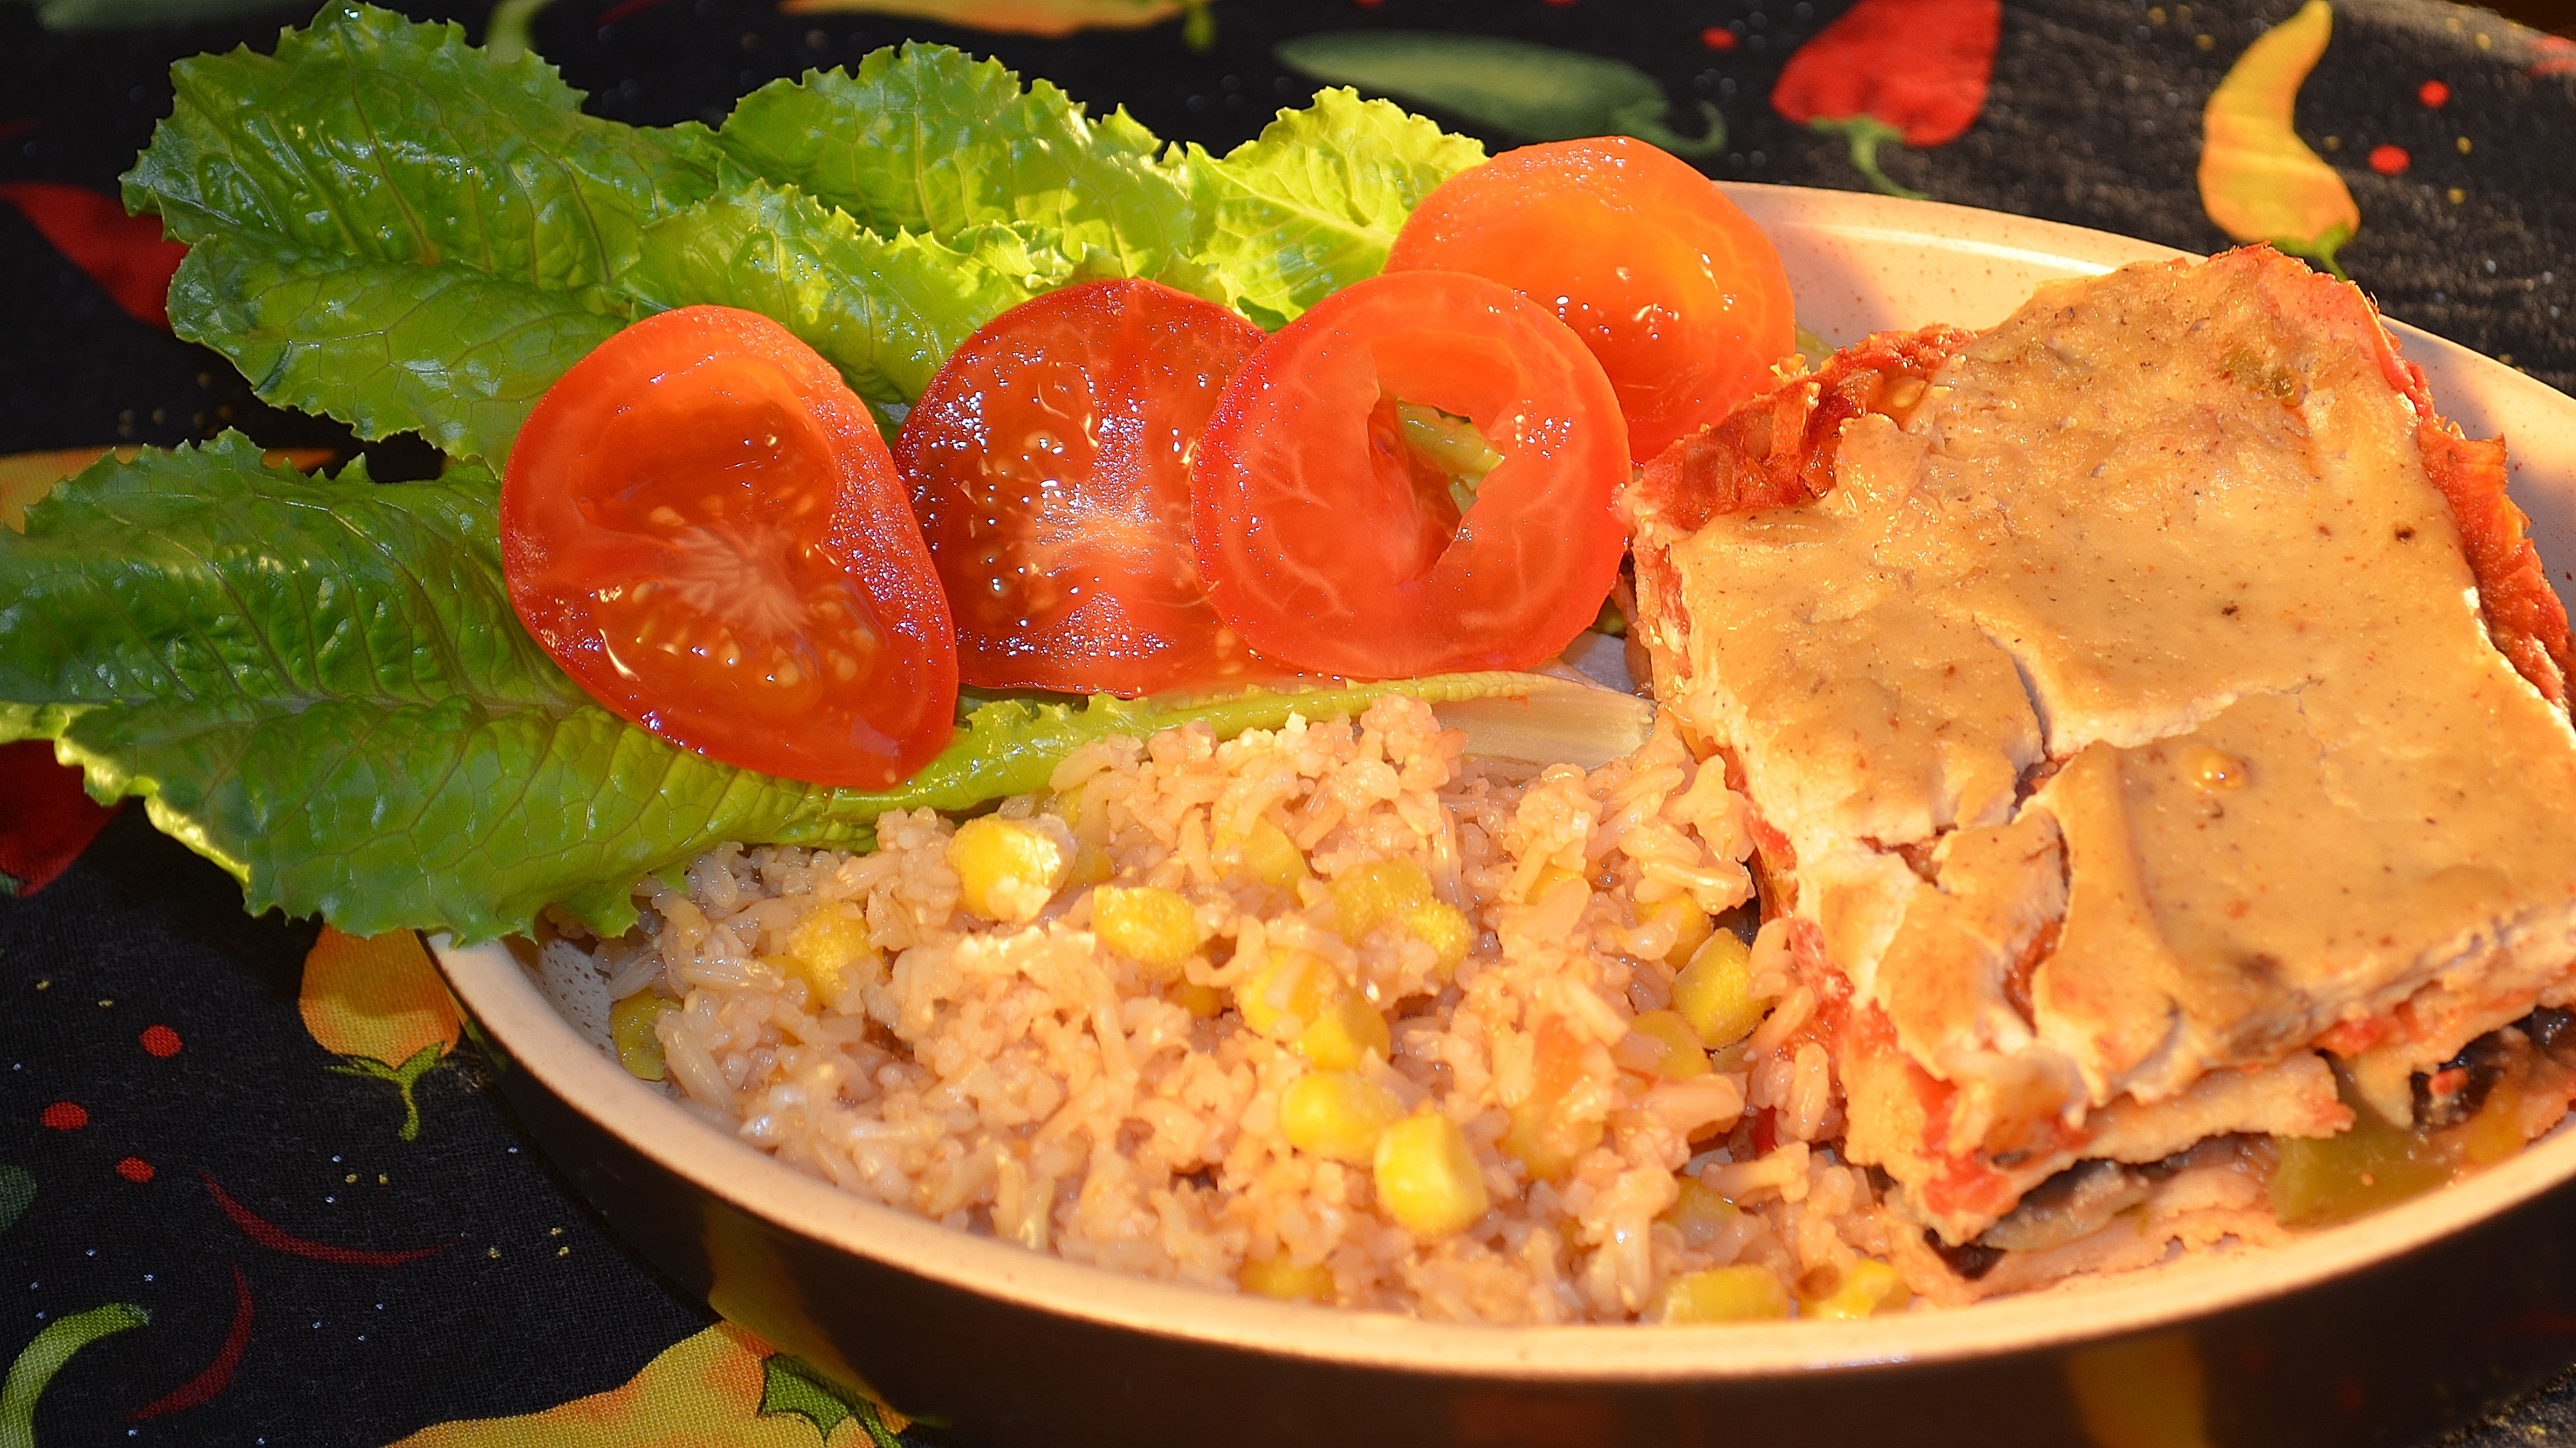 This enchilada pie is remarkably similar to a lasagna … just with more hot peppers, and corn tortillas instead of pasta. The magic is in the spicy, creamy, cashew sauce which tops the pie. It makes a wonderful entree for a family or close friends’ dinner party, along with rice, salad, salsa and tortilla chips, and maybe vegetable fajitas and margaritas. You can ring the changes by substituting refried beans for the black bean chili.